- Thread starter
- #261
You are using an out of date browser. It may not display this or other websites correctly.
You should upgrade or use an alternative browser.
You should upgrade or use an alternative browser.
Building boxes?
- Thread starter aephilli
- Start date

Very nice boxes! You're right, the golden pecan stain does make it pop. I'll make a trip to lowes today. Thank you for posting that.
be sure to agitate or stir it well, the stain is a light reddish brown color for some reason the pigments settle fast in the lighter colors. I used quite a bit of it and it does vary some in color, two coats and rub it well on the second with newspaper and when dry finish it with 3 or four coats of tung oil and a light 600 wet sand, the finish coat and you should be surprised at the results.finish will be in the wood rather than just lying on top of it ,the main reason I use tung oil.
Last edited:
- Thread starter
- #264
....finish will be in the wood rather than just lying on top of it ,the main reason I use tung oil.
Yes, this.
FYI. This was not as easy as it looked and I will NOT be posting pictures of my first box.
Mark, my first two did not get posted. They're sitting on top of my bench as reminders.FYI. This was not as easy as it looked and I will NOT be posting pictures of my first box.
I feel better.Mark, my first two did not get posted. They're sitting on top of my bench as reminders.
Seriously.
if you don't succeed at first try again, do not give up the knack will come. where are you having problems. I will offer to try and help if you want.
- Thread starter
- #269
I feel better.
Seriously.
Yes, almost good enough to try again, now.
I did try again and did a little better the second time, but still plenty of mistakes. I put the wrong size hinges on and had to take them off. But only after messing up one of the edges thinking that beveling it would solve the problem.
Then I had a clever idea involving magnets that didn't work and now I can't get them out. The fit of the stone, however, is a little better, and my choice of top materials as well. I have a bunch of old wine boxes and it occurred to me that they would make better covers for boxes for hones than their current work as bookshelves. This was from a case of '81 Gran Riserva.
Then I had a clever idea involving magnets that didn't work and now I can't get them out. The fit of the stone, however, is a little better, and my choice of top materials as well. I have a bunch of old wine boxes and it occurred to me that they would make better covers for boxes for hones than their current work as bookshelves. This was from a case of '81 Gran Riserva.
Attachments
if the magnets are glued and you want them out use a pistol soldering iron to heat the glue, rest can be remedied by using a hand plane to true it up. if you have a hand plane and never used one try it on the edge of a scrap board to get the feel of it. not a bad job, as my I. e. instructor used to say it aint a mistake till you make it and ,if you learned anything from it then ,you only get better. with that said, given the shape of the stone I would recommend trying a wood chisel to cut it out. slow and careful chisels are notorious for slipping and getting a hand or finger, I usually use a stop on the bench and use both hands on the chisel or if stubborn hardwood then a hammer top tap it slowly. work slow and let the chisel do the work. mark your stone and cut down 1/8 at a time score the ends with the chisel and hammer, then the sides with the grain. yu might be surprised at how quickly you learn it.
Very nice, Mark. I love the wine boxes for the lids. That's a beautiful SB arkie!
if the magnets are glued and you want them out use a pistol soldering iron to heat the glue, rest can be remedied by using a hand plane to true it up. if you have a hand plane and never used one try it on the edge of a scrap board to get the feel of it. not a bad job, as my I. e. instructor used to say it aint a mistake till you make it and ,if you learned anything from it then ,you only get better. with that said, given the shape of the stone I would recommend trying a wood chisel to cut it out. slow and careful chisels are notorious for slipping and getting a hand or finger, I usually use a stop on the bench and use both hands on the chisel or if stubborn hardwood then a hammer top tap it slowly. work slow and let the chisel do the work. mark your stone and cut down 1/8 at a time score the ends with the chisel and hammer, then the sides with the grain. yu might be surprised at how quickly you learn it.
Thanks for the tips on getting the magnets out. They're not hurting anything though, so I'll leave them in for now. I don't have a hand plane or any wood chisels, so I'll just live with the mess I made. The box does its job of protecting the stone, so I'll just be happy with that.
Each one I learn teaches me something new.


Heres one I made for a maruichi I have. I learned a lot and the next one will be done differently. I store my stones on a steel cart with wooden shelves, and my work area is right there so I find without lids would be a bit more convenient for me anyway.

Of course you can drop the stone easily, but I only take them occasionally to meets or other gatherings. I use (hold on now) a milk crate with lots of towels to pad everything. The milk crate is the most indestructible thing and with 2 good handles to boot.
A trim router(dont have one) would work wonders evening up and smoothing out the cuts and rounding off the ends. I havent decided on stain yet. STOLEN from Davids design! LOL
Last edited:
View attachment 490779
View attachment 490780
Heres one I made for a maruichi I have. I learned a lot and the next one will be done differently. I store my stones on a steel cart with wooden shelves, and my work area is right there so I find without lids would be a bit more convenient for me anyway.
View attachment 490781
Of course you can drop the stone easily, but I only take them occasionally to meets or other gatherings. I use (hold on now) a milk crate with lots of towels to pad everything. The milk crate is the most indestructible thing and with 2 good handles to boot.
A trim router(dont have one) would work wonders evening up and smoothing out the cuts and rounding off the ends. I havent decided on stain yet. STOLEN from Davids design! LOL
That stone looks vaguely familiar ;-)
Very nice Bill! Deciding on how I want to stain/seal them is always the hardest decision for me. I usually use tung oil or minwax just because that's what I have here
mark, very nice surgical black, I just bought an old vintage translucent black. its only a 6x2 but it was cheap enough at the local flea mkt. I made a black walnut box for it. I lke the edges so far coming off the translucent. I honed three and finished 2 with the arkie one was left with the coti edge, I got it nailed down on the third one and didn't need a finisher. I am working on a cabinet to house all my straights and brushes, mugs. etc. local lowes had 1/2 x 4 x 3ft oak on sale and I bought a bundle.
My box idea isn't panning out.
Need to regroup, which is hard to do without having tools or woodworking skills.
Basically - I was going to use this pre-fab thing called a basswood frame as the bottom and put a top on it.
Seemed easy enough - the hardware is accessible and what's a few screws?
Well - that would work if the dam things were square all around and they were actually the size they're sold as.
They're not. Close, but not really. Plus, matching the wood... mmmm.. not happening. I'm going to make a Nagura tray out of this one I got from Michaels.
Ok - next idea has to be formulated.
mark, very nice surgical black, I just bought an old vintage translucent black. its only a 6x2 but it was cheap enough at the local flea mkt. I made a black walnut box for it. I lke the edges so far coming off the translucent. I honed three and finished 2 with the arkie one was left with the coti edge, I got it nailed down on the third one and didn't need a finisher. I am working on a cabinet to house all my straights and brushes, mugs. etc. local lowes had 1/2 x 4 x 3ft oak on sale and I bought a bundle.
pics? Love looking at arkie pics. Well, any stone pics actually.
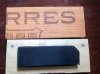
May as well post a pic of my first attempt. Need to practice humility if not downright humiliation.
Attachments
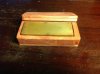
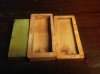
box isn't really that bad, I could clean that up in less time than it takes to read this post. qiick run thru the table saw to true the seams, 1 to 2 minutes on a belt and you would be surprised.
keith let me know the size of the cutout and box, I will cut you a prefab box. you can assemble and finish it.
keith let me know the size of the cutout and box, I will cut you a prefab box. you can assemble and finish it.
Similar threads
- Replies
- 20
- Views
- 2K
- Replies
- 4
- Views
- 2K
- Replies
- 28
- Views
- 3K