I thought I’d post some photos and description of the various phases involved in restoring a Parker fountain pen with a vacumatic fill style in case anyone is curious about the process and what’s involved. I thought that others who have restored them might chime in with any tips or tricks that they've learned along the way. For this thread, I’m using a Burgundy striped vacumatic, but the process is the same for a Duofold and similar for a Parker 51 vac, which has a different section/hood. I do not intend the thread to serve as a “how to” as there are good ones already out there. See, for example, the one at Richard Binder's Site, David Nishimura’s site, or Raven’s March. The repair section on fountainpennetwork.com also has much good information. The section on vacumatics in Marshall and Oldfield’s pen repair book is also quite helpful.
The pen that I'll be working on in this thread is this 1938 Burgundy Parker Vacumatic:

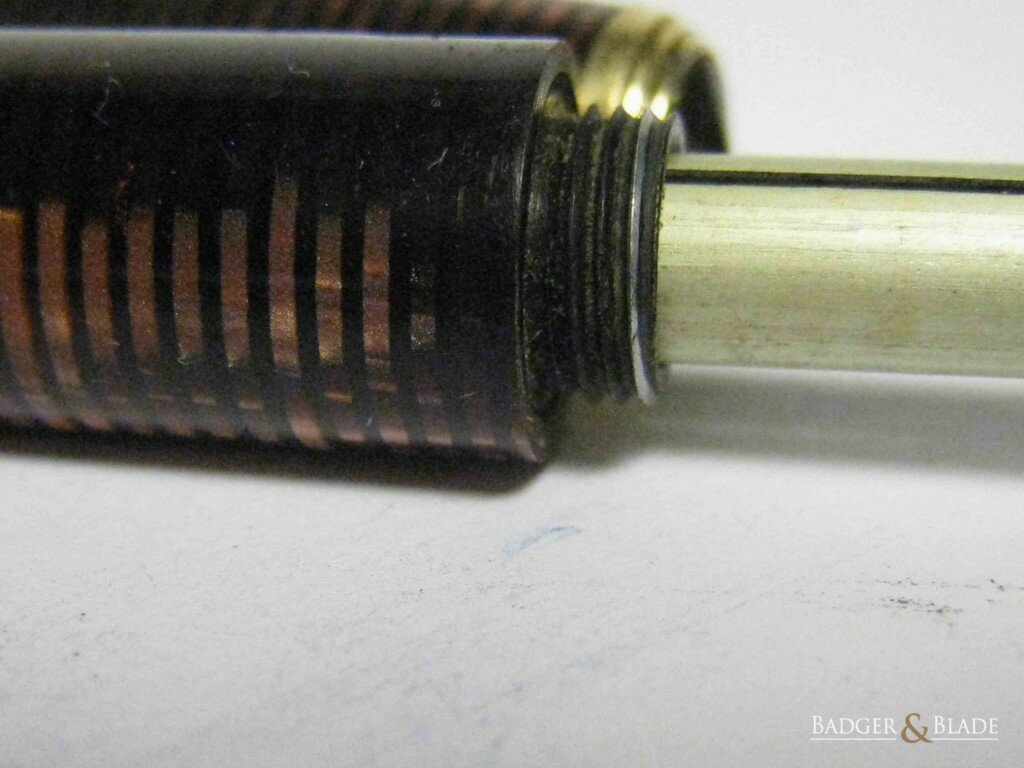
The first thing I do is remove the section, which is threaded. I got lucky on this one and it unscrewed very easily by hand. More typically, a good soak in cold water and some gentle heat with a hair dryer is needed to get the shellac to loosen.
Here's the section removed from the barrel with the nib, feed, and breather tube still in place:

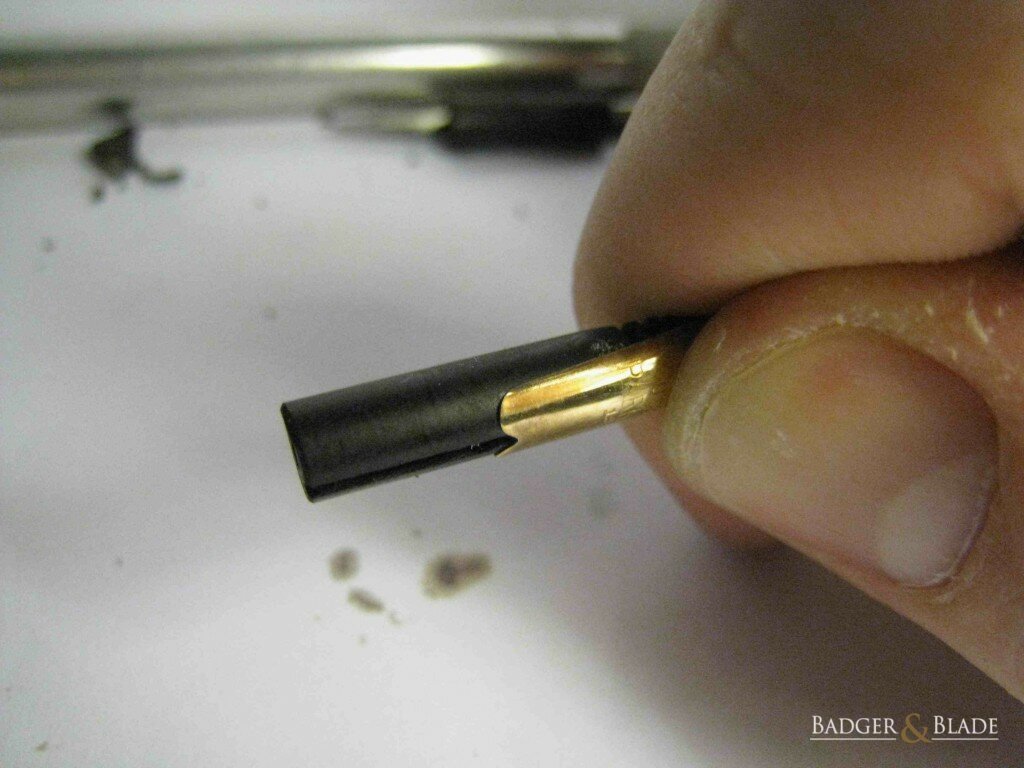
Once the section is out, I remove the breather tube and knock out the nib and feed. Knocking out the nib and feed is accomplished with a knock-out block. I bought one, but they can be made fairly easily as well by drilling holes in a wooden block. I place the nib downward in the smallest hole it will fit and line up a small metal rod on the back of the feed. With a few gentle taps from a hammer, the nib and feed are knocked out of the section. Once everything is out, I give it a good soak and cleaning with a light ammonia solution to get rid of as much old ink as I can.
Section on the knock out block:

Section, breather tube, feed, and nib removed:

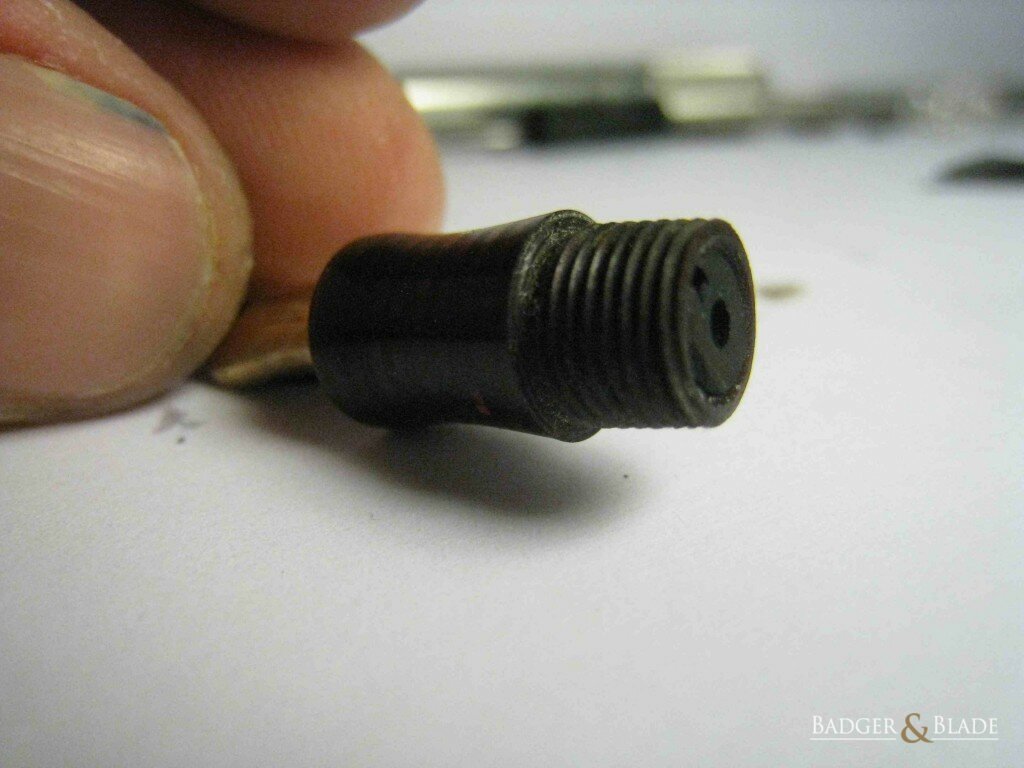
The next step involves removing the fill unit, which requires a special tool because the fill unit has threads to accommodate the blind cap. If you’re going to acquire more than a couple Parker vac fillers (and that includes the striped Vacumatics like this one, duofolds, or “51”s), it pays for itself after restoring only a few pens. The tool has threads designed to fit on to the back end of the retaining collar of the fill unit. It screws on and then can be clamped down to enable it to be removed from the barrel. As before, with some gentle heat from the hair dryer, the fill unit is unscrewed. Sometimes the remainder of the fill unit comes out easily, but it often requires more soaking and a gentle chipping away of the remaining bits of the ossified diaphragm, which can act a bit like glue.
Note the threads on the back of the retaining collar:
Here's the tool for removing the fill unit (note that it is threaded):

The fill unit removal tool in action:

Retaining collar out:

Entire fill unit out:

Once the fill unit is out, one of the more challenging parts is removing the old pellet from the pellet pocket. Every now and then, I get lucky and the old diaphragm is still mostly intact, which enables one to simply pull the pellet out along with the old diaphragm. More typically, the old diaphragm is ossified and breaks apart, which means that the pellet must be chipped away to remove it. One thing I’ve found is that I vastly prefer removing the pellets from the metal (as opposed to the later plastic) fill units. The pellet pocket is much stronger and less brittle. The plastic ones can be quite brittle, which makes extraction of the pellet quite challenging. Getting the pellet out involves chipping it away slowly with something like a push-pin or an exacto knife. I’ve also read of using a dremel with a small burr, but I’ve never tried that route. This step is probably one of the most frustrating and challenging, especially on the plastic fill units.
Here's the pellet still in the pocket:

Pellet removed from the pocket:

Pellet next to fill unit for size reference (it's quite small):

After everything is fully disassembled, I let it soak for a little while. Once things have soaked and I’ve removed as much of the old diaphragm from the barrel, I give it a preliminary polish and then begin reassembling the pen, basically in reverse order.
The first part I do in reassembling the pen is to fit a new diaphragm to the fill unit. As the diaphragms are longer than needed, I first trim it to size. With a handy pellet-pusher tool like the one pictured below, I insert the smaller end into the diaphragm until it rests against the pellet and then I push it into the pellet pocket. I then remove the tool and stick the wider end into the diaphragm. The diaphragm then gets a light coating of talc and is then folded back onto itself until it sits on the collar. Once the diaphragm is installed, I check to make sure it moves properly and extends fully. I then put the fill unit back on the tool and wet the diaphragm to help it slide properly into the barrel. I then tighten the fill unit until the blind cap will screw on until it touches the barrel.
Pushing the diaphragm into the pellet pocket:

Diaphragm coated with talc:

Beginning to fold the diaphragm back over itself:

Diaphragm folded back entirely:

With the fill unit installed, I check for leaks and ensure the fill unit is creating a suction. To test it, this is what I do: Wet a finger, depress the plunger, place the finger against the other end of the barrel, and release the plunger to see if it creates a suction. If it does and the pen remains stuck to one's finger, then it should be good to go.
The next thing I do is reinstall the nib and feed into the section. But before re-setting the nib and feed in the section, I make sure that the tines are properly aligned as it is a bit easier to adjust when removed. Once the tines are aligned, I carefully line up the nib on the feed and pinch it tightly between my fingers. With the nib and feed pinched tightly, I then push it back into the section until the feed reaches the rear of the section and reinstall the breather tube.
Pinching nib and feed:
Pushing nib and feed into the section (I find it works best when I set the section against the edge of my desk and push it in):

Nib and feed inserted into section until the feed reaches the rear of the section:
Before using a bit of section sealant to secure the section to the barrel, I like to make sure everything is moving properly and that the diaphragm extends to just above the breather tube so that it will fill as fully as possible.
Here's the diphragm at rest:

And extended (note that it comes to just above the breather tube):

Once everything looks good, I do a test fill with water and ensure that there are no leaks. If there are no leaks, I empty the pen and then seal the section to the barrel with some section sealant. After letting it rest, it is filled with ink and then adjusted to make sure it is writing well and smoothly. Here's the final product:


And that's all there is to it. I'll be curious to hear if anybody has any special tips or tricks that they've learned along the way. I know I've really enjoyed working on these pens.
The pen that I'll be working on in this thread is this 1938 Burgundy Parker Vacumatic:
The first thing I do is remove the section, which is threaded. I got lucky on this one and it unscrewed very easily by hand. More typically, a good soak in cold water and some gentle heat with a hair dryer is needed to get the shellac to loosen.
Here's the section removed from the barrel with the nib, feed, and breather tube still in place:
Once the section is out, I remove the breather tube and knock out the nib and feed. Knocking out the nib and feed is accomplished with a knock-out block. I bought one, but they can be made fairly easily as well by drilling holes in a wooden block. I place the nib downward in the smallest hole it will fit and line up a small metal rod on the back of the feed. With a few gentle taps from a hammer, the nib and feed are knocked out of the section. Once everything is out, I give it a good soak and cleaning with a light ammonia solution to get rid of as much old ink as I can.
Section on the knock out block:
Section, breather tube, feed, and nib removed:
The next step involves removing the fill unit, which requires a special tool because the fill unit has threads to accommodate the blind cap. If you’re going to acquire more than a couple Parker vac fillers (and that includes the striped Vacumatics like this one, duofolds, or “51”s), it pays for itself after restoring only a few pens. The tool has threads designed to fit on to the back end of the retaining collar of the fill unit. It screws on and then can be clamped down to enable it to be removed from the barrel. As before, with some gentle heat from the hair dryer, the fill unit is unscrewed. Sometimes the remainder of the fill unit comes out easily, but it often requires more soaking and a gentle chipping away of the remaining bits of the ossified diaphragm, which can act a bit like glue.
Note the threads on the back of the retaining collar:
Here's the tool for removing the fill unit (note that it is threaded):
The fill unit removal tool in action:
Retaining collar out:
Entire fill unit out:
Once the fill unit is out, one of the more challenging parts is removing the old pellet from the pellet pocket. Every now and then, I get lucky and the old diaphragm is still mostly intact, which enables one to simply pull the pellet out along with the old diaphragm. More typically, the old diaphragm is ossified and breaks apart, which means that the pellet must be chipped away to remove it. One thing I’ve found is that I vastly prefer removing the pellets from the metal (as opposed to the later plastic) fill units. The pellet pocket is much stronger and less brittle. The plastic ones can be quite brittle, which makes extraction of the pellet quite challenging. Getting the pellet out involves chipping it away slowly with something like a push-pin or an exacto knife. I’ve also read of using a dremel with a small burr, but I’ve never tried that route. This step is probably one of the most frustrating and challenging, especially on the plastic fill units.
Here's the pellet still in the pocket:
Pellet removed from the pocket:
Pellet next to fill unit for size reference (it's quite small):
After everything is fully disassembled, I let it soak for a little while. Once things have soaked and I’ve removed as much of the old diaphragm from the barrel, I give it a preliminary polish and then begin reassembling the pen, basically in reverse order.
The first part I do in reassembling the pen is to fit a new diaphragm to the fill unit. As the diaphragms are longer than needed, I first trim it to size. With a handy pellet-pusher tool like the one pictured below, I insert the smaller end into the diaphragm until it rests against the pellet and then I push it into the pellet pocket. I then remove the tool and stick the wider end into the diaphragm. The diaphragm then gets a light coating of talc and is then folded back onto itself until it sits on the collar. Once the diaphragm is installed, I check to make sure it moves properly and extends fully. I then put the fill unit back on the tool and wet the diaphragm to help it slide properly into the barrel. I then tighten the fill unit until the blind cap will screw on until it touches the barrel.
Pushing the diaphragm into the pellet pocket:
Diaphragm coated with talc:
Beginning to fold the diaphragm back over itself:
Diaphragm folded back entirely:
With the fill unit installed, I check for leaks and ensure the fill unit is creating a suction. To test it, this is what I do: Wet a finger, depress the plunger, place the finger against the other end of the barrel, and release the plunger to see if it creates a suction. If it does and the pen remains stuck to one's finger, then it should be good to go.
The next thing I do is reinstall the nib and feed into the section. But before re-setting the nib and feed in the section, I make sure that the tines are properly aligned as it is a bit easier to adjust when removed. Once the tines are aligned, I carefully line up the nib on the feed and pinch it tightly between my fingers. With the nib and feed pinched tightly, I then push it back into the section until the feed reaches the rear of the section and reinstall the breather tube.
Pinching nib and feed:
Pushing nib and feed into the section (I find it works best when I set the section against the edge of my desk and push it in):
Nib and feed inserted into section until the feed reaches the rear of the section:
Before using a bit of section sealant to secure the section to the barrel, I like to make sure everything is moving properly and that the diaphragm extends to just above the breather tube so that it will fill as fully as possible.
Here's the diphragm at rest:
And extended (note that it comes to just above the breather tube):
Once everything looks good, I do a test fill with water and ensure that there are no leaks. If there are no leaks, I empty the pen and then seal the section to the barrel with some section sealant. After letting it rest, it is filled with ink and then adjusted to make sure it is writing well and smoothly. Here's the final product:
And that's all there is to it. I'll be curious to hear if anybody has any special tips or tricks that they've learned along the way. I know I've really enjoyed working on these pens.
Last edited by a moderator:


")
