What's new

Horn scales question

Hey all,

I finished making some acrylic scales for a restore project, so of course now looking to refine what I learned by making (hopefully) some horn scales. I just received a horn blank from Maggard's that was advertised as being 1/8" but came in quite a bit thicker - almost 1/5". I want to lap these down but having never worked with horn before thought I'd ask here before screwing these things up - anything to note when sanding/cutting horn so that I don't permanently mar them?
 
Huh, don't know why this didn't show up in my first search, but here's a whole thread on the issue:
 
Yea, horn is one of my favorite materials for making scales. Horn often comes that way and is easy to work. Bandsaw or grind on a belt sander to thickness.

Once you thickness the material it may curl and you may need to straighten, don’t worry just heat, hot water, heat gun or oven and clamp to flatten and let cool. You may need to repeat the process a couple times to get them to stay flat.

I clamp both scales in a woodworking vise with large wood chops, but a couple clamps and a batten clamped to a bench works just as well.

Google (How to make a traditional set of horn scales ... the way I do it.) for a great photo tutorial on making horn scales from a master.
 
Read/watch:


You want to thin the horn before shaping - will save you time. That said, takes time to thin horn. The stuff is hard. I made my first set of horn scales with no power tools. Just sanded and sanded and then sanded some more until my hands hurt. Then I bought a 4 x 36 belt sander from Harbor Freight for less than $100. And still takes time using the belt sander.

Would love to own a drum sander like Portland Razor and a laser cutter like Ralf Aust but that ain't happening:


For sanding, I use 100 (80 in my belt sander), 240, 400, 800, 1200 and 2000 grit wet/dry sandpaper. For shaping, I use a $10 4-in-1 rasp and a $10 cabinet scraper.

Good luck and have fun!
those videos are pretty cool - that laser cutter would solve many shaping problems, i reckon i could try draw and ask a signage company to cnc in acrylic - would be much cheaper option. Maybe fun to try it out.
The portland machine is great too - I watched their videos many years ago before I even thought of trying anything myself, I also have a few of their earlier razors

Do you use the belt sander only in the first stage of sanding - shaping and thinning? Could you not swap belts for finer paper and keep using? I dont have enough work for one, but its interesting to see how they are used in scale making.

Unlike Brad Maggard, I use the belt sander to thin and then shape the outline to about 1/32 inch. I have also the sander to round the edges, but I would only do this after hand sanding the last 1/32 inch. I prefer using a rasp for shaping.
 
I used my palm sander to thin out the blank. I used carpenter's tape to attach the blank to flat formica, then used 100-something grit to bring it down to about 1/8" in, spot checking with my calipers. I was thinking of going a little thinner on the blank, but was a little concerned that after touch-ups, scraping etc. I didn't want to get too thin. So 1/8" for now. Horn definitely takes a little longer to sand down than acrylic.

I traced a line dividing the blank in half then used a spare scale to trace an outline on one of the halves. Then I used my power jig saw to cut the blank in half. Carpenter tape attached the two halves together one on top of the other. Later I'll drill the pin holes and use a Dremel to cut away some of the larger chunks before I started sanding the shape further into form.

I really like that idea of a scraper to help bring it into shape. I'll look into one of those next time I'm at the local hardware store.

One thing I haven't read anywhere yet on this topic but that I'll add to the literature - man does horn have an odor. All the sanding in my workroom definitely made me open a window.
 
I'd say halfway through sanding on these. Used the jigsaw this time to cut away the rough outline, which worked much better than the Dremel. Palm sander with 100-something grit to get closer to the final shape. Still not quite there yet but it's getting there. Pretty soon I'm going to have to start casting around for some sort of material to use for scales - there wasn't enough horn on the blank to salvage for that purpose.

PXL_20230208_151343316.PORTRAIT.jpg
 
During lunch break I jumped onto the Maggards site and bought one of their "seconds" horn blanks - that should make a good wedge source. I also remembered I had a lump of beeswax in the tool drawer. I can use that for a final coating after I sand this thing up to 1500 grit.
 
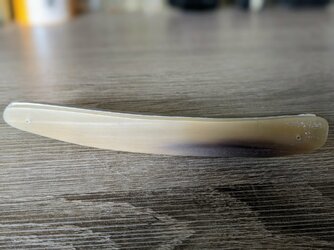
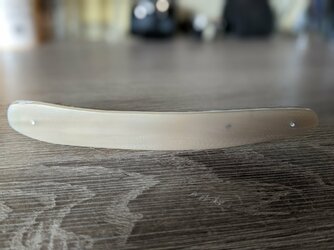
Here we go, a little late-afternoon sanding later, and we're closing in. I still have to sand some scratches off the one end on the streak but the major shaping is done.

I have to say, I think I prefer working with horn more than acrylic. It takes a little bit more effort to sand, but that push back actually allows a bit more control. And the feel of it is superb - cool and solid. The carpenters tape is still binding the two sides together so the photo doesn't show how semi-translucent the sides are.

I put a restored Bengall blade into some acrylic last week but I may transfer them to the horn scales. Seems like a more natural fit (pun only kinda-sorta intended).

PXL_20230208_205411116.PORTRAIT.jpg

PXL_20230208_205439541.PORTRAIT.jpg
 

Slash McCoy

I freehand dog rockets
Horn can be a very unruly substance. It is best to begin with a piece that is significantly thicker than the finished thickness, as much will be lost in sanding below the level of surface imperfections and much of the warpage. I love horn scales but I have to say, you definitely have to repeat flattening, several times, for good results. The horn has a lot of internal stress from drying and aging, and as you sand, the horn will often warp a little. Actually, as you do nothing at all, it will often warp a little. I sand down to about 150% of final thickness, heat and flatten, and repeat. Then sand down some more, leave it be for a couple of weeks, and flatten again. Sand some more, let it sit, flatten again. Some pieces will behave better than other pieces. You could get some that handles almost as nice as synthetic materials but don't expect that. Horn is typically a lot more work than acrylic but a well crafted pair of horn scales can be quite beautiful. I usually do not use horn for the wedge. For that, I like acrylic, mostly because of the wide choice available in translucency and color.
 
You might consider thinning the pivot end a lot more.
Horn can be really annoying, but the horn I got from Masecraft never twisted up on me. The stuff from fleabay warped without even touching it.
It's a classic material, feels and looks nice. Not my fave to work with but I do like it. I like it more when someone else makes them though.
I like to use dimensionally stable materials for wedges. Brass, for example. I love lead wedges. G10 is indestructible but hard to make into a wedge. I had some Thiers wedge material here for a while, soft and pliable and it 'mushed' nicely too.
 
I tried heating horn. Did not work for me. I have had the best experience just flattening both surfaces of the blank/slab on my belt sander before splitting, attaching and shaping.
 
I tried heating horn. Did not work for me. I have had the best experience just flattening both surfaces of the blank/slab on my belt sander before splitting, attaching and shaping.

That's what I did - just sanded both sides flat. So far so good - I haven't had any major warpage (yet?). But I'm seeing the wisdom of not using horn for a wedge. I made one but it doesn't blend is with the sides as much as I'd like. I noticed that the Aust razor I have in horn doesn't even really have a wedge per se - it's just a thin, uniformly shaped end piece.
 
I own five Sheffield 7/8 near wedges - four Wade & Butcher and one Joseph Rodgers. The original scales of all five had/have little heels (like dress shoes) that form a wedge. I recently made replacement scales for two of the Wade & Butchers, making the wedges out of matching horn. In my opinion, they look great and capture the original look of the razors. In order to capture that look, I had to polish the outer perimeter to match the scales.

You will notice that Matt at GSG makes horn wedges for some razors. The idea actually came from one of Matt's restores.

And with blond horn, you gain transparency and can almost see through the wedge.

1676152811087.png
 
Top Bottom