What's new

honing off a chip

I am thinking about using a file and filing off the chip without a bevel, keeping the smile as intact as possible. Then proceeding to the hones with tape on the spine and restoring the bevel with the blade laying flat.

In other words, the file will be perpendicular to the edge and the bevel will not exist any longer after I remove the chip. The edge will be square without a bevel, without an apex.
Then I plan on starting with like 320 grit and working up to a finish edge and bevel (apex). I am thinking about removing the tape on the spine at about 2000 grit and finishing without tape.
I worked on one before and I worked for a long time with the spine and edge flat on the stone. It took a while to hone the chip out.

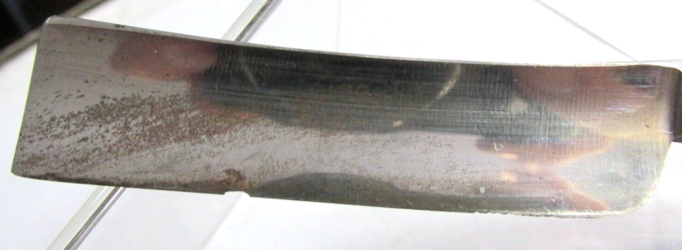
Any tips or suggestions and am I thinking straight with this? It is a very nice Wade and Butcher 3/4 inch blade and the chip is no deeper than a 1/6th of an inch a bit less. I am looking forward to a good edge when completed.

thanks in advance for the great advice and constructive criticism.
 
Breadknifing only gives the illusion of quick progress. The amount of steel you’ll need to remove remains the same. Why not just keep honing normally till you remove the steel? I do accept a lower grit and tape is necessary. But why introduce anything else?
 
ok, that makes sense, also I am concerned about keeping the same smile following the spine that has a similar curve. Your advice is keeping me out of trouble. I might use a diamond plate as I would a stone.
My first razor with a chip didn't go so well because I did not use tape at first.
 

Legion

Staff member
You can’t file a razor with a normal file.

Use a coarse stone or a diamond plate, and hone away the chip, lifting the spine off the hone as if it were a knife. Once the chip is gone, or almost, lay the razor flat and reset the bevel.
 
Besides the smile you want to preserve, the bevel angle might be something to consider.

So how big is the chip? Pix help.
 
It s not a bad chip, I am concerned about the rust, I have not touched the razor yet.
 

Attachments

  • s-l1600.png
    s-l1600.png
    1.2 MB · Views: 93
You can’t file a razor with a normal file.

Use a coarse stone or a diamond plate, and hone away the chip, lifting the spine off the hone as if it were a knife. Once the chip is gone, or almost, lay the razor flat and reset the bevel.
I like that tip about lifting the spine because I have much more experience with knives. That is better than using tape at first.
 
I ground a chip off my TI. The spine got some wear and the edge became dead straight I did'nt get a hold on the geometry of that knife...

As an beginner I like the spine to support guided sharpening. With the spine on the stone the whole edge should be sharpenable with a light stroke. From heel to tip, on both sides.

I have not touched the razor yet.
My initial step would be some light strokes, to see how the edge corresponds to the spine. Then adjusting the smile, to meet the shape of the spine. Or adjusting the shape of the spine, to meet the smile. Usually its a little bit of both. And you can adjust the smile a little to your liking.

If that work came out good, the knife should be easy to grind, even to me. I would take a fast stone (nice feedback is a great thing) and grind away. Just watching to keep everything fine.

Good luck!
 
Last edited:
Yes, that is exactly how I remove large chips. You need to use a Diamond file, a regular steel file will not cut heat treated razor steel. They are not expensive, $10-15. This is not bread-knifing but works with a lot of control.

When removing a chip, you must remove ALL the surrounding steel past the level of the bottom of the chip. You must do some planning and measuring, or you can ruin how a razor looks and remove more steel than needed.

This is a good opportunity to make the razor an actual smiling razor where the edge matches the spine. Easy to do with a bit of planning and a sharpie.

Google “Make Me Smile, razor honing” an old step by step photo tutorial on how to properly reprofile an edge removing a minimal of steel on a very similarly looking razor.

You can use a diamond file or diamond plate, with the spine on the bench and edge straight up, Bread-knife, saw the razor edge into a low grit stone or diamond plate, High angle hone, (hold the razor at 45-70 degrees to the stone and drag the razor across a low grit stone or diamond plate, or just hone the razor with a couple layers of tape to protect the spine. All methods work and all will remove exactly the same amount of steel from the edge.

But some give you more control and allow you to see exactly what is happening at the edge, while protecting the spine from needless wear.

Why would you want to hone the razor with tape and finish without tape? You risk not honing the bevel to the edge on the finishing stone, unless you do a lot or laps, or your finish stone is aggressive.

Remove the chip with a diamond file or plate, high angle hone the razor with the spine off the stone or diamond plate to knock off the corners of the edge and begin to cut a bevel, then tape the spine and fully set the bevel. If you want the razor honed without tape remove the tape after bevel setting and the remaining stones will bring the bevels back to meeting fully.

But here is your opportunity to test the myth, hone the razor fully with tape and see if you really can feel the difference, if any, that tape or no tape makes. There is no downside to tape. Once you have mastered honing, then decide if you want to use tape or not.

That old razor has minimal spine wear, the chip has probably saved it for years, don’t ruin it now with needless spine wear.

Also, be aware that impact, chip damage often goes much deeper than the bottom of the chip, so do not be surprised if after the chip is removed, that the razor micro chips after a few days shaving and stropping.

Remove all the rust with 000 steel wool and WD40 prior to removing the chip.
 
Also, be aware that impact, chip damage often goes much deeper than the bottom of the chip, so do not be surprised if after the chip is removed, that the razor micro chips after a few days shaving and stropping.

Remove all the rust with 000 steel wool and WD40 prior to removing the chip.
thank you for the precise outline. I have everything you mentioned. I always have been one to have every grit sandpaper up to micro finishing. I could polish my teeth with the finest. I have at least a dozen of diamond files. After reading your outline I will re-read it a few times. I will make a template with the spine as a guide and carefully follow the temple and Sharpie tracings.
On my junk razors, I used sandpaper of all grits on the blade and when I was finished it appeared that the razor had no spine wear because the sanding smooths it all out.
I will definitely use tape because I dislike seeing spine wear. Once the blade is restored it will shine like new. All these details that you gave give me confidence that I can follow.

This brings back flashbacks from when I was 12 years old and I found a sword all rusty behind a real old man's house. I sanded it until it shined, sharpening the edge and placing new leather on the handle.
One day, I showed the old man and he grabbed it from me as if I had stolen it. I never saw him or the sword again and never got a thanks. That was about 55 years ago! lol That old guy used to put beer in his cereal. We used to watch him outside his window closely adjacent to the street! He had to be 95 years old. Thanks to all, much appreciated.
 
That chip is significant. If that was my razor, I would not just hone it out with the spine up or on tape. That would have too much impact on the bevel angle. I would alternate honing without tape, with honing the blade spine lifted and I'd check the angle as I go. Depending on what the existing bevel angle is, I might just hone it on the stone normally until the chip is gone.
You have a good bit of oxidation all over too. I would guess your new edge will need to be honed a good smidge past where the chip terminates now...
 
That's a significant chip, and a fair amount of metal needs removal, no point in treating it with the softly softly approach, firstly I would hit a 400 grit diamond plate, lift the spine well clear of the plate, and just get rid of it, you may have to slightly reprofile the heel.

s-l1600.png
 
Have you noticed that the edge at the heel
looks like a saw ?
l yes I know what you mean by that. I will take all the advice from everyone and carefully experiment until I find the niche. I learned on my first one not to go crazy and fast because that is exactly what I did. I will try to enjoy this taking my time and learning as much as I can. Keep in mind that the few razors I worked on were completely straight across to a perfect square tip point.
 
That's a significant chip, and a fair amount of metal needs removal, no point in treating it with the softly softly approach, firstly I would hit a 400 grit diamond plate, lift the spine well clear of the plate, and just get rid of it, you may have to slightly reprofile the heel.

View attachment 1734921
I hear you on that. get rid of the mess. I am curious to see how things work out.

Personally, I can not grasp how it will work out since the spine has a curve. I suppose that the edge should match when finished.
I like your approach, but I am going to play around with a higher grit to see how it feels.
Like a batter swinging a bat around before he is pitched a live ball. Something like that.

Once I get in the groove I will go to a diamond plate as you suggest and keep that spine up a hair completely. I will try to use the file approach, edge perpendicular, straight down on a higher grit to shape it, the heel, and the smile, as others have suggested.
I have a dozen India oil stones that are begging to be used and I think they will work well on the semi-rough work after the diamond plate.
My first whetstone will be a King 300 which will be good practice. It is very forgiving.
Thanks for the incentive, everyone has been helpful.


If you look at my line near the edge of the blade you can see there is not much of a curve in that blade edge, the blade naturally getting smaller in size towards the heel which is what you see with most straight razors, the curve with that razor is all in the spine. I cannot foresee any problems in getting that razor back to where it needs to be, it's not a smiling blade which makes removing and honing the razor much easier.
 
Just cut off the rust with a single edge razor blade and polish with 000 steel wool and WD40.

It does not matter how you remove the steel, the exact same amount of steel will need to be removed to the bottom of the chip and you will still need to cut a new bevel, not a big thing. When you do that, the heel will come around. It will need reprofiling anyway.

But this is an opportunity to make something unique and cool while making the repair, The steel must come off anyway.

Sounds like you plan to take your time and look at your options.

Trace your razor onto a piece of card stock, carefully cut out the razor profile. Now use the spine cut out, the positive or negative, does not matter to draw a matching spine profile on the posterboard edge, so that you remove a minimum of steel at the heel, the narrowest part of the razor.

You do not need to make the smile/curve exactly the same as the spine, so that the toe and heel match in width, but with the cardboard templates traced onto poster board you can experiment with different edge treatments before any steel is removed.

Once you have settled on one or two potential shapes, cut out the new shape and trace that profile onto the razor edge with a black sharpie. That will give you a very good preview of what the razor will look like when finished. You can mark either side differently and decide which profile you prefer. WD40 and a paper towel will remove all the sharpie.

Invest in a pair of plastic calipers, $10-15 and take lots of measurements before any steel is removed. Once you decide, remove the steel, I use a 140-diamond plate or a 600/1000 diamond file. The metal is thin and goes quickly, and like I said it does not matter how you do it, as long as you have lots of control.

As I said earlier, “Also, be aware that impact, chip damage often goes much deeper than the bottom of the chip, so do not be surprised if after the chip is removed, that the razor microchips after a few days shaving and stropping.”

Nice project, enjoy and learn something new.

s-l1600b.jpg
 
Top Bottom