What's new

Got the scope out again.

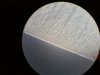
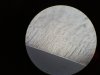
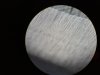
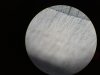
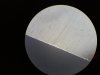
Pierre post shave pre and post strop. Same razor as previous post.

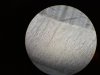
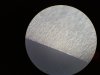
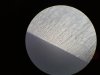
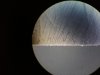
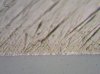
Really is amazing how similar these stones are to Thuri's. They act the same. They shave the same. The edges even look the same.
 

Attachments

  • $20160622_002625.jpg
    $20160622_002625.jpg
    30.2 KB · Views: 187
  • $20160622_002743.jpg
    $20160622_002743.jpg
    31.2 KB · Views: 186
Last edited:
Quick question about equipment - how hard is it to get a regular optical microscope set up for digital photography? I assume making the blade stay put and getting the camera mounted and focused on the eyepiece are the hard parts. I see monocular and binocular Unitrons on craigslist (not sure if the binocular ones are amenable to photography) and Ebay for less than a hundred bucks and new production AmScopes on Amazon for similar prices - is it worth it to give one of these a try? The shots in this thread look much clearer than typical USB scope shots, but I don't know whether that's achievable with inexpensive gear.
 
I've only read, but binocular's are fine from what I hear. You simply put a camera on a single eyepiece. The easiest are probably trinocular's as you can mount a camera and still use both eyepieces.

I'm using a $30 phone mount and a 5mp cell phone camera over a monocular scope, probably the cheapest possible setup with this kind of resolution. The razor isn't very tricky. Once you set the focus knobs and find the position and angle that allows the best image, it can stay that way until you change razors. You will need to remove the slide brackets, but that's usually easy to do. The camera is more trouble. The mount is tight (and apparently I bought the best one available), but it's not tight enough to avoid shifting when you plug/unplug the phone or perform similar actions. And tuning the camera in can take 20 minutes or more for a really good alignment. That's why most of my pictures aren't full FOV. It'd be several minutes additional tweaking for that extra 10% fov... not worth it.

That said. Camera's designed to mount on scopes are ridiculous ripoffs. Getting anything CLOSE to 5mp would have cost me well over a hundred dollars. All the affordable camera's are sub 1MP. Which are garbage images like the ones earlier in this thread.

Optical will give you superior image quality to a USB scope because you're minimizing the amount of digital magnification. And I'm sure it's improved in recent years, but it will never surpass the accuracy of good quality glass optics. As you see in the images I restricted FOV to allow my systems natural digital magnification to be reflected, quite a bit of clarity was lost. None of those images were upscaled by me in any way. The system simply digitally magnified it due to the particulars of the camera setup, and then the board scaled it back down to ~ the level of optical magnification in play if I left full FOV. I'm sure there artificial filters I could find and apply, likely present in the software of USB scopes, to improve clarity; but they would do so at the cost of accuracy.
 
Got my scope in today and played with it a bit at my lab bench at work after hours. The optical clarity seems great for how little I paid - I was able to get a great look at a penny I had sitting around at 40x and 100x. The "focus adjustment" is pretty limited (from what I can tell, the coarse and fine focus knobs are just moving the specimen plate up and down rather than actually adjusting where the optics are sitting).

The trickiest thing seems to be lighting. A compound microscope like this has its LED lamp on the bottom and I'm sure it works great for transparent/translucent things wet-mounted to a slide. It was significantly harder for me to get a non-translucent sample (the aforementioned penny) well lit from the top with an LED torch. This is exacerbated by the distance at which the objective lenses are set to focus - I have a bit of clearance with the 4x objective, less with the 10x, and practically none with the 40x. This will probably limit me to 250x optical magnification (10x objective with 25x eyepiece), with whatever digital magnification my phone's camera inherently gives me on top of that.

Tomorrow I'll bring a couple of razors in and jerry rig a mount for my light with some solder station "helping hands" and see if I can get decent pics.
 
The "helping hands" light mount was a failure. Thinking of either making an illuminator with gooseneck tubing and an LED, or getting some fiber optic filament. One of my coworkers suggested I could make a ring lighting setup out of lexan. Anybody have better ideas?
 
Managed to get the gooseneck LED illuminator up and running, and fought with the camera mount until I was able to get some pics that made sense. Overall, it was very difficult keeping the camera in position (it tends to sag over time because it's cantilevered in the mount and held in place by friction), nudging the LED into a spot where it was providing good light, and getting the scope's focus right. The photos as a rule look worse than what I saw looking through the scope with my eye, but I think the images are decent for a first try.


Here's the bevel on a Morley "Clover Brand" I got off Ebay and finished on one of my jnats - it's been used once and cleaned but not properly stropped. Optical magnification runs from 250x to 1000x (haven't run the numbers on final magnification on my monitor):

proxy.php

proxy.php

proxy.php

proxy.php

proxy.php

proxy.php

proxy.php

proxy.php

proxy.php


The last two done at 1000x optical are as blurry as they are largely because the clearance between my 40x objective lens and the thing you're imaging is really really small - it sort of forms an aperture between the light source and the thing you're trying to image. It looked a little better in person, but not much. Maybe trying to get raking light would have yielded better results.

I've got some more that I took of my Bismarck and my Baurmann "Comfort" that I'll comb through and upload later.
 
Mystery stone which I've always suspected is a vintage Jnat.
Image FOV ~130micron wide. ~ 1750x on my screen.
 

Attachments

  • $20160720_002721.jpg
    $20160720_002721.jpg
    117.8 KB · Views: 91
Last edited:
Free particles being trapped between the bevel and the stone. Of course those "deep scratches" are about 1.5-2 microns across, and likely wouldn't even show up until around 400x magnification. It's probable they remain from work on a stone prior to the finisher, as the finisher may not be taken to a full bevel polish, particularly to the point of removing examples like that.
 
Last edited:
Got a stage micrometer slide, so I have some idea what the overall magnification is with my setup. The pitch here is 10 microns, and on my monitor this shows up as 1.5 inches giving me ~3800x overall. Nb. I cropped an 800x600 section of the image so that B&B's board software didn't resize it:
proxy.php


This pic was taken using autofocus on my phone's camera. I think I could have gotten it a little crisper if I'd futzed around with manual focus. It was nice not to have to mess around with the illumination much, though.


Additionally, I took some pics of the Bismarck's bevel, but only the 380x ones came out well - the others weren't focused on the apex.
proxy.php


Finally, the bevel of a Friedrich Baurmann "Comfort 25". This was the first razor I honed myself, and it's probably the razor I've honed the most different ways out of the razors in my little collection. Recently, I dropped it with the scales closed, creating some tiny chips on the edge. This necessitated some time on the D8F before progressing through slurry on an LV coti and tomo slurry on a Nakayama asagi, finishing on water on the same jnat. It actually didn't take that long, and it shaves great again now that all is said and done.

First a pair of shots at 950x with different lighting:
proxy.php

proxy.php


Then a shot at 3800x. This is about the only bevel shot I've been able to take at this magnification that was well lit and properly focused:
proxy.php
 
Nice images. I'm unsure if your scaling is correct, though. As the finest bevel depth razor I own is a wonderedge, which is possibly the thinnest ground razor ever made, and its bevel is 225microns deep. If your scaling is correct, your razor has a 50 micron deep bevel. Unless of course you're honing with several layers of tape, in which case, the bevel depth would be greatly reduced.

Assuming your scope is a 40x10, and the 3800x is @ full mag? Using a typical FOV, the board is scaling your "3800x" shot down to about 400x. Likewise, the 10x10 or 950x is closer to 100x. This gives you a 500micron or 0.5mm bevel depth, which is very standard. Of course this is all due to the board resizing your images. As they are on YOUR computer, before uploading, they very likely are the magnifications you state... as the first image (which you cropped to prevent resizing) is.
 
Last edited:
A little focus on the deep scratches. In this example, the deep scratches are from an 8k Synthetic.

Examples are on a Jnat I'd consider prefinisher to low end finisher for a razor. Very high quality stone, very slow without pressure, surface tones in to a very even, regular cut, but not quite as fine as most razor finisher Jnats.

15 passes
75 passes
200 passes

At 15 passes you can see the work at the edge is already mostly done, but a great deal of the 8k scratch pattern remains, including the deep cuts.
At 75 passes you can see the 8k pattern has been greatly reduced, but the deep cuts are only very slightly recessed from the edge.
Around 150-175 passes, feedback ceases to evolve. Final shot is at 200 passes. As you can see the 8k pattern is almost entirely removed, excepting the very deep cuts. Edge has begun to receive gouging from the minimal amount of autoslurry from the stone, creating a pseudo-tooth appearance at the first few mm of bevel... essentially creating a "slurry" scratch pattern at the edge and directly behind it.

I'll do a "cleaned up" synthetic edge probably Friday if I have time, showing an edge where these gouges are removed by progressing through aggressive synthetics to a "perfect" edge (time consuming and little noticeable improvement in shave quality with the majority of finishes). I'll also show how time spent on slurry can obfuscate these deep scratches by creating a "gouged" scratch pattern throughout the bevel, made up of similarly deep but much more regular scratches. I'll do some testing and comparison to see if this slurry "cleaned" bevel actually removes the gouges or simply masks them, as well as presuming the former, if this offers a benefit over the alternatives (fully cleaning on aggressive cutting hones such as a synthetic progression or simply ignoring the unusually deep scratches).
 

Attachments

  • $8ktoJnat15pass[1].jpg
    $8ktoJnat15pass[1].jpg
    31.1 KB · Views: 53
  • $8ktojnat75pass[1].jpg
    $8ktojnat75pass[1].jpg
    31 KB · Views: 53
  • $8ktojnat200pass[1].jpg
    $8ktojnat200pass[1].jpg
    28.2 KB · Views: 53
Nice images. I'm unsure if your scaling is correct, though. As the finest bevel depth razor I own is a wonderedge, which is possibly the thinnest ground razor ever made, and its bevel is 225microns deep. If your scaling is correct, your razor has a 50 micron deep bevel. Unless of course you're honing with several layers of tape, in which case, the bevel depth would be greatly reduced.

Assuming your scope is a 40x10, and the 3800x is @ full mag? Using a typical FOV, the board is scaling your "3800x" shot down to about 400x. Likewise, the 10x10 or 950x is closer to 100x. This gives you a 500micron or 0.5mm bevel depth, which is very standard. Of course this is all due to the board resizing your images. As they are on YOUR computer, before uploading, they very likely are the magnifications you state... as the first image (which you cropped to prevent resizing) is.

The razor does have a very thin grind and the resulting bevel is difficult to see without a loupe, even though I honed without tape. The scope setup is 25x4 (eyepiece x objective) in the 100x optical/380x overall pics, 25x10 in the 250x optical/950x overall pics and 25x40 in the 1000x optical/3800x overall pic. Unless I mixed up the eyepieces, though I don't think I did.

That being said, the board is definitely resizing them and resulting in (much) less magnification for the uncropped pictures, which is kind of a pain in the butt for this purpose. The bevel is thin but not 50 microns thin :)


The 8k -> Jnat pictures are really neat. The last one where you see a bunch of little striations near the apex (which you infer are the result of autoslurrying) are particularly interesting. Here's a question for you - I've been warned against doing too many water laps on a Jnat by several different folks, with the suggestion that doing so will result in either a foil edge or some other sort of harshness. So far, I haven't observed this on any of mine - in fact, I get edges that I like quite a bit when I keep honing on water until I hit some tells (commonly I do x-strokes until I get suction and undercut) coming off of tomo slurry. Do you think that autoslurrying on some stones is the cause of the roughness that people warn about?
 
Yeah, if you're running 1000x that'd put you around 1100x (or so) in your final image (and like 220-250x ish in the 950x) making the bevel about 200microns thick I'd estimate. Keep in mind that with 25x eyepieces a 40x is hitting beyond the cap of useful magnification, which I think is 650 or 750x for most 40x objectives. I'm unsure how that limit interacts with further digital magnification, like we've been doing, but I expect it isn't bypassed... so really all we're doing is making it a little easier to see the information available at ~750x, at the possible cost of introducing artifacts to the resulting image. I'm pretty sure to get beyond that we'd need oil immersion objectives, which I don't know if it'd even be possible with a razor edge.


As for your question about Jnats and water... I've yet to find a Jnat that didn't perform better for me when finished on water than on slurry. If a stone damages an edge on water (unless it's an oilstone), I consider it a bad stone and get rid of it. I expect the issues people are encountering will vary a bit depending on the particulars of the stone. It's possible some will damage the edge without a slurry buffer. It's possible some people just lack appropriate technique on certain jnats on water. I know I've owned a few where the razor gets very sticky as it finishes, and likes to skip and smack itself on the stone if honed without care. I'm sure there are plenty of possible explanations for their findings, but I'd have to have the stones and razors in question to even begin to guess in specific cases.
 
Last edited:
Same razor, taken directly back to Same Jnat, this time with Tomonagura slurry (harder and finer stone than base stone).


Pic 1. Twenty five passes on slurry. As you can see, deep scratches much less noticeable.
Pic 2. Same point, focus higher up. Showing how little visible evidence of deep scratches remains.

Pic 3. Seventy five passes on slurry. No evidence left of deep scratches.

Pic 4. Return to water. After 25 passes. Deep scratches starting to reappear as the slurry scratch pattern is polished out.

Pic 5. 75 water passes. Scratches now visible again. Reduced, but still present.
 

Attachments

  • $20160729_000154.jpg
    $20160729_000154.jpg
    37.8 KB · Views: 35
  • $20160729_000206.jpg
    $20160729_000206.jpg
    37.7 KB · Views: 35
  • $20160729_000434.jpg
    $20160729_000434.jpg
    34.3 KB · Views: 36
  • $20160729_000610.jpg
    $20160729_000610.jpg
    33.3 KB · Views: 37
  • $20160729_000852.jpg
    $20160729_000852.jpg
    31.8 KB · Views: 37
Also after 75 passes on water. Showing how the slurry scratches remain WITHIN the larger scratches, creating a lighting effect, where with focus off the scratch, it is visible as a deep scratch (chasm) in the bevel, but with focus on it, it is MUCH harder to see as the remaining scratches from the slurry (within the larger scratch itself) become visible and create a "can't see the forest for the trees" situation. I'm speaking specifically of the darkest line (About 11:45 o'clock) along the top of the bevel in the first pic (a remaining 8k scratch), which is reduced to a very subtle shade difference when focus is put on it, revealing the tomo-slurry produced scratch pattern within it.
 

Attachments

  • $20160729_001055.jpg
    $20160729_001055.jpg
    33.3 KB · Views: 28
  • $20160729_001101.jpg
    $20160729_001101.jpg
    31.2 KB · Views: 28
Same razor after ~20minutes honing on a 10k Synthetic (~0.9micron avg particle size), painstakingly kept clean (necessary for this level of bevel polish, as random atmospheric grit can scratch up the bevel significantly). Ballpark 500-700 passes at varying levels of pressure. Almost "perfect". Approaching the point where the deepest scratches are no longer able to be determined as belonging to a previous stone, or having been created on this stone. Another 20-30 minutes still necessary to get a "perfect" bevel. As you can see, for all the bevel polish, the edge isn't being improved any... hence why this seems a mostly pointless endeavor.
 

Attachments

  • $20160729_004316.jpg
    $20160729_004316.jpg
    25.6 KB · Views: 32
  • $20160729_004331.jpg
    $20160729_004331.jpg
    24.2 KB · Views: 32
Top Bottom