What's new

Third Restore: Ever Ready 100

Picked this up at a local store today.
$100_2195.jpg

$100_2196.jpg

Color is a bit bright because I used flash. Took the pic below without flash, but that did not show off the blue properly.

$100_2192.jpg

It's in great shape, except for the worn out boar knot. The 20mm TGN Finest on the left will be it's replacement.
I will not be doing any type of sanding on the outside of the handle if I can avoid it. There is a mold line between the knot hole and the Ever Ready branding that I could do away with if I sanded. But the patina to the creme color of the top portion of the brush might be compromised if I did this, and I don't want to lose that, if I can help it. So this brush will get a soak in hot water and dish soap, and then a good scrubbing with a soapy cloth and tooth brush. Once the knot is fitted I'll hit it with polish, but that is it.
I was going to put this knot in this handle.

$100_2197.jpg

As a matter of fact, this handle has already been fitted for this knot. But I can always get a generic, modern sort of handle like this one, if I want. I'd much rather restore the Ever Ready.
More to come.
 
I decided to try another way of removing a knot, which I saw on Youtube.

proxy.php


The idea is to put the brush up tight to the vise jaws, and crush the glue bulge above the knot. It looked good on the video, but for me the vise kept slipping off the glue bulge and just crushing hairs. I tried to push the knot into the vise as I cranked down on the jaws, but all I accomplished was to cause the brush to come apart.

proxy.php


I trimmed the hair and sussed out my options. I assume a bit of epoxy will put the handle back together. But it was actually good that it happened, because now I can get to both sides of the knot, plus really be able to see what's going on during knot removal.
I started with a 1/8" bit and drilled a few holes.

proxy.php


You can see my progress from the back side.

proxy.php
 
Next the name of the game is use whatever I can to further compromise the plug in the old knot. A big drill bit will start us off.


proxy.php


After that, all I did was take a small chisel and knock the plug out.


proxy.php


Piece of cake, really. I like that!

proxy.php


proxy.php
 
Calipers read 20.12mm.

proxy.php


Glue bulge above the epoxy base plug reads 21.82mm

proxy.php


Used a flat sanding board to lightly sand and smooth out the opening.

proxy.php


Wanted something I could use in my drill like a sanding drum. Took a nut driver socket and using 3M 77 spray adhesive, I think we have a winner.

proxy.php


And, ready to accept the knot.

proxy.php
 
I don't have any black paint to fill in the lettering. It actually looks like it might have been gold, anyway. Not certain I will even worry about it. It is still quite legible, and I think I might be of a mind to let it be, like the patina on the white piece. Not certain, yet.
 
Alright, according to my measurements, from the bottom of the glue plug to the tip of the hairs my knot is 64mm in height. I have been playing around with a damp knot at various heights in the handle, and 47mm looks like my sweet spot for this one.
Anyone know if I can just wipe the handle dry with tissue, wipe the epoxy plug dry and go ahead and set the knot, or do I need to wait for the knot to thoroughly dry first?
 
BTW, anyone notice it looks like the bottom of this brush is stamped "IRREG"? I assume that means "Irregular", though I can't find a thing wrong with it.
 
Looks like another winner - nice job on documenting the restore with the pictures.

You probably would be OK setting the knot in the brush with damp hair and a dried off plug, but you may want to hold off until dry. No need to rush it, even though you are likely anxious to get it done and use it tomorrow.

Looking forward to the pictures of the completed brush.
 
Labrax, thanks. I'm more anxious to get it done tonight because my wife is away at her mother's. She comes home tomorrow, and the smell of curing epoxy is not conducive to domestic harmony.
If I don't finish it tonight, with the daytime temps outside I will have to wait another week to set the knot. But I believe I will hold off. I may go ahead and fill the handle to the appropriate level and let that set up. Then all I will have to do when the time comes is epoxy in the knot.
 
Hey Mike,

Any bathroom silicone adhesive that you could set it temporarily - probably could use it permanently with it too. How fast is the epoxy at setting - 5 minute epoxy would probably be fine if you dried the epoxy base and set it tonight. Best of luck whatever route you take.

Pete
 
BSAGuy, thanks.
Ready for epoxy.

proxy.php


The three pieces of wooden dowel will be used as filler.
Like this.

proxy.php


I will fill the bottom half of the handle halfway with epoxy, insert the filler wood, and join the two parts of the handle together. Then I'll finish filling until I reach a level about 18mm below the top of the handle(46mm loft). This should allow for a bit of squeeze out around the plug , and put me (hopefully) right at 47mm loft once I go to set the knot.
I'll let the epoxy in the handle set up good before I do that.
 
I've found that wrapping the top with masking tape then cutting away the knot hole helps keep the epoxy off of the handle.

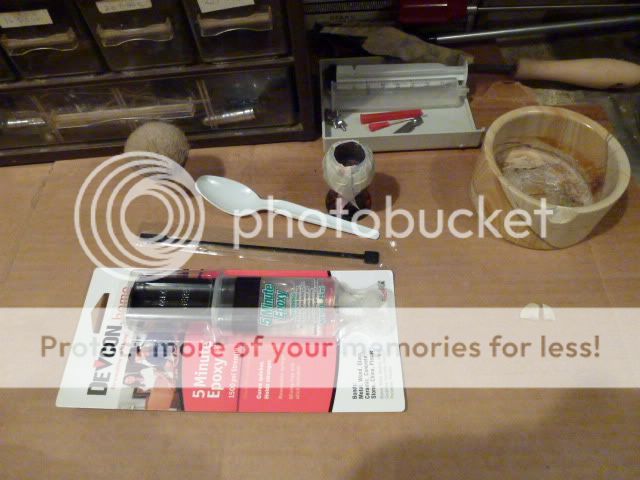
I like to mix the epoxy in a plastic spoon then apply it with a coffee stir stick/paddle

proxy.php
 
Mick, thanks. I taped, but I like your idea of using the scissors. I will definitely use that one.
As for mixing epoxy, I find it simple to mix some of the epoxy in the handle. I use the plastic shell the epoxy is packaged in to mix the rest, as per the instructions. Works well.
I used a long, narrow piece of spruce soundboard wood as a stirrer, since I've got plenty laying around.
 
SE razor blade works well for cutting away the excess tape on the handle. I'm sure you have a few of them around somewhere
 
SE razor blade works well for cutting away the excess tape on the handle. I'm sure you have a few of them around somewhere
Yep. I have used one for that. It works great. The scissors were just quicker to hand tonight.
I set the knot. It is curing right now. Loft ended up at 48mm. I was shooting for 47mm, but I don't think 1mm will make a dime's worth of difference in performance.

$100_2219.jpg

I will most likely shave with it tomorrow even, and post up a post bloom pic. Thank you all for watching.
 
That looks great - like that color combo and the depth that you set the knot. I have three knots out for delivery today - can't wait to get home and get at least one completed tonight myself.

Looking forward to the post-bloom pic and your thoughts on the performance of the brush set at that height.

Nice job!
 
Very nice write up and a great result. The same thing happened to me with an Ever Ready, made it nice and easy to work on. I used pennies to build up a shelf for the knot.
 
Boaz, labrax, thank you.
That looks great - like that color combo and the depth that you set the knot. I have three knots out for delivery today - can't wait to get home and get at least one completed tonight myself.

Looking forward to the post-bloom pic and your thoughts on the performance of the brush set at that height.

Nice job!

Congrats, and enjoy the restores. Nothing like shaving with a brush you put together yourself.
I will most definitely post a pic and my thoughts. My thanks to everyone who has been a part of this thread.
 
Top Bottom