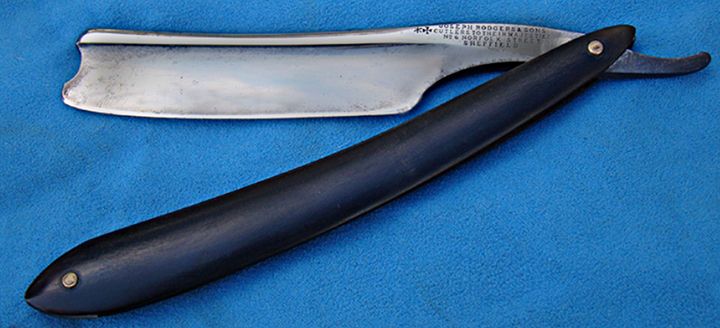
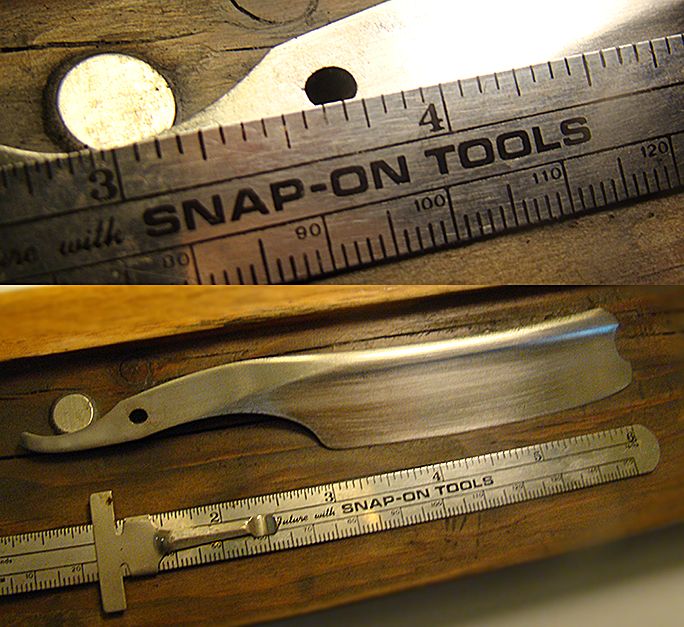
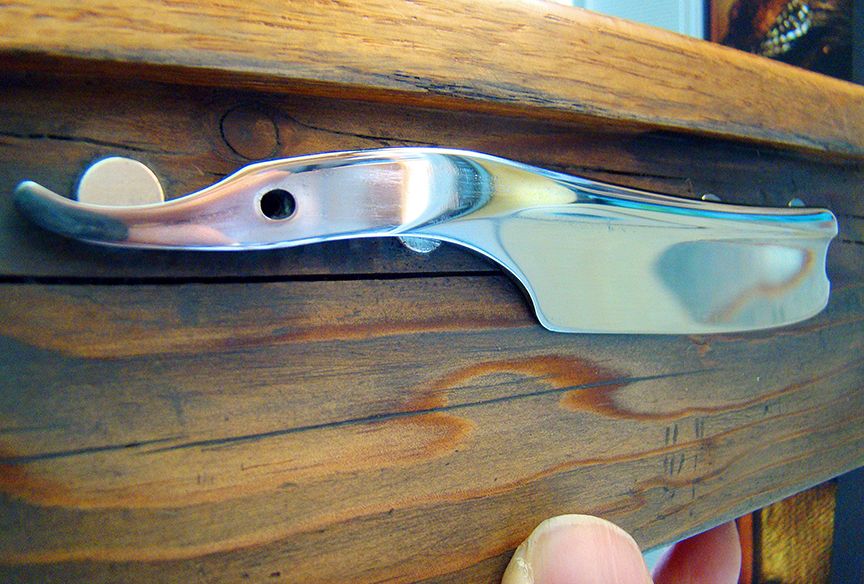
I picked up this Joseph Rodgers & Sons 'Faux Frameback' from a Gold Country antique shop. The blade looked to be rather good shape, despite some built-up tarnish, scratches and grime; the black horn scales were in excellent shape, although the pivot pin lost a cap on one side.
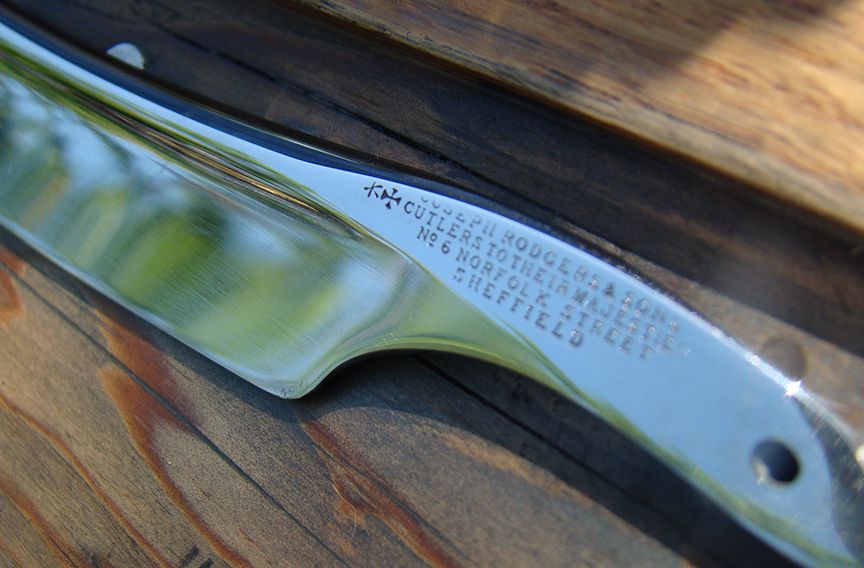
After some light cleaningshowing the 'good' side of the blade...
First up, Repinning the Pivot:
One side of the pivot pin was missing, and so my approach was to simply gently tap the pin loose to remove it, using a .125 punch. The key is to make sure the backside is supported before starting to avoid damaging or breaking the scales.
Halfway home and....tap, tap, tap....SNAP! There went the pivot end of my beautiful black horn scales...
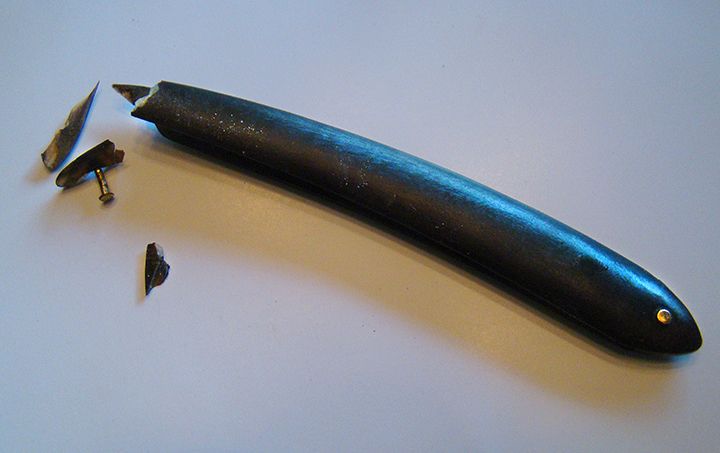
It happens sometimes, no matter how careful I may be. More often than not, this process has worked without fault. In hindsight, these scales would have benefited from a several day soak in Neatsfoot oil to make them less brittle.
So it looks like I'll now be making some scales...
THE BLADE:
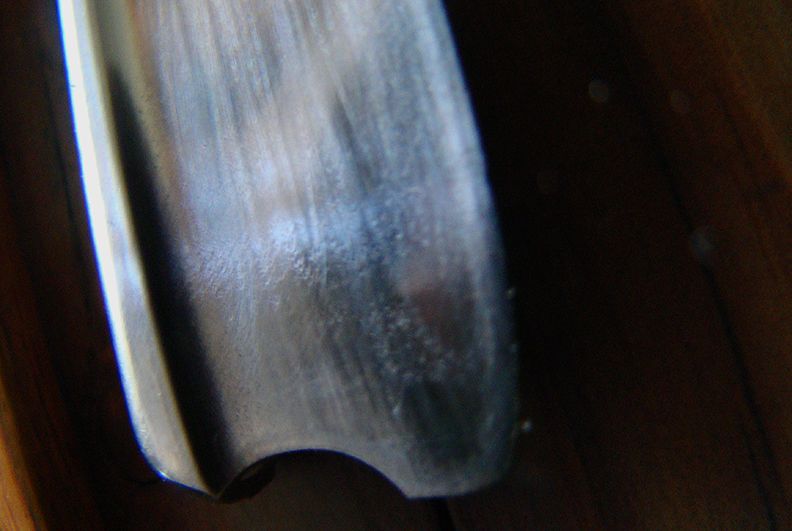
A good collection of black stuff on the bladewater stains, black rust, and a bit of "Devil's Spit"although I was confident there wasn't much pitting beneath the surface. Plenty of scratches, though...

Hand sanding - Starting at 180 grit, working my way up the grit scale. You can see evidence of some pitting once the 'spit' is removed...
As I continue up the grit scale, the pitting is becoming less obvious...
Another thing I noticed while sanding is the oversized pivot hole, which has elongated to more of an oval. I'll reduce the diameter of this before assembly...
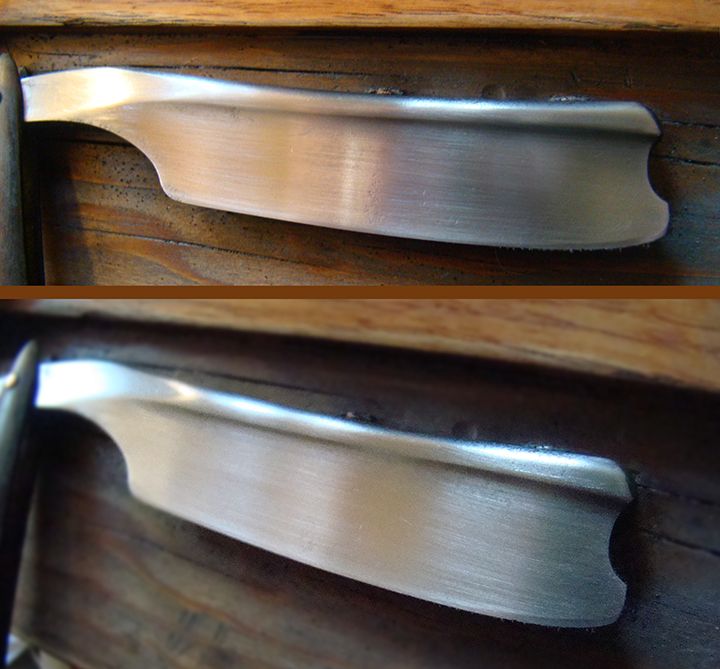
Back to sanding: As I got up to 600 grit, I started spritzing the blade with a bit of WD40, and will continue to do this until I get up to 1200 grit. At this point, the blade is getting the mirror-like quality to the finish...
From there, I'll dry sand/polish with 1500 > 2000> 4000>6000>8000.
and call it 'finished'.....
On the oversized pivot hole: I plugged the entire hole with 5-minute epoxy, let in dry overnight, sanded it flush and drilled a 5/64 hole for the pivot pin.
On to the SCALES:
I created a variety of scale shapes and had to decide which to use. Initially, I was just going to replicate the original shape (version 1), but I was intrigued with version 6 as well.
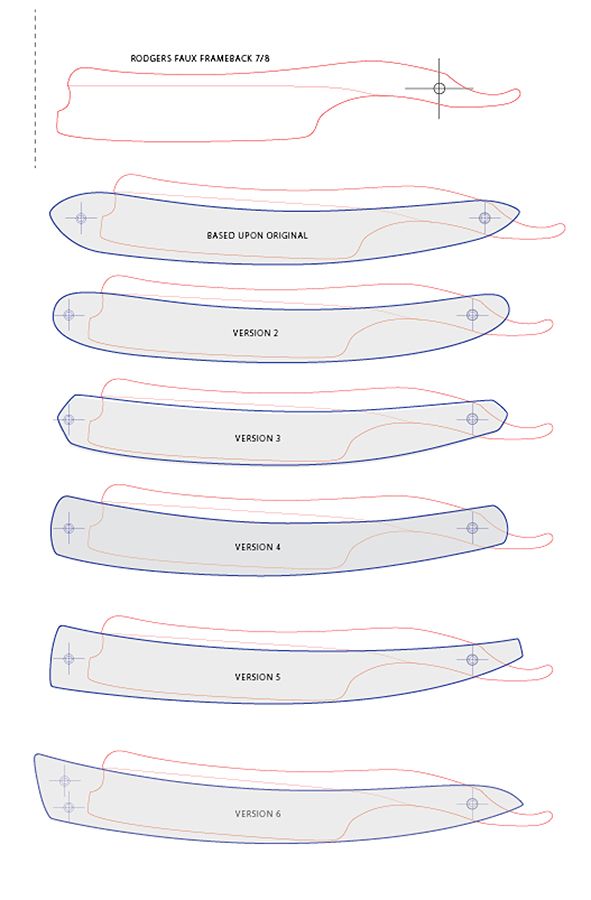
I decided to make two sets...and then decide. I took two different sets of wood blanks, purple heart and cocobolo rosewood. I'd make one set (version 1) from the purple heart; Version 6 in the cocobolo.
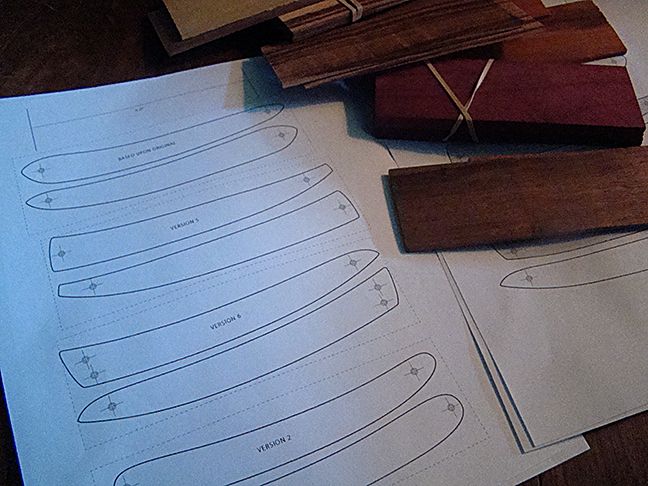
After some considerable sawdust generation, I wound up with four sets of scales from which to choose.
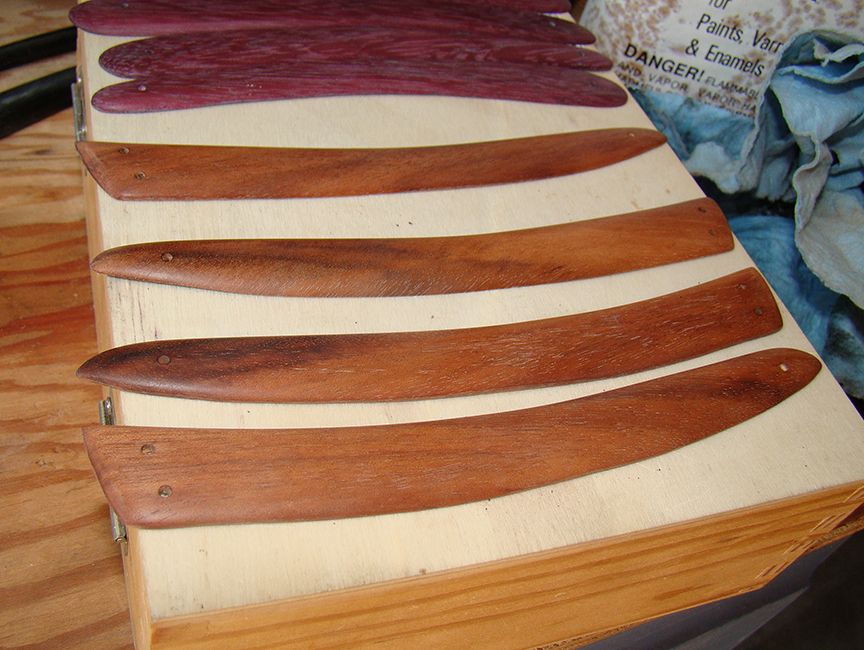
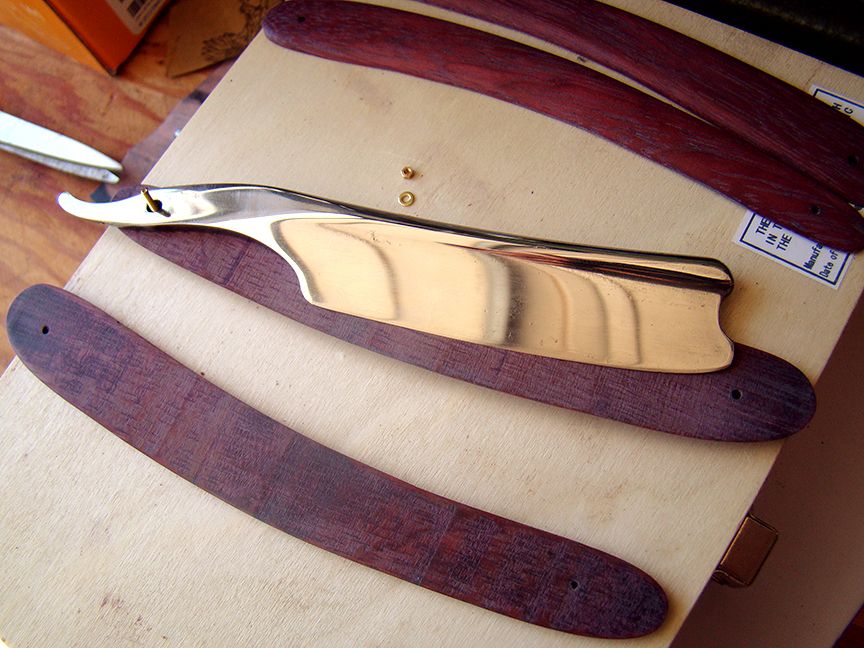
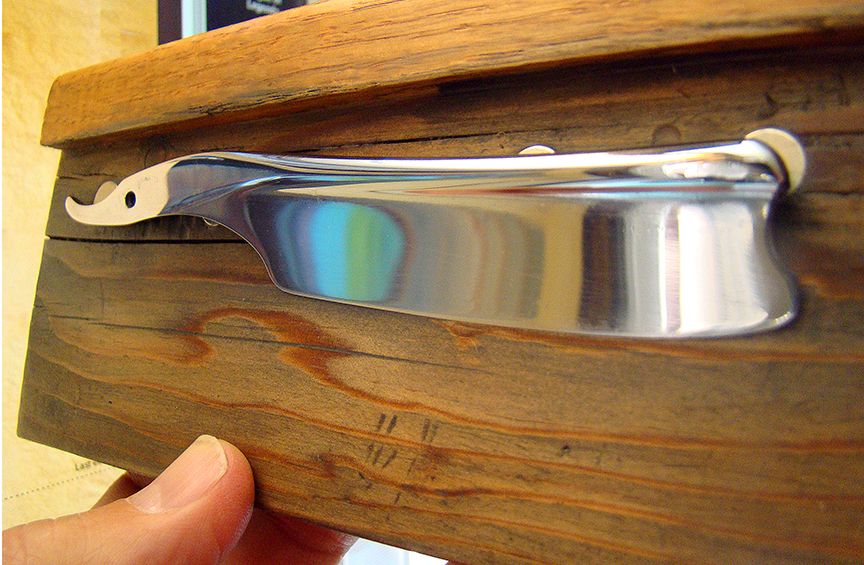
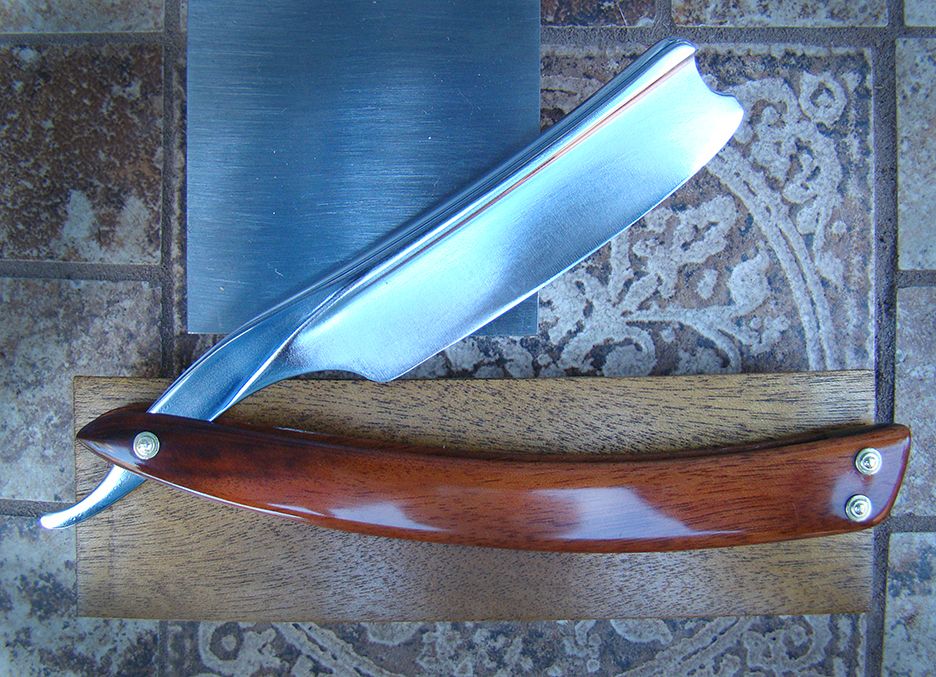
After several 'dry fittings' I opted to use the cocobolo scales. I really liked the swooping lines of the scales and how they mimicked the curves of the blade.
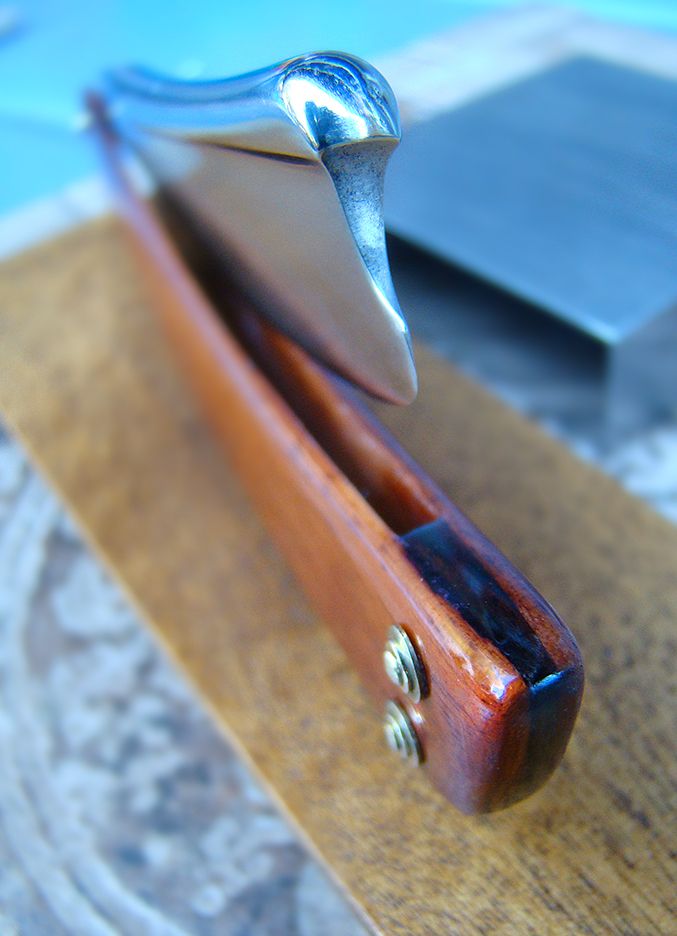
For the wedge, I had some dark indian rosewood that contrasts nicely with the lighter cocobolo.
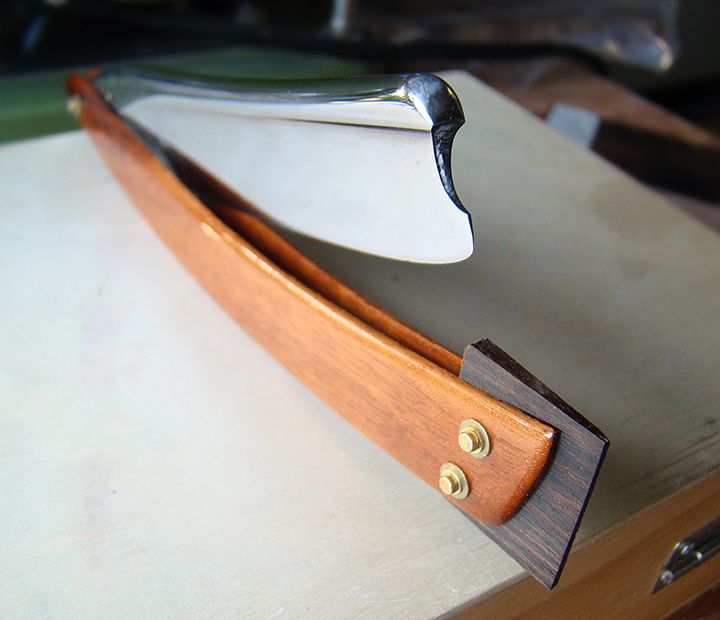
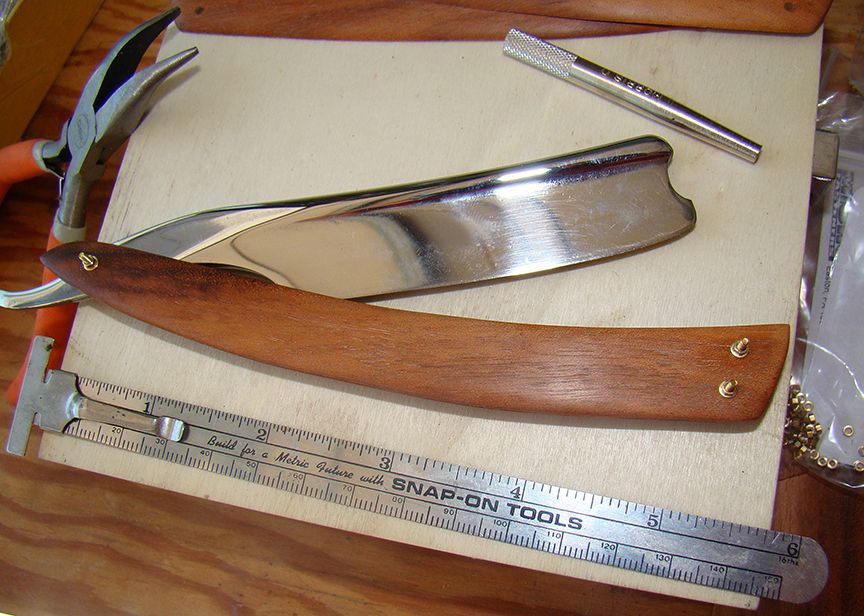
For the finish of the scales, after smooth-sanding them up to 2k grit, I applied several coats of brush-on poly.
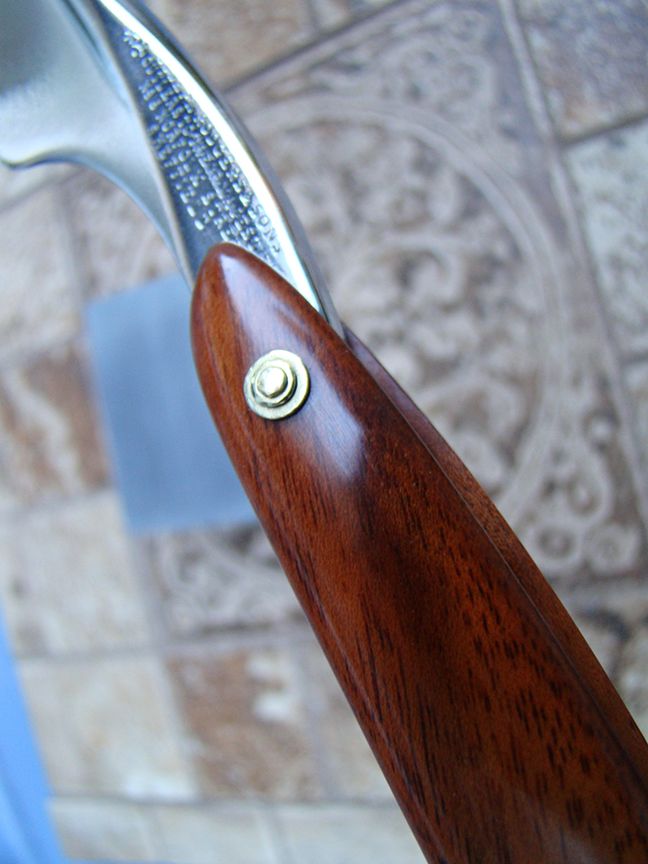
For the hardware: solid brass pins and double brass washers.
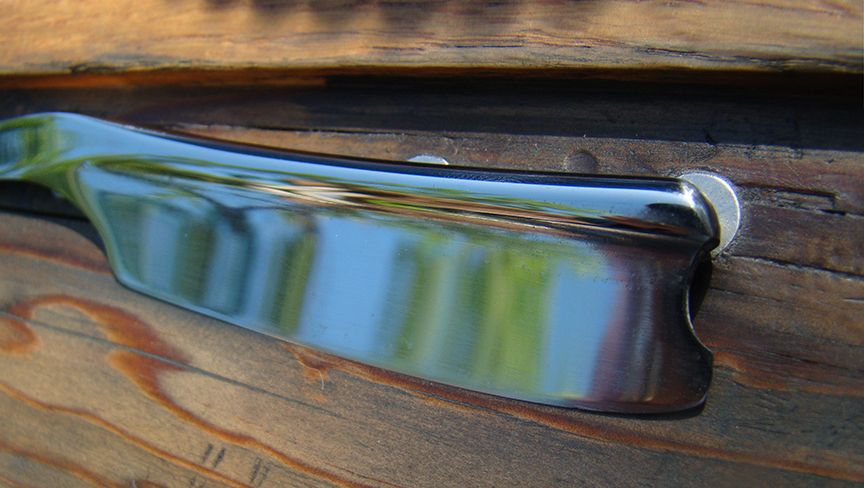
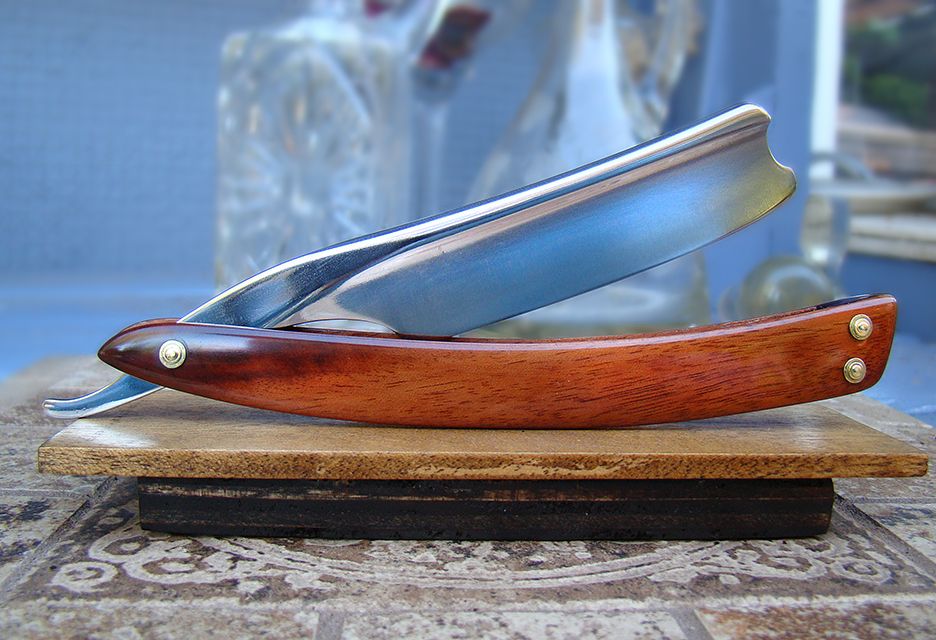
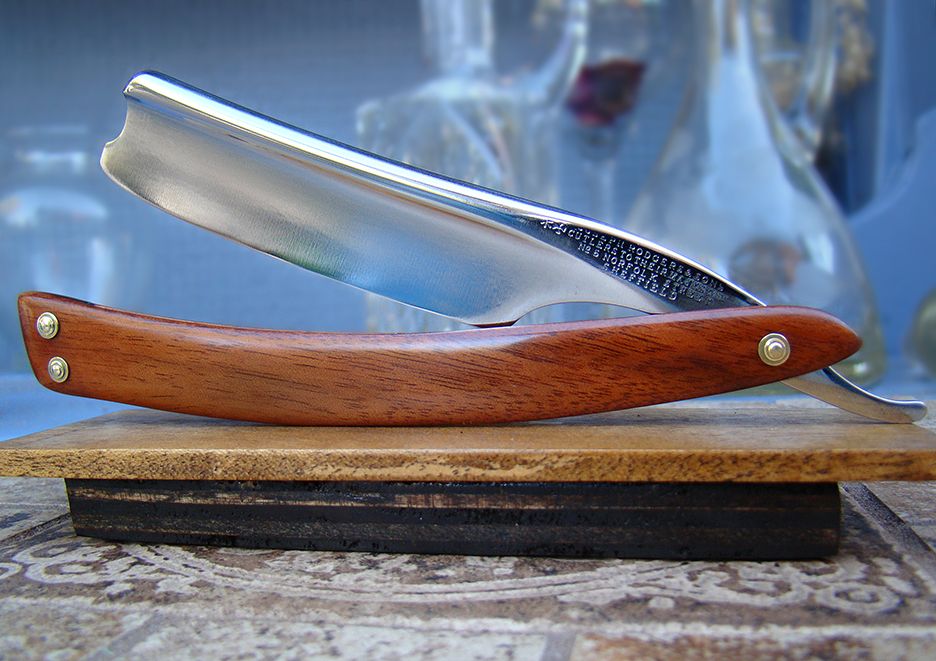
It's a hefty razor, but I find both the line of the blade and scales very graceful! Thanks for looking!
After some light cleaningshowing the 'good' side of the blade...
First up, Repinning the Pivot:
One side of the pivot pin was missing, and so my approach was to simply gently tap the pin loose to remove it, using a .125 punch. The key is to make sure the backside is supported before starting to avoid damaging or breaking the scales.
Halfway home and....tap, tap, tap....SNAP! There went the pivot end of my beautiful black horn scales...
It happens sometimes, no matter how careful I may be. More often than not, this process has worked without fault. In hindsight, these scales would have benefited from a several day soak in Neatsfoot oil to make them less brittle.
So it looks like I'll now be making some scales...
THE BLADE:
A good collection of black stuff on the bladewater stains, black rust, and a bit of "Devil's Spit"although I was confident there wasn't much pitting beneath the surface. Plenty of scratches, though...
Hand sanding - Starting at 180 grit, working my way up the grit scale. You can see evidence of some pitting once the 'spit' is removed...
As I continue up the grit scale, the pitting is becoming less obvious...
Another thing I noticed while sanding is the oversized pivot hole, which has elongated to more of an oval. I'll reduce the diameter of this before assembly...
Back to sanding: As I got up to 600 grit, I started spritzing the blade with a bit of WD40, and will continue to do this until I get up to 1200 grit. At this point, the blade is getting the mirror-like quality to the finish...
From there, I'll dry sand/polish with 1500 > 2000> 4000>6000>8000.
and call it 'finished'.....
On the oversized pivot hole: I plugged the entire hole with 5-minute epoxy, let in dry overnight, sanded it flush and drilled a 5/64 hole for the pivot pin.
On to the SCALES:
I created a variety of scale shapes and had to decide which to use. Initially, I was just going to replicate the original shape (version 1), but I was intrigued with version 6 as well.
I decided to make two sets...and then decide. I took two different sets of wood blanks, purple heart and cocobolo rosewood. I'd make one set (version 1) from the purple heart; Version 6 in the cocobolo.
After some considerable sawdust generation, I wound up with four sets of scales from which to choose.
After several 'dry fittings' I opted to use the cocobolo scales. I really liked the swooping lines of the scales and how they mimicked the curves of the blade.
For the wedge, I had some dark indian rosewood that contrasts nicely with the lighter cocobolo.
For the finish of the scales, after smooth-sanding them up to 2k grit, I applied several coats of brush-on poly.
For the hardware: solid brass pins and double brass washers.
It's a hefty razor, but I find both the line of the blade and scales very graceful! Thanks for looking!