What's new

First restoration came out "JUSTRITE"

I have begun to acquire a few nice Straight Razors. I am really enjoying using, honing and stropping them to achieve a DFS. There is something about using hot steel early in the morning with a fine soap that just sets my day off right. A couple of the blades I have also have a few minor cosmetic issues (scale, rust, pitting, etc.) and a couple just have scales that I really don't care for. I have decided to dabble in the art of restoration. I am pretty comfortable in a workshop as a mechanic by trade and none of the required tools are a mystery to me. Now, seeing as how I really don't feel like destroying a perfectly good vintage razor due to my lack of skill (or blatant ignorance, whichever you like) I decided to pick up a sacrificial lamb as my first restoration project. I picked up this "JUSTRITE" for about $20. Not a bad deal for a no name blade. I liked the scales and figured the blade was not in that bad of shape.

$IMG_1552.jpg

This is how the razor came to me fresh out of the mail call. A picture is worth a thousand words but those words did not describe how bad the condition of the blade really was. I do not blame the seller as it appears the condition worsened after the initial sales pictures were taken. Besides, this is skill development project so no harm done.

$IMG_1558.jpg
$IMG_1559.jpg

Next I disassembled the razor and realized just how bad the blade was. I also noted that this is actually a German Steel blade that the Miller & Co. just put there name on. There is corrosion and pitting on the blade and quite a bit of active red rust on the tang. Also, the scales were useless. Cheap plastic, warped and cracked. So, what started as a simple clean, polish and reassemble has quickly become a full blown restore.

$IMG_1560.jpg$IMG_1561.jpg
 
I began going through the grit range and immediately noticed an improvement in the look and feel of the blade. The majority of the rust and discoloration came off with the first round of 220 grit.

$IMG_1569 (Edited).jpg

after about 2 hours of 220 I was able to move on to 500.

$IMG_1571 (Edited).jpg

About 1 hour of 500 set me up for the 1000.

$IMG_1575 (Edited).jpg

With the 1000 I was already beginning to achieve reflections in the blade. After about an hour of 1000 I moved on to the 1200 and 1500 and 1500 wet.

$IMG_1577 (Edited).jpg

After 1500 wet I was at almost mirror. I am really happy the way things are going so far.

$IMG_1579 (Edited).jpg
 
What a neat razor and a job well done! This is very encouraging. I have a few that need a good once over, and i'm unusually frightened to do it myself.
 
My original idea of cleaning and polishing the scales went out the window as soon as I realized how bad they were. I attempted to make a pair of replacement scales that were identical in shape and size so that I may replace the original metal inlays. I really dig the way that looks. After many frustrating hours fighting with a warped piece of blond water buffalo horn I thought I had achieved my goal until one of the scales crumbled in hand. Horn is not easy to work with and the piece I had was doomed from the start. It was not true, it had spiderweb cracks and the layers of material had begun to "de-laminate". Thankfully it was the worst piece of stock I had to work with. Again, try my skill on the sacrificial lambs before moving on to quality materials.

After that little fiasco I took a whole different direction and just decided to freehand some scales and let the blade tell me what it wanted. This is what I came up with.

$IMG_1585.jpg

By no means a reinvention of the wheel, just a look I've seen that I really like. Taking my newfound knowledge of how to work with horn (go slow, be careful, have patience, use finer saws and files...) I selected a nicer, thicker, higher quality piece of black water buffalo horn and set to work.

$IMG_1588.jpg

I got so caught up in making the scales that I did not take all that many pictures.

$IMG_1590.jpg

I wanted to use a brass wedge but I was not able to source any brass in my area. I was however able to score a piece of copper pipe cap. I sliced the top of the cap off thinking I would use that. Bad idea, too much curve and too many imperfections.

I then split the pipe in half and hammered it flat.

$IMG_1592.jpg

Here is the makings of my new wedge. After a little fiddling around and a few test fits I decided not to taper the wedge. Whether it needs to be tapered or not is a different conversation for a different thread. I just didn't like the way it looked.
 
Now that all my sanding, shaping, cutting, filing, hammering and polishing and buffing were done it became time for final assembly.

I played with pinning and peening the old scales so I hopefully wouldn't ruin the new scales. Pinning is not hard (but its not easy either). After a few tries I was able to get the look I wanted. I use double stack washers (brass/stainless) on the the wedge/spacer side and triple stack (brass/stainless/brass) on the pivot side. Again, no reason for this, just developing some new techniques.

$IMG_1608.jpg

I am very happy with the results of my restoration.

$IMG_1609 (Edited).jpg

I feel that it looks very classy and has given this old blade a new lease on life.

$IMG_1610 (Edited).jpg

It is now lying in wait for the honing stones and soon I will take it out for a test drive. Thank you for reading this and I look forward to doing this again sometime soon.
 
Took the blade to the stones and set the bevelon my nice new King 800/4k. A great little stone for the price ($25 locally).The bevel came out very thin and even. The blade was able to shave arm hairsafter just the 800.

View attachment 705762

After the 800/4k I went through my Welsh slatehones. Started with 8k then to 12k and on to 15k. All stones were used withwater and slurry. These stones cut quickly and give a nice even edge.

$IMG_1620.jpg

After honing it was time for a few laps onstrop. The blade got about 40 laps on the canvas and about 60 laps on theleather. The bevel was mirror smooth and shining bright.

View attachment 705764
 
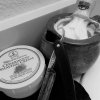
First test drive this morning. Used my new Semogue Boar that is breaking in very nicely and a wonderful TOBS cream and had a DFS with little to no effort. The blade shaves smooth and close and after a little Captains Choice Cat O' Nine Tails I was out the door and on my way to conquer the world...

$IMG_1622 (2).jpg

... One vintage razor at a time :thumbup1:
 
Top Bottom