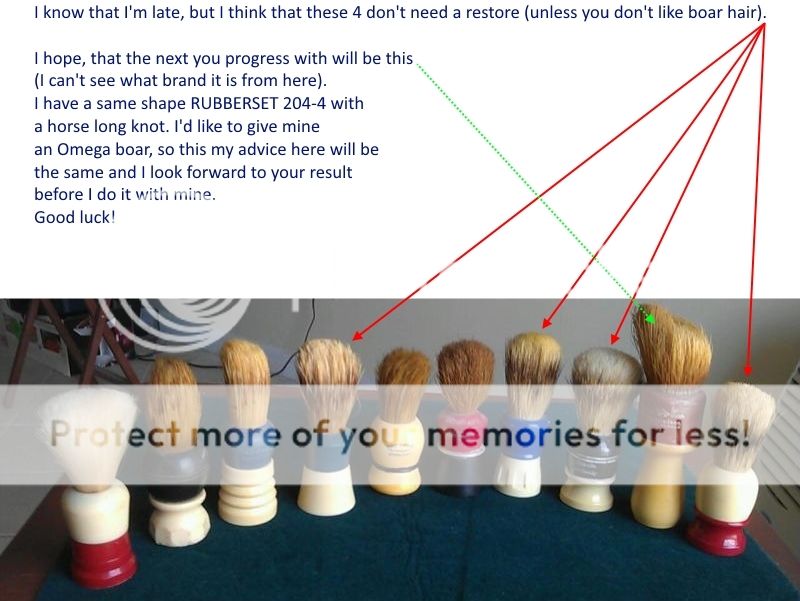
So I was at home and on drugs last week due to an abscess tooth...and that combination led to a little treewhaling some vintage brushes.  Or...more to the point, brush handles. I think all of these are going to need new knots. So here's a pic of the little collection I assembled in a week:

I haven't decided what I'm going to restore first, or what knots I'll pick...and I may need some advice from some of you on the way. I'll post pics to this thread as I make some progress.
Or...more to the point, brush handles. I think all of these are going to need new knots. So here's a pic of the little collection I assembled in a week: I haven't decided what I'm going to restore first, or what knots I'll pick...and I may need some advice from some of you on the way. I'll post pics to this thread as I make some progress.