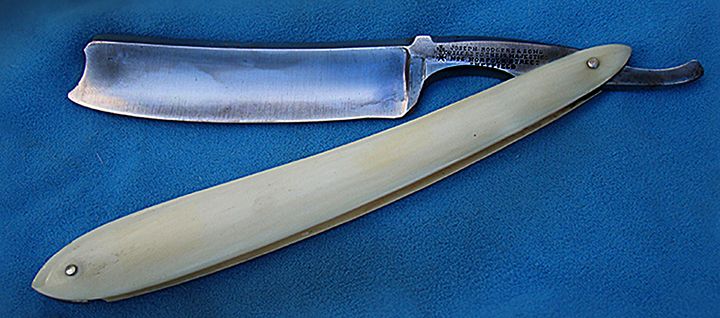
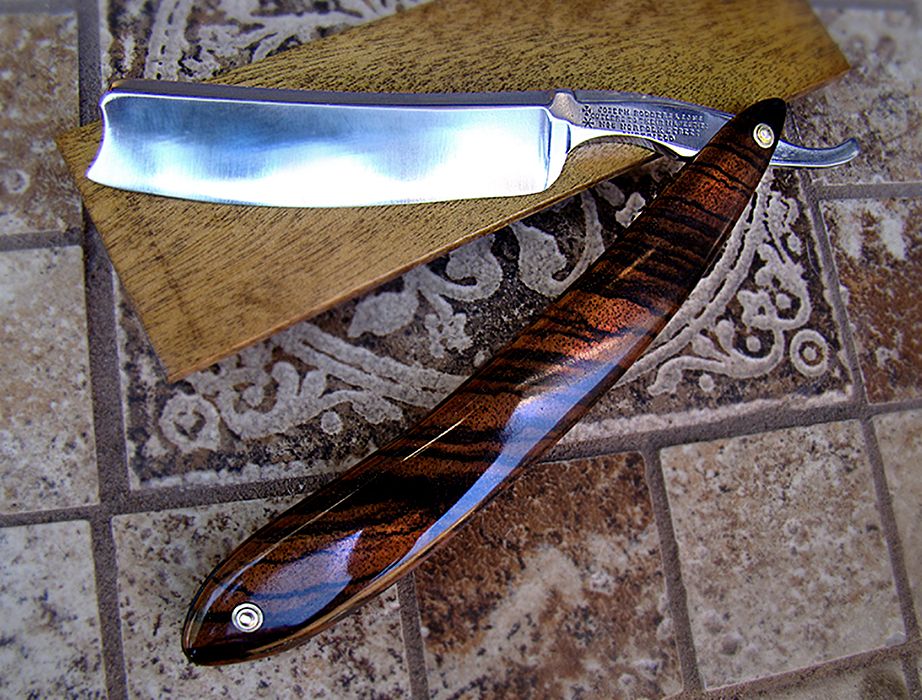
I came across this old Joseph Rodgers razor in an antique store in Nevada City. I was intrigued by the razor design: a heavy, broad-spined, thickly-shouldered carbon steel blade, exaggerated spanish point with a smiling edge and thumb notch. The scales were cracked and split on the wedge end. One of my concerns was the obvious heel hook (no doubt caused over time by the thick shoulder preventing the heel from hitting the hone properly), which I'd have to remedy with a little grinding to maintain the curve of the blade from toe to heel.
SCALES: Disassembled, the scales were useless as was the cracked wedge piece. Starting from scratch, I decided to base my new scales on the existing ones, albeit somewhat thicker to help offset the weight of the heavy blade.
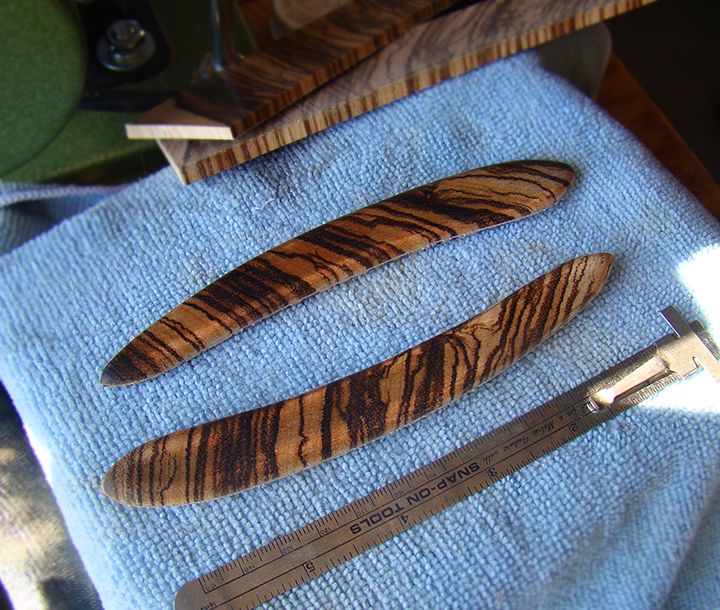
I had several sets of zebra wood I picked up off ebay and chose a set that had good figure.
Sample of one of the sets:

After sketching out the new shape, the scales were rough cut from the blanks using a bandsaw.
Next up, they were sanded to the final shape and the edges were chamfered on the belt sander. I wound up making two near-identical sets of scales; one for now and one for later use.
Two sets of scales (the sections are adhered together with double-stick tape):
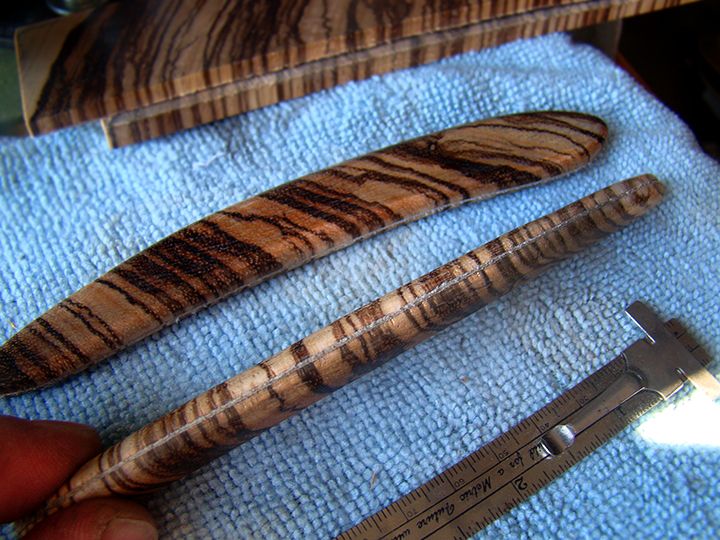
One challenge was getting the figure to 'book match' properly where the sections met:
Pin/wedge alignment & correction: I used ebony for the end wedge. I ground a piece of the ebony into the desired shape on the belt sander. In my preliminary set-up with wedge and micro-fasterners, I realized my pivot holes were misaligned (operator error! ) If I did not correct this, the blade would never align properly when closed.
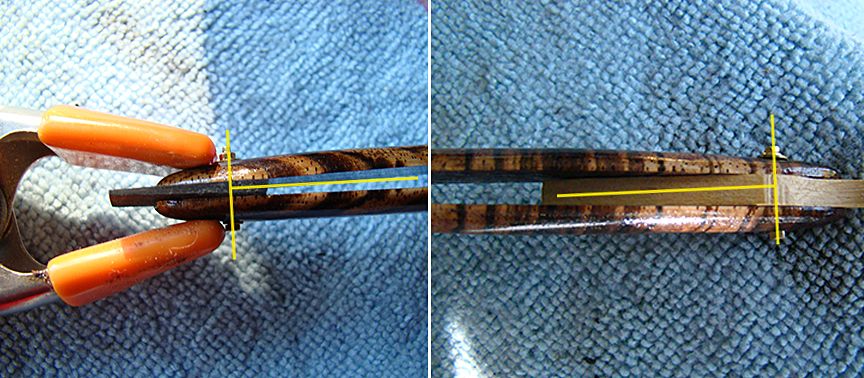
Evidence of a misaligned pin (yellow wood is a mock tang for set-ups)
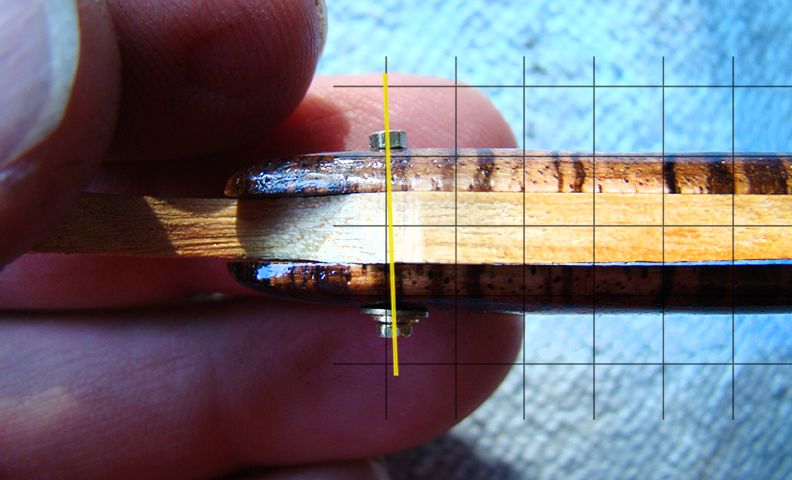
Fortunately, I was able to rebore the pivot hole and correct my error. The fact that I planned on using oversized (double brass washers) helped cover my boo-boo....
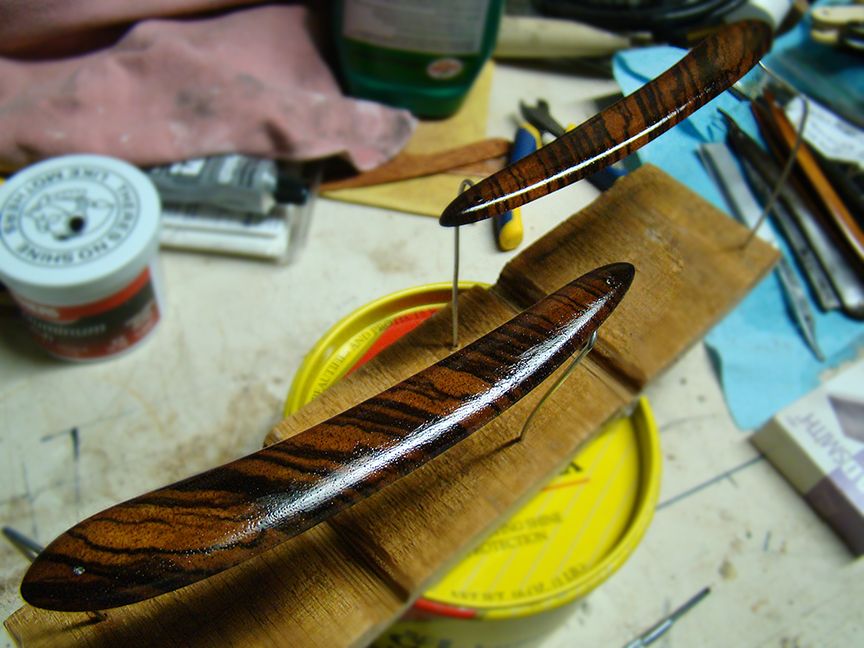
I chose a CA finish for the scales (durable!). This requires some time & patience, but I really like the end result.
Early coats of the CA finish. I applied about 15 thin coats before sanding & buffing to gloss:
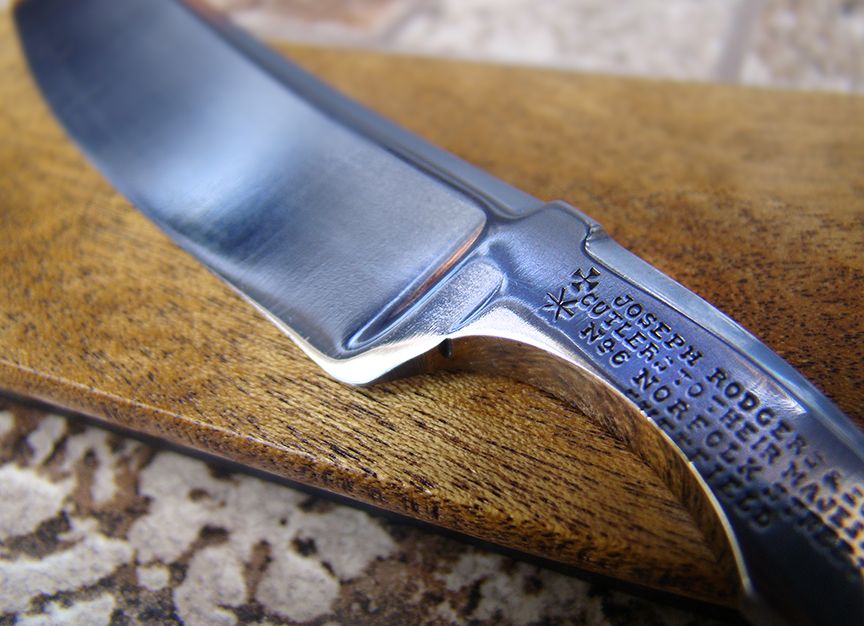
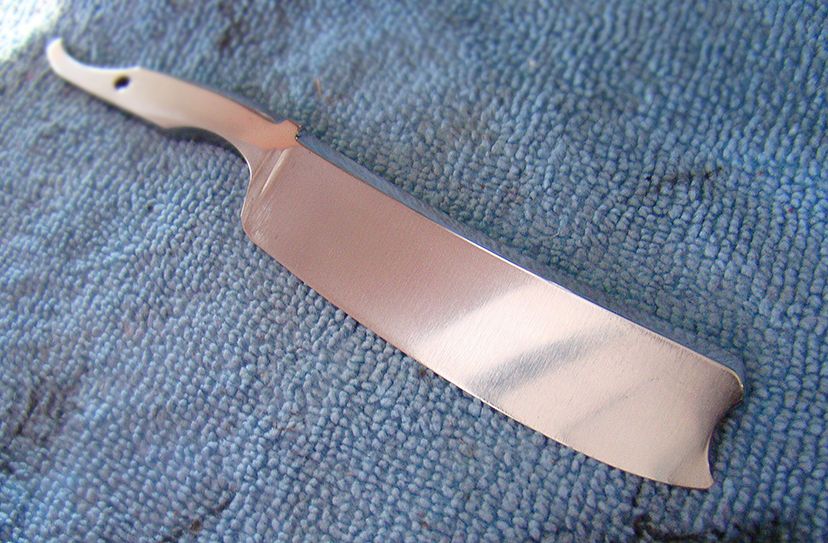
The Blade: After an initial hand-scrubbing to remove age-old grime, I took the blade to the buffer. I began with 85g greaseless compound >185>400>600>emery compound. Next I had to deal with the heel hook on the blade edge. Using my DMT 350 plate, I carefully ground the heel curve and shoulder so it came into line with the blade's curve.
Here it is post-clean-up and with the fixed heel:
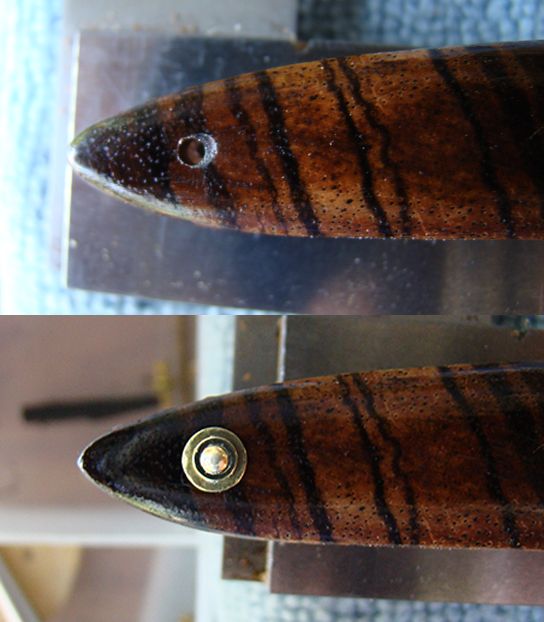
Finished! Brass pins, double brass external washers & brass inners.
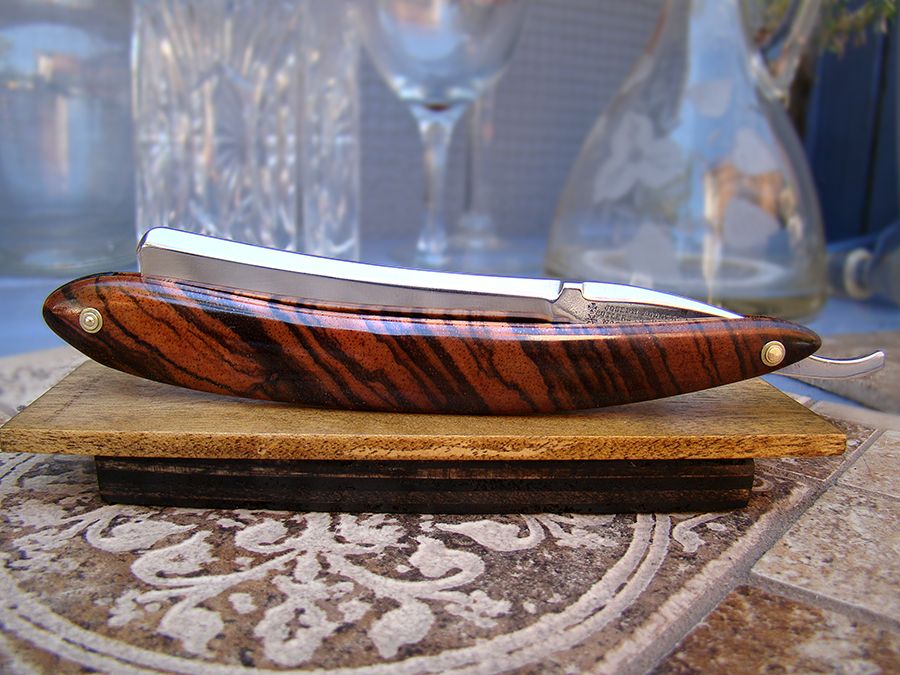
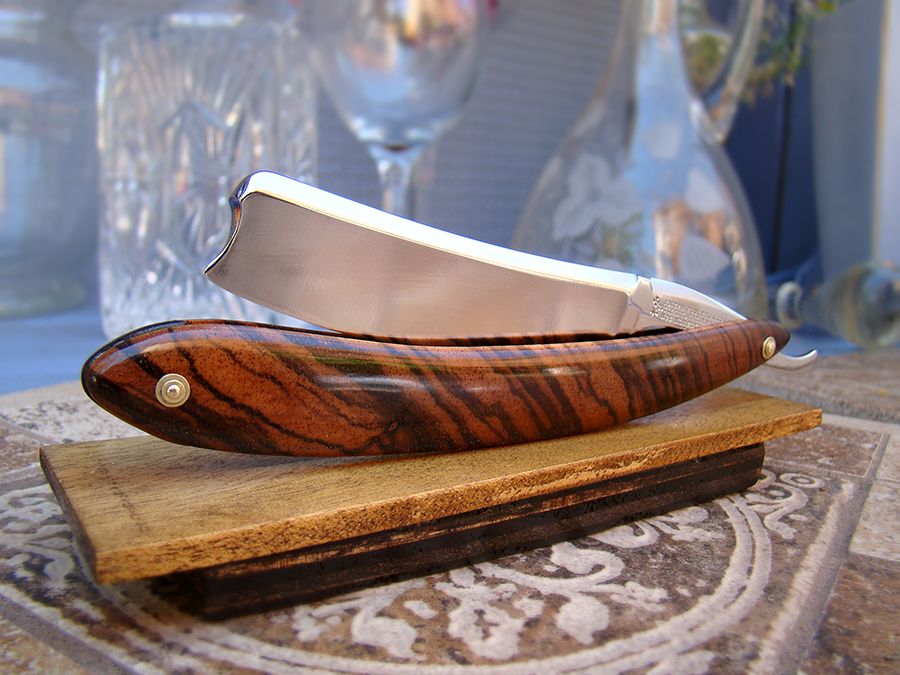
A substantial razor with plenty of heft to both blade and scales! It feels good in the hands (balanced!). The blade took a wickedly-sharp edge off the hones. I found it took some practice to get myself comfortably acclimated to both the shape and weight of this razorbut once mastered, it's a pleasure to use!
SCALES: Disassembled, the scales were useless as was the cracked wedge piece. Starting from scratch, I decided to base my new scales on the existing ones, albeit somewhat thicker to help offset the weight of the heavy blade.
I had several sets of zebra wood I picked up off ebay and chose a set that had good figure.
Sample of one of the sets:
After sketching out the new shape, the scales were rough cut from the blanks using a bandsaw.
Next up, they were sanded to the final shape and the edges were chamfered on the belt sander. I wound up making two near-identical sets of scales; one for now and one for later use.
Two sets of scales (the sections are adhered together with double-stick tape):
One challenge was getting the figure to 'book match' properly where the sections met:
Pin/wedge alignment & correction: I used ebony for the end wedge. I ground a piece of the ebony into the desired shape on the belt sander. In my preliminary set-up with wedge and micro-fasterners, I realized my pivot holes were misaligned (operator error!
) If I did not correct this, the blade would never align properly when closed.
Evidence of a misaligned pin (yellow wood is a mock tang for set-ups)
Fortunately, I was able to rebore the pivot hole and correct my error. The fact that I planned on using oversized (double brass washers) helped cover my boo-boo....
I chose a CA finish for the scales (durable!). This requires some time & patience, but I really like the end result.
Early coats of the CA finish. I applied about 15 thin coats before sanding & buffing to gloss:
The Blade: After an initial hand-scrubbing to remove age-old grime, I took the blade to the buffer. I began with 85g greaseless compound >185>400>600>emery compound. Next I had to deal with the heel hook on the blade edge. Using my DMT 350 plate, I carefully ground the heel curve and shoulder so it came into line with the blade's curve.
Here it is post-clean-up and with the fixed heel:
Finished! Brass pins, double brass external washers & brass inners.
A substantial razor with plenty of heft to both blade and scales! It feels good in the hands (balanced!). The blade took a wickedly-sharp edge off the hones. I found it took some practice to get myself comfortably acclimated to both the shape and weight of this razorbut once mastered, it's a pleasure to use!
