What's new

Old cameras and exploratory sugery

Having a soft spot for older film cameras and especially rangefinders from the 60's, 70's and 80's, I from time to time take the chance and buy unknown, untested cameras "in the wild" at flea markets and garage sales. Have found many deals this way and with a little bit of work mixed with a can-do attitude and the ability to say oh well if things don't work out, anyone can do this.

I will say, I have thrown out cameras while learning and have not had any training beyond a few videos and conversations about specific cameras. If it is a camera you care about, can't replace easily, or do not want the possibility of screwing things up more ( aka fubar), then send it to a trained professional. I learned by doing. More importantly, I have learned how NOT to do certain things... :)

This past Sunday I picked up a nice looking Yashica MG -1 rangefinder for $5. It functioned mechanically, wasn't dented or beat up, and had minor corrosion in the battery compartment. But, aperture blades were clean, functioned smooth, glass was in great shape, and everything was there. So, for the price of a Draft brew I decided to take the chance.

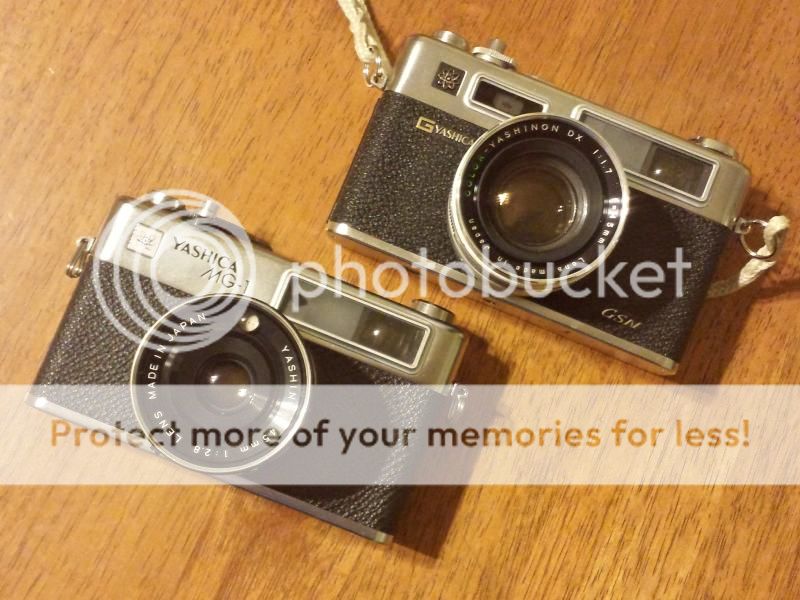
Knowing the camera is the first step to buying like this. The MG -1 is the baby brother to the much more popular Yashica Electro 35 series. It is the same size and shape, but has some different features. It was nearly half the price of the GSN when new.

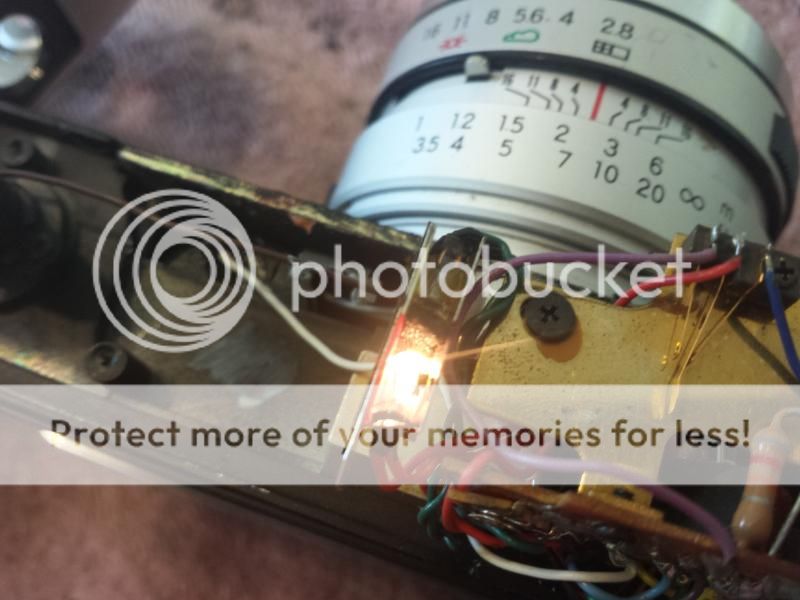
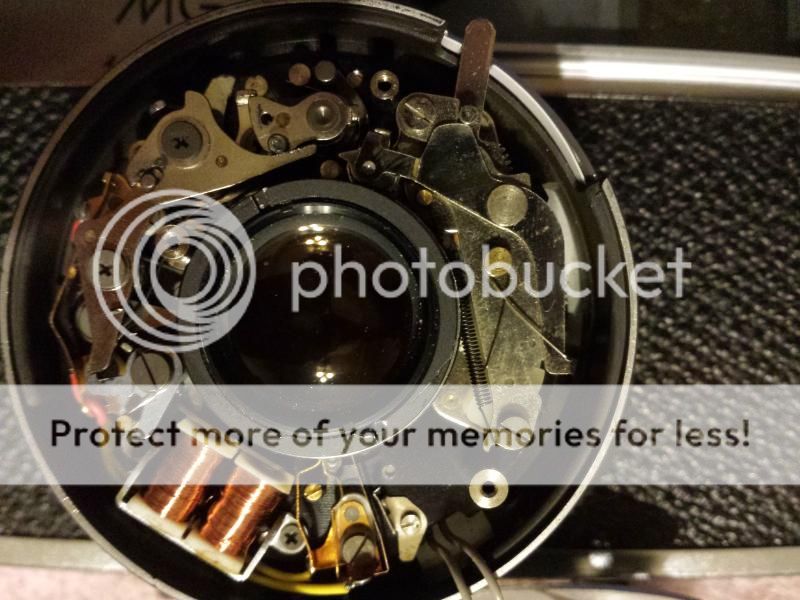
This camera has a cds cell inside the lens ring, the little eye above the lens, for metering. This one was nice and clean. Nice thing about this style is it will meter through any filters you put on. Yashica users will likely be familiar with the "POD" or Pad of Death. It's a little 2 mm thick piece of rubber that deteriorates into some sort of petroleum by product type goo and is essential to keeping everything in proper adjustment. If it is worn out, when you wind on the film you will hear a loud "clunk" and that isn't good. This one went clunk. I already had a replacement pad with self adhesive backing. But, any durable material that is exactly 2 mm thick can be used. I've heard that flexible magnet, Tupperware lid, and any other hard-ish material being used.

Next thing about old cameras is the batteries. This one was designed for a 5.7v mercury cell, well, since those are pretty much extinct, finding a modern replacement is important. I have a good supply available through my work of 6v alkaline cells that work well enough, though it does throw the meter off about 1/3 of a stop. 4 LR44 batteries can also be taped together to work. There are even adapters available for not much money.

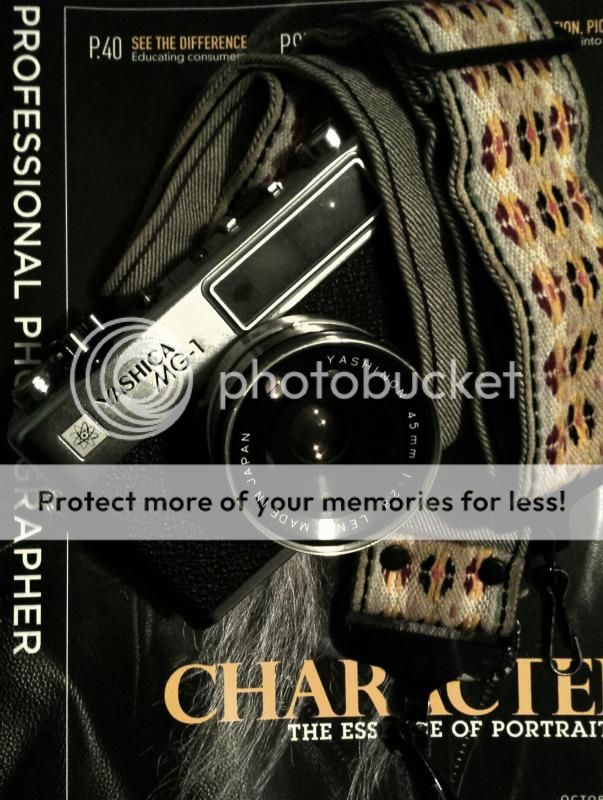
Here is the camera...

proxy.php


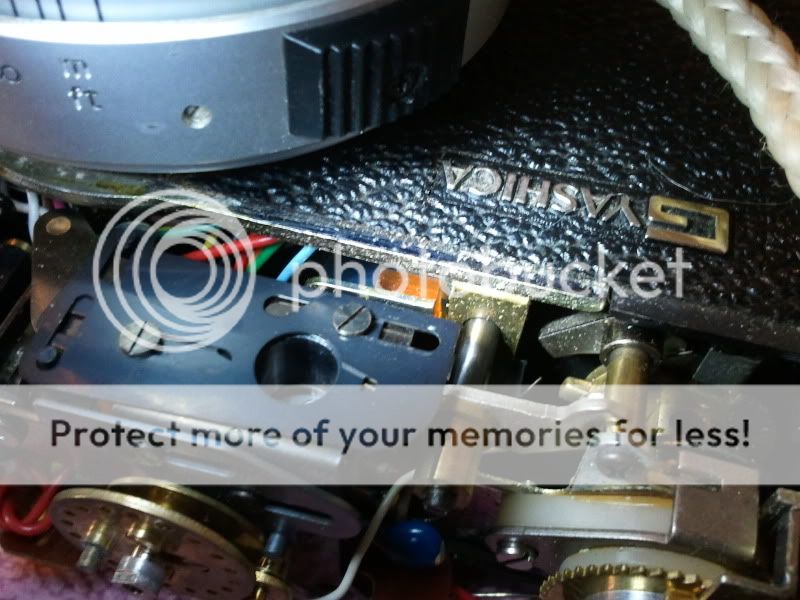
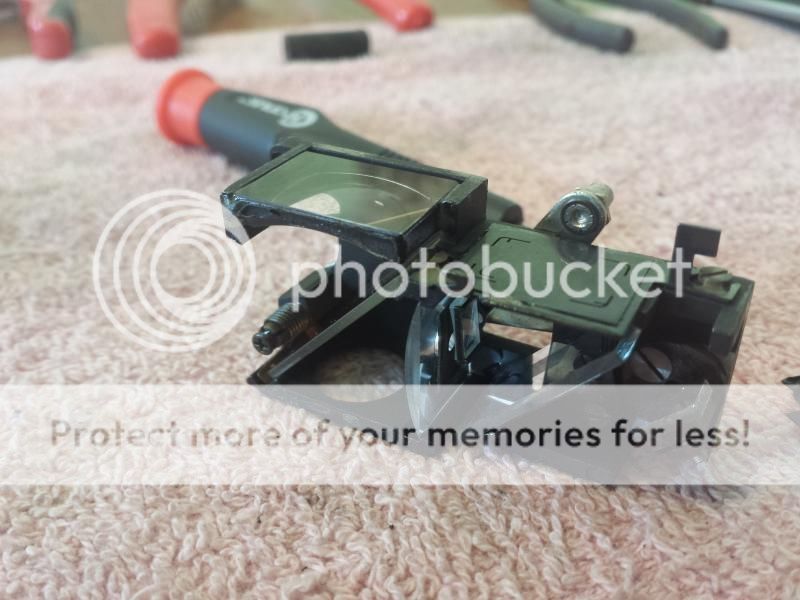
Here next to my Electro 35 GSN For comparison. ..

proxy.php


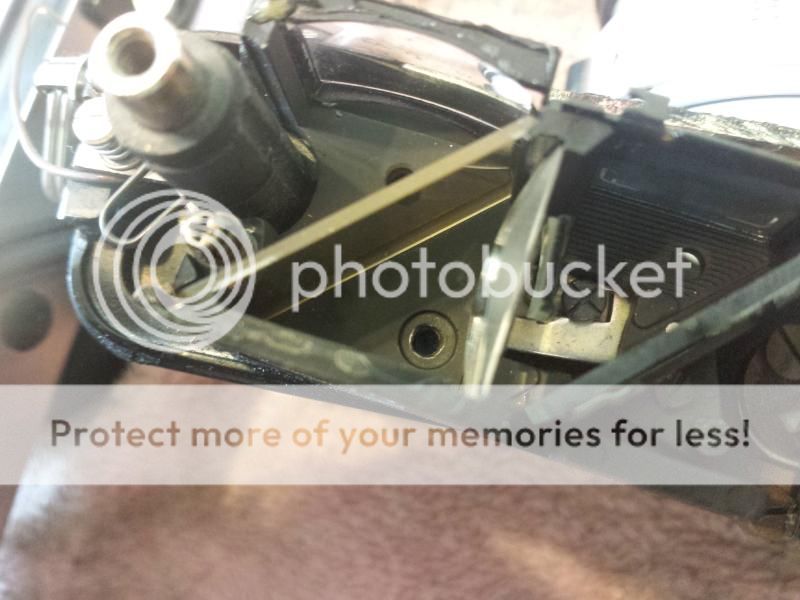
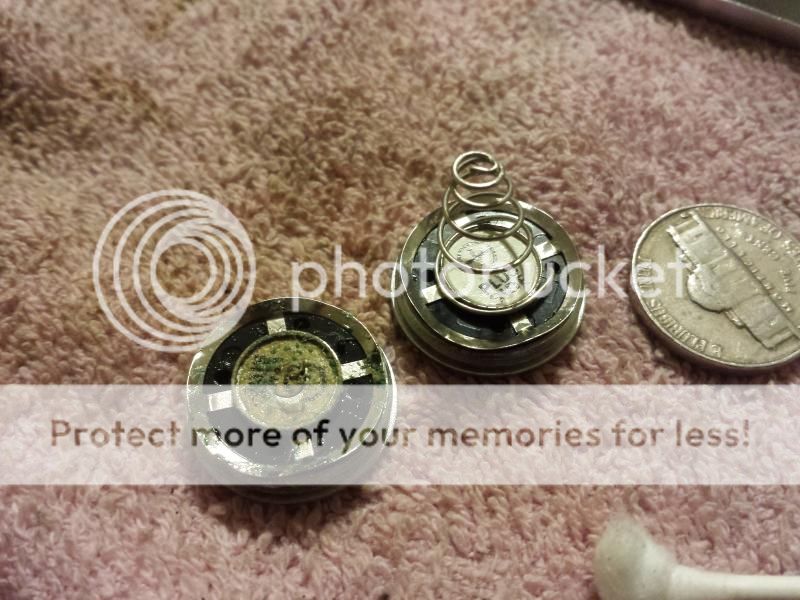
First and obvious thing to do was tackle the corrosion in the battery compartment. Seemed to be mostly contained to the screw cap. The clean one is from my GSN to compare if this one will even make suitable contact.

proxy.php


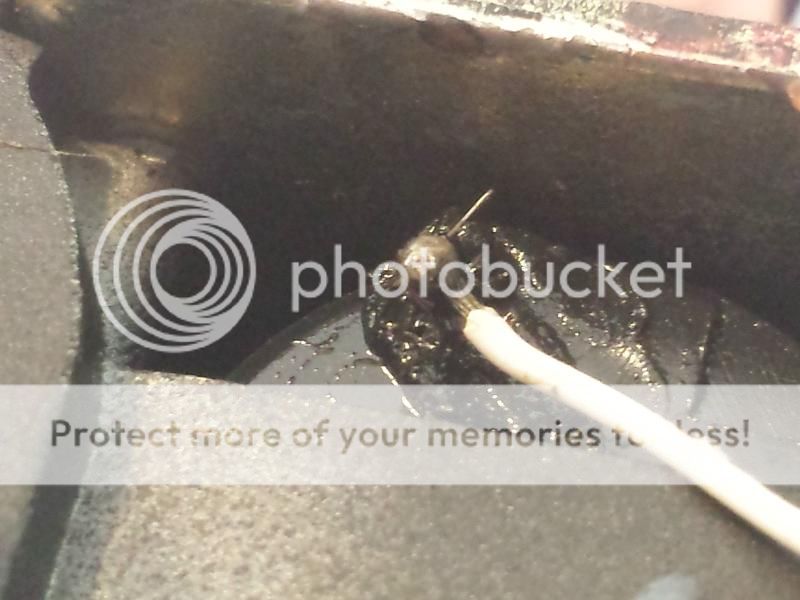
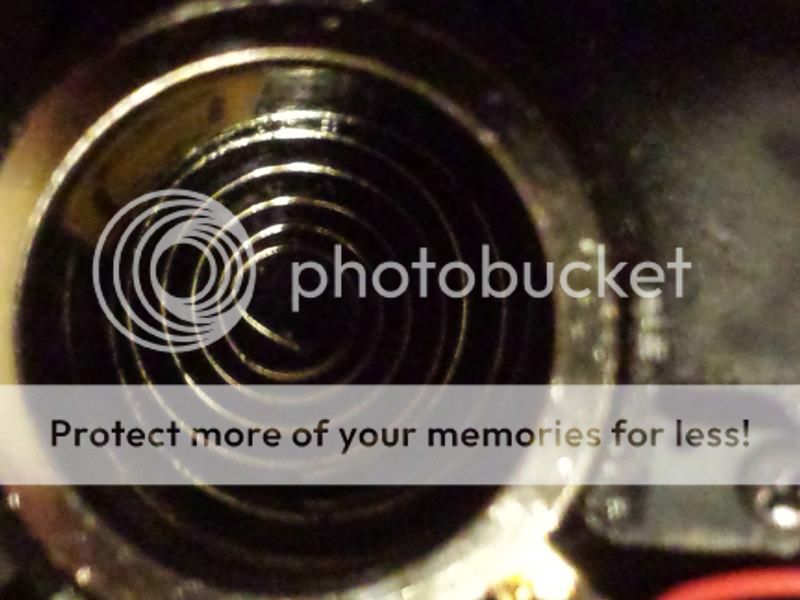
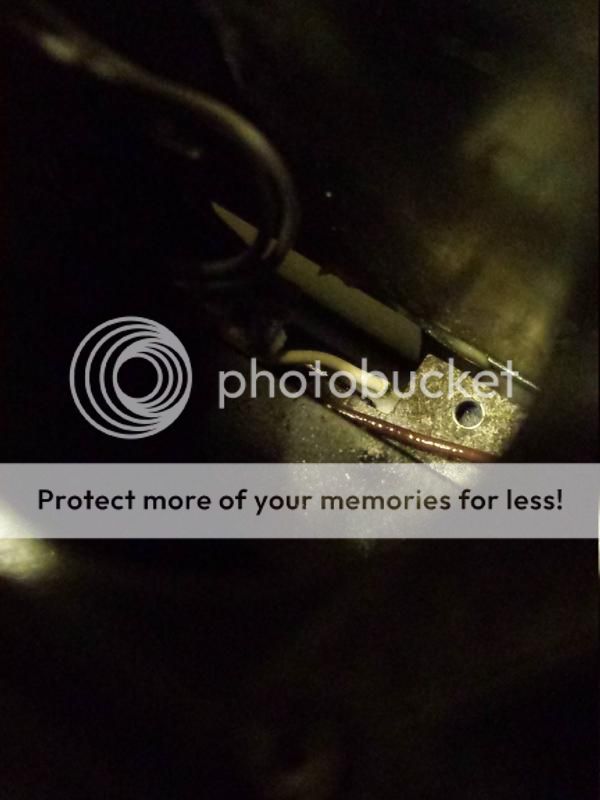
A look inside the battery tube shows that there is a small amount of corrosion near the base of the spring. This could be troublesome, could be nothing...

proxy.php


So I spray a bit of foaming electrical contact cleaner in there to help it out. Swab out the excess and leave it to do its thing.

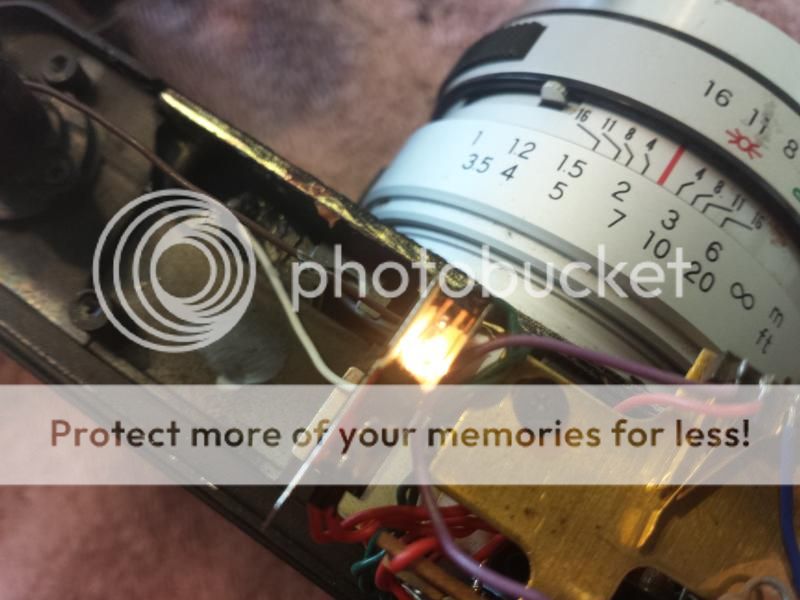
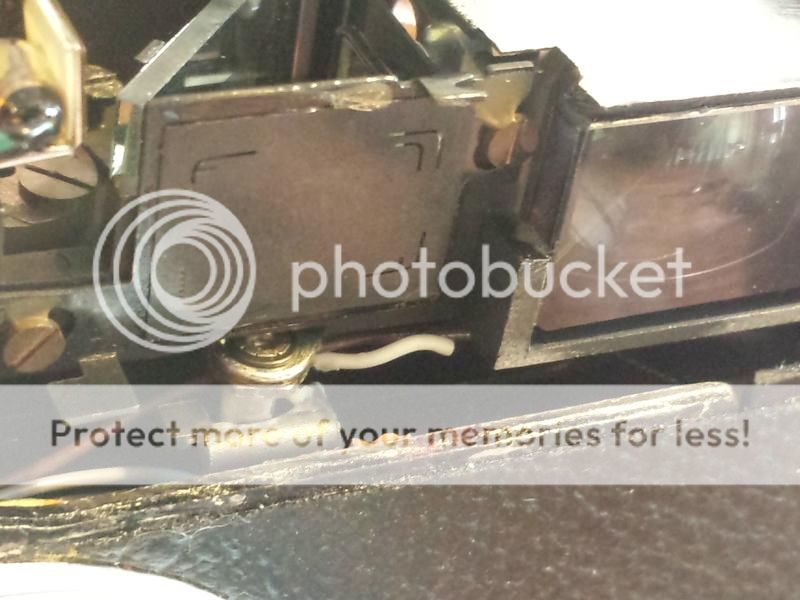
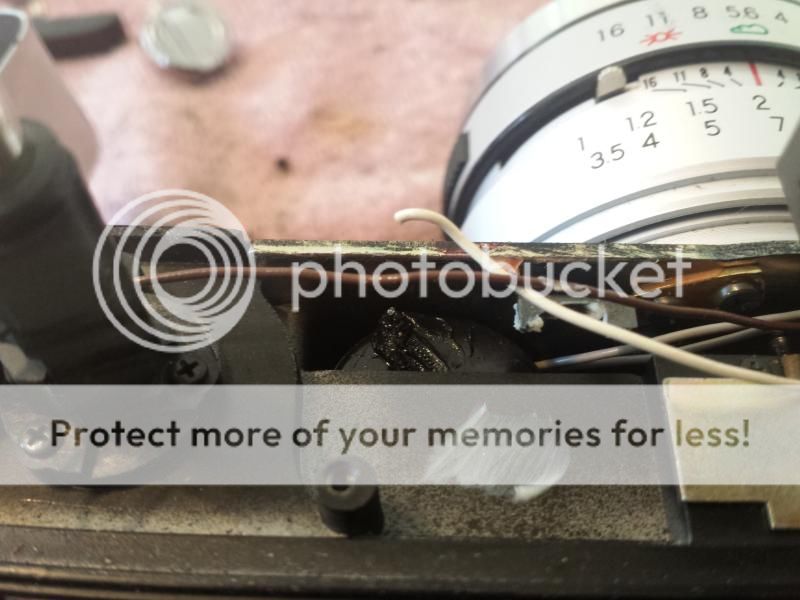
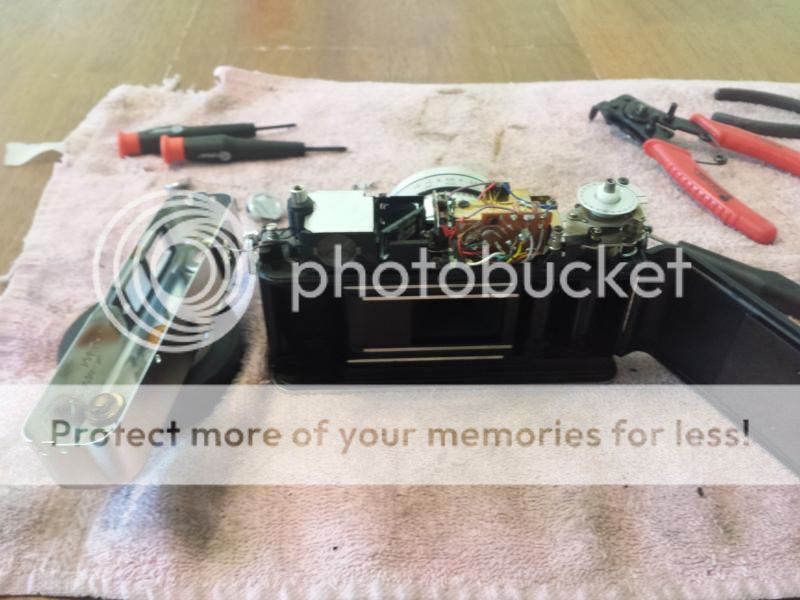
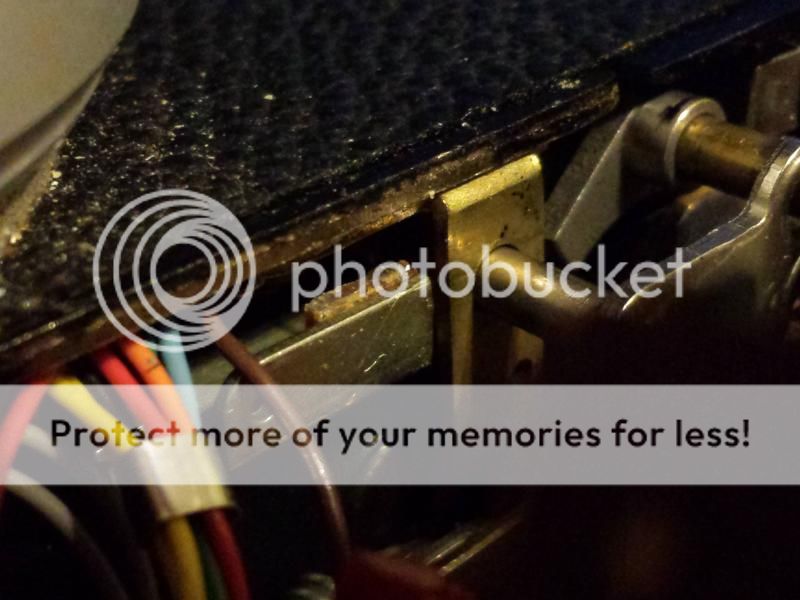
Next is to tackle the POD. This camera is laid out differently than the GSN I am familiar with and locating the POD is entirely new for me. There isn't much info out there about these specific cameras, everybody wants the GSN. So after some searching to no avail, I decide to just dive in and snoop around.

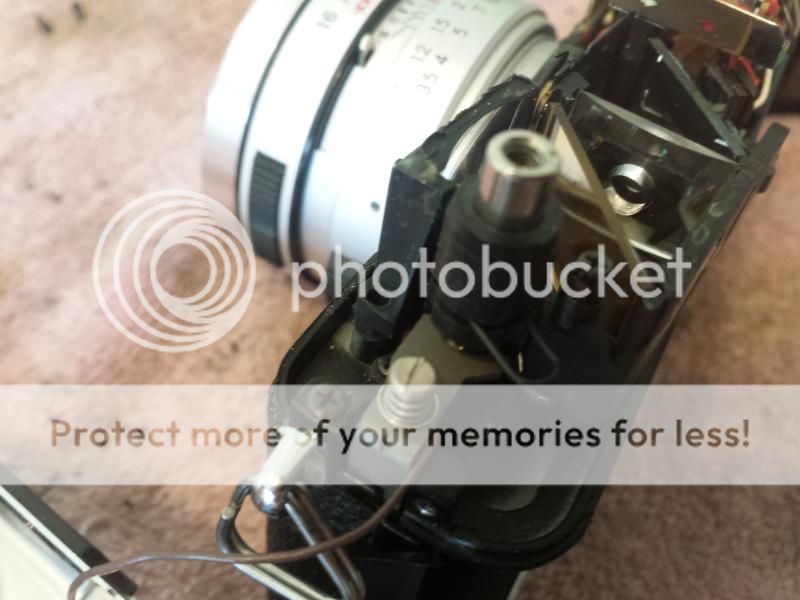
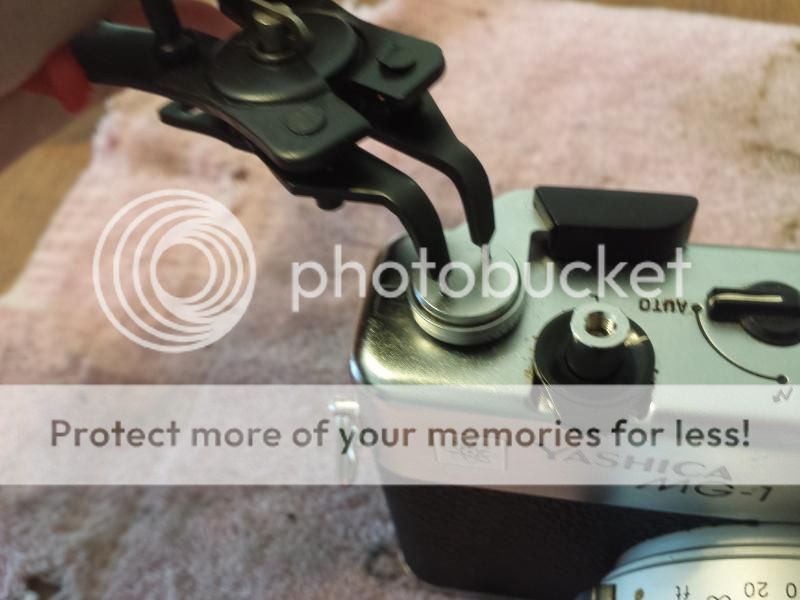
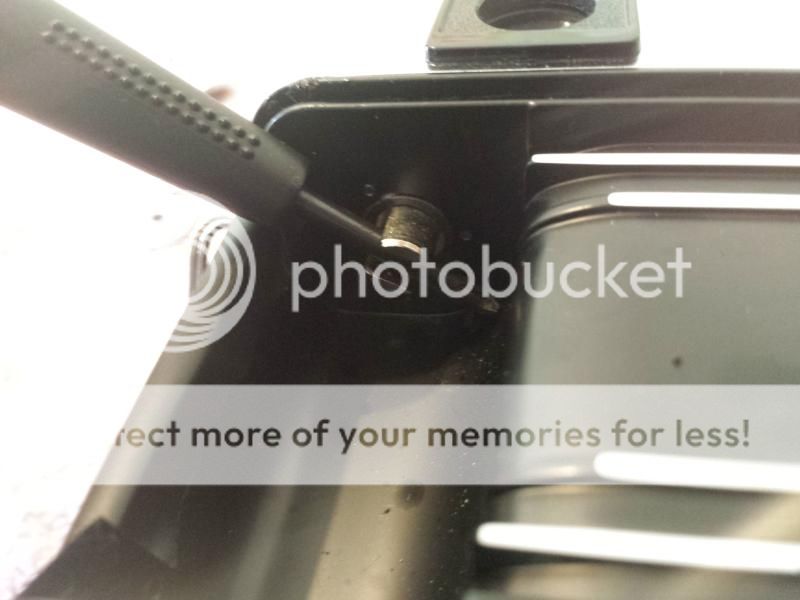
To pull the top plate, use a small spanner to remove the advance lever, under it are a wave washer and backing plate. Next is to open the back (tape over the edge of the door so it doesn't latch closed) and hold the film rewind spur to unscrew the rewind knob. Next is three small screw around the edge of the top plate. Lift carefully, there is a tiny wire that connects the hot shoe to the electronics. It a pain if it breaks.

proxy.php


proxy.php


More in next post
 
Last edited:
Once the top plate is off, this is a good time to blow out the 40 years of dust and grime, clean the viewing glass and give a general inspection. Forgot to take a picture of the assembled innards under the top plate, but with the lens facing you the rangefinder mechanics will be on the right, a 90° brass support plate and small circuit board in the middle then the film advance and shutter release on the left.

proxy.php


Two small screws hold down the brass plate, but be careful because the one nearest the RF mechanics also holds down the tiny exposure compensation lights which are on a sliding mount. Then there are two equally small screws holding the tiny circuit board to the brass plate. Unscrew those as well. The brass plate will lift free and the circuit board can be brought towards you and leaned to the right out of the way. Near the front of the body is a horizontal plate even with the front casing, just to the right of the shutter release. On the bottom of this plate is the dreaded POD!

I'm pointing at it with the screw driver here...

proxy.php


Close up of the deteriorated state the original POD is in...

proxy.php


I use a razor blade (single edge box cutter blade, no need for a feather or anything, lol) that I tempered back so it will take a bend. Just a little bend so I can get under there and keep it flat against the plate it's stuck to. Scrape, pick, pry, scratch it off as best you can. Once satisfied, take a paper clip and put a 90° bend 1/8" long in the end of it. Stick the new POD on the end and maneuver it into place. If I had 3 or 4 arms I would have taken pics while doing this step. Use the same paperclip to press the new POD down securely. Consider that step done.

Now simply reverse the tear down order to reassemble the innards, blow any stray dust or pieces of old POD out. One last clean of viewing elements. Screw the top plate back on.


I then turned to the shutter mechanism to make sure everything is lubed and adjusted well. You need a wide spanner to pull the retaining ring from the lens body, then the black cone falls out along with the meter shade. Next are three very very tiny screw that hold the filter ring to the shutter enclosure plate. These are very tiny. Before the filter ring can be removed two screws holding the cds cell need to be removed. Now the filter ring will lift off along with the plastic aperture/iso ring. Be careful, there is a tiny spring and ball detent under it!

I warned you they were tiny...

proxy.php


After those pieces are removed, two more screws hold down the shutter enclose plate, removed you get to see the workings of a Copal step less electronic shutter! Quite the engineering feat to get these things to work!

It is safe to arm and fire the shutter while exposed, it's pretty cool to watch it work. This one appears to be in good working order and we'll adjusted. Just a quick clean of any excess grease and relube.

proxy.php


Once again, repeat these steps backwards to reassemble.

More in next post.
 
Last edited:
So, if you've made it this far, there is light at the end of the tunnel...

With everything buttoned back up and adjusted, it's time to go back to that battery corrosion. It's been sitting for 30 minutes or so now.

Clean it up well with clean dry cloths, get a fresh battery that I tested in my GSN and drop it in. I used the good battery door to start so I could compare the ugly one for working condition or not.

Turns out that light at the end of the tunnel is a train headed my way, this thing is dead. No power. Pull battery, clean contacts again, double check polarity (yes it was in the right way) and put it back. Nope. No juice. Crap.

The positive power wire is easy enough, it's the red wore on the top of the battery tube. It looks good, connections are good. Remember that little bit of corrosion in the bottom of the battery tube? Well, it may be the culprit. I unscrew the two screws holding the battery tube in place, if everything is all and well, when the camera is turned over it should not fall out because the negative lead should be holding it in. I turn it over and give a little shake, the battery well fall out! Dammit! That corrosion did all its damage on the outside of the battery compartment and broke the wire off.

I know this for a fact because there it is, staring at me like Timmy from the bottom of the well calling for Lassy...

There, that little white wore poking out with nowhere to go.

proxy.php


Having had enough fun at the dining room table for one evening and not wanting to break out the soldering iron I decided it I'd going to have to wait for my next day off later this week.

The repair seems simple enough, solder the tiny wire back to the end of the spring and it's all good. But, it's the location of this wire that causes the headache, it's directly under the RF mechanism and fairly short. Not going to have many chances to screw it up. So, when I do sit down to fix this I will continue the rehabilitation of this old memory maker into my fleet.

Stay tuned...


Cheers!
 
:w00t:

First Captain and now this! I cannot even begin to describe my admiration for these handymen. The only thing I can use is the keyboard. :blush:
 
:w00t:

First Captain and now this! I cannot even begin to describe my admiration for these handymen. The only thing I can use is the keyboard.:blush:

+1 And I am not even very good with one of these! :lol: Great work, Xander, and thank you for the detailed posts. I hope you enjoy the camera.
 
Last edited by a moderator:
Thanks guys, hoping that I can get this thing up and running in a couple days! It will be a nice little addition to the fleet. I like these Yashica cameras, the lenses are vastly underrated and over looked but are quite contrasty and sharp. The Copal shutter is nice too. Next on my list of cameras is the tidy little Konica c35, nearly fits in a vest pocket! I have the c35 V, but it isn't a true rangefinder, it's a scale focus camera.

I will take more pics as I finish up the MG -1, a few that I missed as well. Hope I don't bugger it up too bad, been a while since I have soldered anything as small as this!

Then, of course, run a test roll through it!
 
Great job, and thanks for the detail and the detailed pictures. I'm sure I'll be opening one up one of these days; I've already amassed a pretty good supply of Electros. I have finally wised up and now carry a battery and adapter with me when out hunting for cameras in the wild (along with an array of other batteries), and I'm a little more likely to let one pass if it doesn't at least power up. One question which has me wondering - I had always thought that the 'clunk' when advancing the film on an Electro was a sign of a healthy POD, not a shot one. I have a GSN that is in fine working condition and it definitely has the clunk, and others (non-working) which do not. I have yet to get into a POD replacement but it's in my near future, so thanks again and keep us posted!
 
Well, it's kinda two fold with the POD. A heavy, loud clunk is a sign of a POD that had deteriorated but is still there. It's begun to harden and turn to goo. No clunk and it's completely gone. My GSN and now this MG -1 have a muted thud, much quieter than it was before. I got lucky with my GSN, it's a late model and had the updated POD material that is in perfect contion. I did not need to replace it. I did open it up to double check and was ready to do so, but it's gtg and fairly quiet. It did need a tiny bit of adjustment under the bottom plate to get the timing perfect, but was OK the way it was.

Here is the POD on my GSN, it's the bright orange rubber pad. It's easier to get to than the MG-1 because it's accessible with removing only the top plate. But removing the top plate is a little more involved than the MG-1 due to the iso dial. (Tip: turn the iso all the way to one stop or the other so there is no guessing if it's right when you put it back.)

proxy.php
 
Super, thanks! I had read different accounts of whether it is possible (or advisable) to attempt the POD surgery from the top or whether it's necessary to tear the poor fellow all apart.
 
It is a bit fiddly to get in there because it is even with the top of the body plate, but an assortment of bent picks and such make it doable. Installing one of Jon Goodman's replacement PODs is simple with a bent paper clip or needle just like I outlined in the MG-1.

Just be careful pulling the top plate, the wire to the hot shoe (and PC socket on GSN) is very thin and not long enough to allow the top to rest on the table while the camera is upright. Laying it on its back with the top facing you is the easiest. Don't forget to put a piece of vinyl tape over the catch for the film door, if it closes you don't have the rewind knob attached to reopen it!
 
Quick update after some hurried work this morning after doing dishes and laundry but before I had to leave for work...

proxy.php


You know what that little light means...WE HAVE POWER!!! But.... not all is well. Another issue has revealed itself...

I will post a detailed account of today's tinkering and add in a few photos to the previous posts to give some better visuals. Of course, there is an extra part left over after putting everything back together, but I know what it is and where it goes. Just a dust cover.

Stay tuned.
 
Last edited:
Today's tinkering.

Well, I needed to locate the loose end of the negative power wire in the top of the camera so I could solder it back to the spring in the battery compartment.

So, the top plate came back off. Before I took anything else off I just looked around a bit, sure enough, there was the broken power wire directly under the viewing glass group.

proxy.php


Well, with it located I now needed to get access to it to stick a 500° iron in there to solder it back on! Did not have enough room as it is.

So, on top of the view finder is a sheet metal dust shield, it's glued on and should just pop off without causing bending. This one did. On the left of the view finder near the take up spindle is one mounting screw, the other is inside behind the glass...Both holes are empty so you can see exactly which ones need to come out.

proxy.php


This is the one under the dust cover.

proxy.php


Once those are out, the spring tension on the focusing arm will kick it back. Lift it out and set it aside. Good time to give a detailed cleaning.

proxy.php


This now leaves us a wide open plain to work unobstructed on the power wire! Except for that hot shoe wire running across there, just tuck it behind a screw standoff to keep it out of the way.

Strip and clean the end of the power wire, examine the condition to see if the corrosion carried up the wire. This one looks serviceable. I use a small safe edge needle file to clean the end of the spring sticking up. I use lead free 4% silver solder, not sure if it's the right thing but it's what I have and works well. Fire up the iron, clean and tin the tip, and solder it on!

proxy.php


Not a perfect joint, the spring is large and suck up a lot of heat wanting to melt everything around it so I had to use the high setting on my iron to get the solder to melt reasonably quickly. But it is secure and making good contact!

proxy.php


Next is to throw a better in and check it out. . .

proxy.php


Both under and over exposure warning lights are working, which means that contact is good, cds cell is good, aperture contacts are good, and all the related electronics are good!

After cleaning the viewing elements, reinstall the RF assembly. Be sure the dog leg sticking out the front is behind the little J shaped hook, not on top of it. Install the left mounting screw first but not really tight, then loosely install the other. There is a lot of play in these and now you need to realign the RF with the focus ring. I take the whole thing and with the screws loose move it back and forth while viewing the split image at something 75 yards away or more. Tighten everything down once your focus patch matches the infinity location on the focus ring. Double check at close distances. You shouldn't have to use the adjustment screws.

This camera has another problem I will tackle later, the lens wobbles. Much like the Minolta Hi - Matic series. But, it also allows the RF patch to move, affecting your focusing. This will cause issues when taking pictures.

The next issue that popped up after all this, the shutter doesn't move. It twitches, but doesn't open. Earlier everything looked good, but I must need to recalibrate my eye balls, something is rotten in Denmark.

So that's phase two complete. We now have power.

Today is my Friday so I will be able to give several hours of attention to the shutter tomorrow.

Stay tuned for the next episode!

Say cheese!
 

oc_in_fw

Fridays are Fishtastic!
Xander, in the next to last photo with the white wire- looks like a cold solder joint. .You're gonna need either some flux or more heat to get good flow through the wire. .With old wiring liquid flux helps a lot.
 
Yeah, that's a glob on the end of the spring sticking up. I used lead free liquid flux, tinned the wire and got a good connection around the shaft of the spring. I will keep an eye on it though. Thanx. ETA: although a bit of extra resistance here might actually help since I'm using a higher voltage battery than specified! (One can hope can't he?!)


Been doing a bit of thinking about my shutter problem, I think I have it figured out! These use a rack and pinion gear to take the movement of the winding lever and turn it 90° to **** the shutter. If the winding lever is let to slap back it can cause the rack to jump a gear, so not winding on far enough to fully **** the shutter. This happened a few times on accident trying to **** the shutter without the top plate on, so my own fault!

The rack and pinion is accessible through the top of the camera and no need to dig into the shutter again. It tracks against a backing plate under the small circuit board in the middle between the view finder and frame counter/trigger/winding lever.

I doubt the wife is going to let me dig into it tonight, and I'm at work still, but first thing tomorrow morning I will do this first thing! After the dishes, vacuuming, laundry, and whatever else is on my list of chores, lol!
 
Last edited:
Thanks again for the vicarious pleasure of watching this ongoing repair and restoration. I have no doubt that I will be referring to these pictures at some point!
 
BTG, it's all about sharing information. I like working on cameras (and many other things too) and I don't mind writing up these pictographic essays. If this gets someone to fix a camera and shoot it, just one time, I will consider this a resounding success!Finishing up breakfast, and will prepare my work bench (dining room table, lol, too many other things on my bench) and get the shutter fixed and hopefully the lens wobble.
 

oc_in_fw

Fridays are Fishtastic!
At work we have flight simulators from 35 years old to 6 months. Old wiring is a booger to get good flow from. I never thought how the slight increase in resistance might help you.
 
Top Bottom