
This thread is for all the members with a B&B hobbyist badge to display their excellent brush creations and restorations. Pics are a must. We love eye candy!
You are using an out of date browser. It may not display this or other websites correctly.
You should upgrade or use an alternative browser.
You should upgrade or use an alternative browser.
Brush hobbyists display cabinet
- Thread starter Legion
- Start date
- Status
- Not open for further replies.
Thank you David and the admins for an area for us Hobbyists to post pictures of work in progress, new stuff/ideas, etc. - much appreciated!
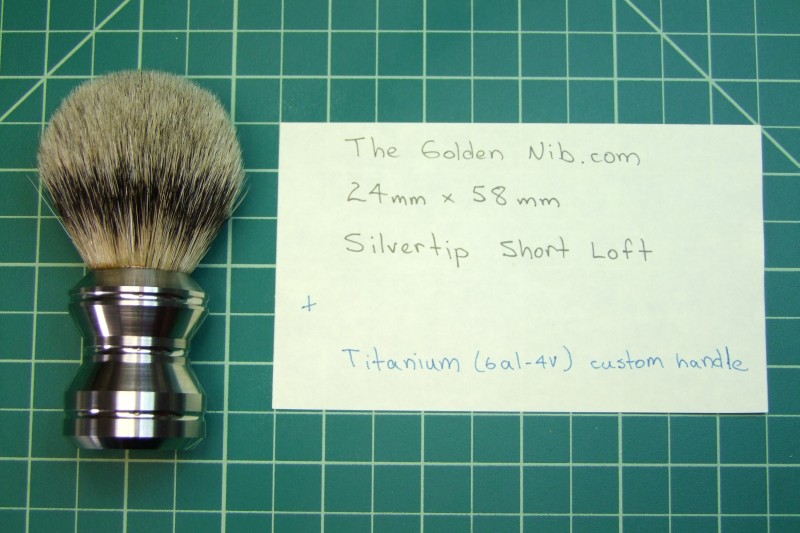
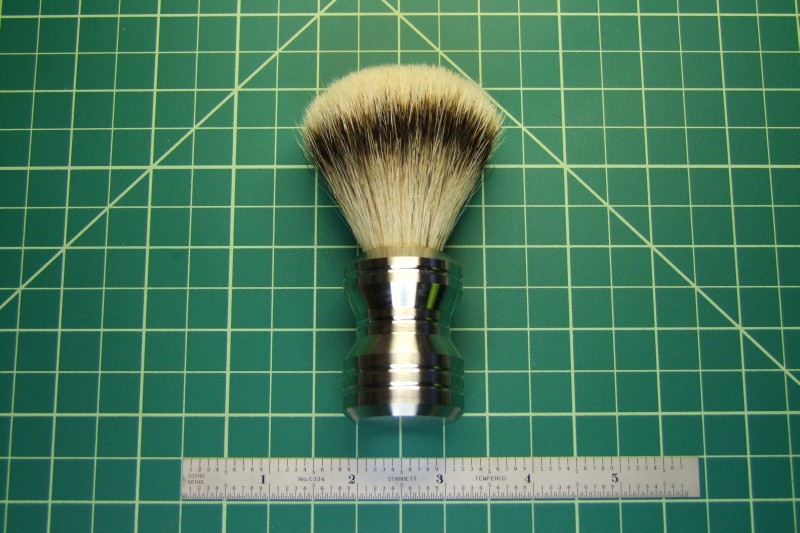
I made this Ti shaving brush for myself, but given the interest and numerous PM's asking for one, I decided to make a few more. I am also working on making Titanium DE handles, so that is why I became a Hobbyist:
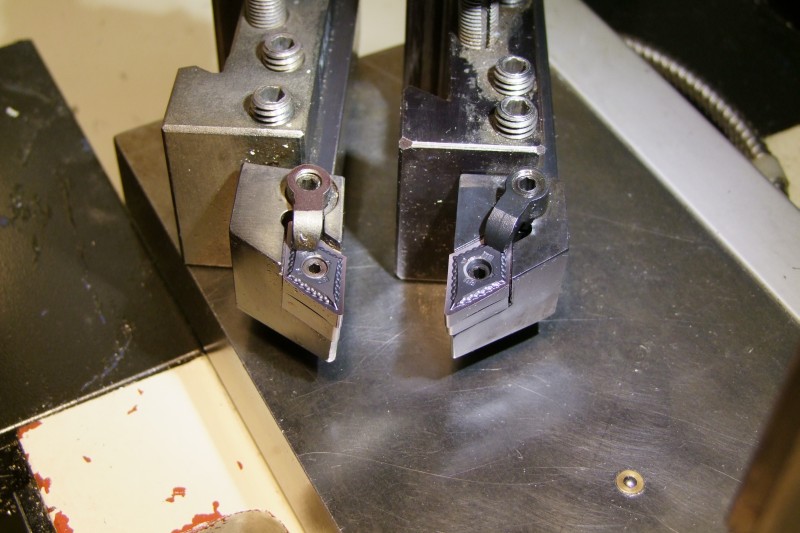
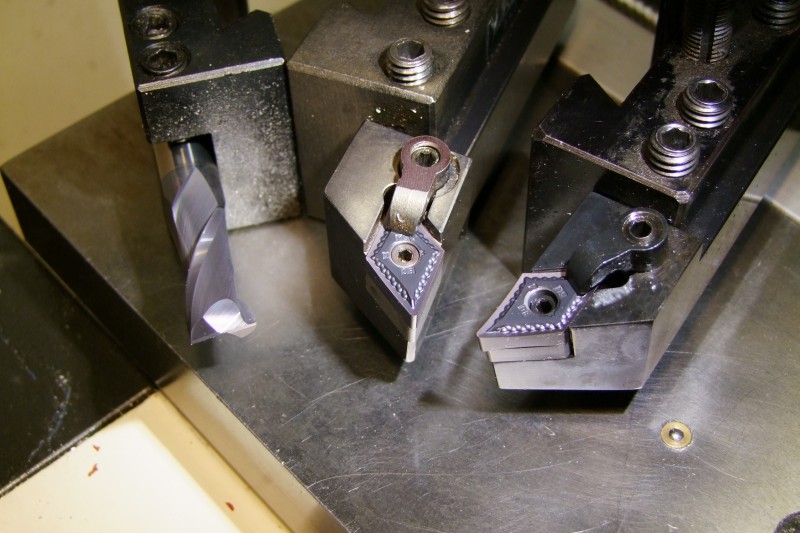
In these work-in-progress posts I will also post information about the tools/inserts I am using, since that was another area of interest, specially those considering a lathe, or those with a lathe but considering working on Titanium. To facilitate work in Titanium, I recently got these two new tool holders (3/4" being held by BXA holders): the one on the left side of the picture is a "left cutting holder" (which means that you cut from right to left, towards the chuck) and the one in the right side of the picture is a "right cutting holder" (you cut moving from left to right, away from the chuck):
I called Kennametal technical support, and they recommended these inserts for working in Titanium:
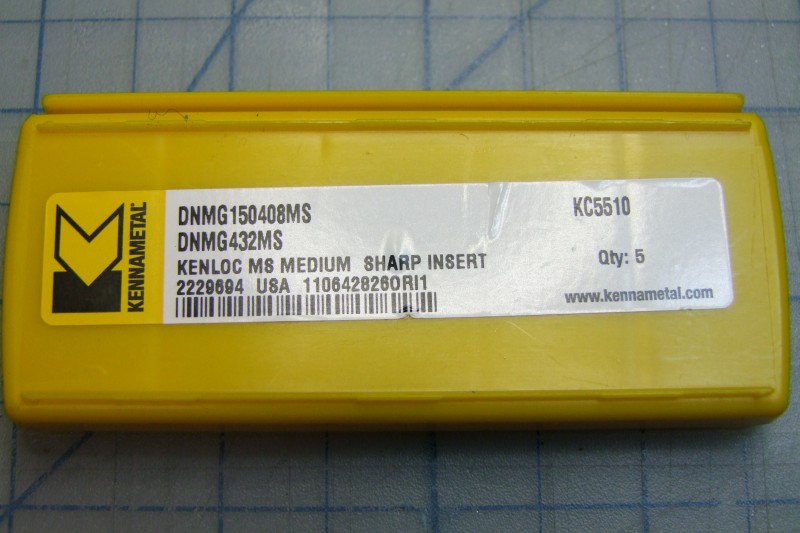
Whenever possible, TiAln coatings are preferred as well, but all tooling will wear out quicker when working with Titanium, so plan on purchasing additional inserts/tooling as you do more Ti-related work:
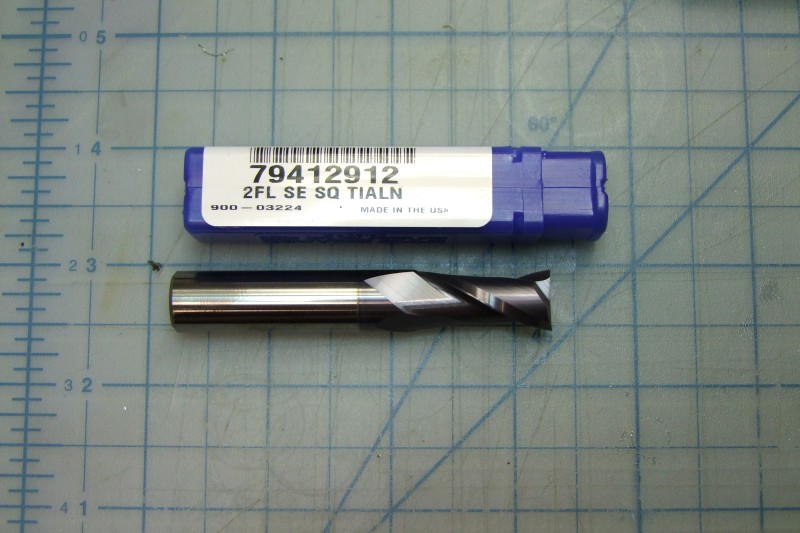
Here are the 3x tools in their respective holders:
I got two more SilverTip knots coming so I will try to post more work-in-progress pictures this weekend.
As the admins noted, this is "not" a sales thread, but please go ahead and ask questions about the techniques, tools, brushes, feedback (good and bad), etc..
I made this Ti shaving brush for myself, but given the interest and numerous PM's asking for one, I decided to make a few more. I am also working on making Titanium DE handles, so that is why I became a Hobbyist:
In these work-in-progress posts I will also post information about the tools/inserts I am using, since that was another area of interest, specially those considering a lathe, or those with a lathe but considering working on Titanium. To facilitate work in Titanium, I recently got these two new tool holders (3/4" being held by BXA holders): the one on the left side of the picture is a "left cutting holder" (which means that you cut from right to left, towards the chuck) and the one in the right side of the picture is a "right cutting holder" (you cut moving from left to right, away from the chuck):
I called Kennametal technical support, and they recommended these inserts for working in Titanium:
Whenever possible, TiAln coatings are preferred as well, but all tooling will wear out quicker when working with Titanium, so plan on purchasing additional inserts/tooling as you do more Ti-related work:
Here are the 3x tools in their respective holders:
I got two more SilverTip knots coming so I will try to post more work-in-progress pictures this weekend.
As the admins noted, this is "not" a sales thread, but please go ahead and ask questions about the techniques, tools, brushes, feedback (good and bad), etc..
Last edited:
I got a PM asking to expand more on the equipment to do metal machining, specifically something that could at least do DE handles, and since others might have similar questions on the equipment, I figured it would be better to share links/advice with the larger group instead.
In general, working with metal requires a very solid and stiff setup - the larger/heavier the lathe/mill, the better. Like with most things, nobody can learn by just reading, and with machining metal, this is even more so, as the knowledge comes from hands-on work on your own lathe/mill. But fortunately today we have so much stuff over the internet, including guides and videos (on youtube), and these resources are "very" helpful to get anyone started.
It is important to get the lathe that is sized for the envelope of work intended. So if one is working as a gunsmith, working on rifle barrels, you would typically get at least a 12x36 lathe, BUT, if one is making something smaller, like DE handles, then something in the 7x or 8x range would do OK. True, making smaller parts in a larger lathe is even better, but most (like myself) get started with one of the many Chinese 7x lathes, which are re-branded by vendors all over - it is essentially the same machine, but from vendor to vendor there are a few differences.
These sites were the ones I used to get started back in 2004/2005, and they are still good today:
http://www.mini-lathe.com/
http://littlemachineshop.com/Info/MiniLatheUsersGuide.pdf
To give you an idea of price ranges for metal working equipment, I thing Grizzly is great as they have small machines, large machines, and everything in between:
http://www.grizzly.com/featured/metalworking-machines
And of course, just as B&B is for shaving-related folks, there are some very good forums out there for machining in general:
http://www.practicalmachinist.com/vb/
and some other hobby forums have sub-forums in which they do a lot of DIY, where metalwork also takes place:
http://forums.mtbr.com/lights-diy-do-yourself/
(you might need to first subscribe to see this sub-forum, but it has "very" knowledgeable and friendly machinist in it):
http://www.candlepowerforums.com/vb...ted-Materials-Mechanical-Machining-Discussion
I hope this helps.
Last edited:
Oh no! Another hobby to pursue! Must.... resist....
I totally understand, but this other hobby (machining) makes it possible to make many other things - it is an "enabler" hobby (if such a thing exists!)Oh no! Another hobby to pursue! Must.... resist....

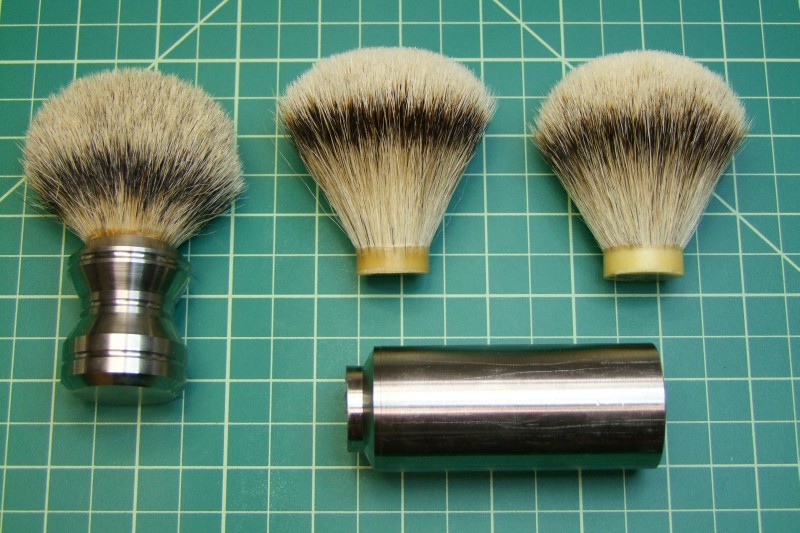
I ran out of time this weekend to start the new Ti brushes, but I did receive the two new knots I wanted to use from the golden nib
(left to right: 24mm Silvertip short loft, 22mm Silvertip - FAN, 24mm Silvertip)
(left to right: 24mm Silvertip short loft, 22mm Silvertip - FAN, 24mm Silvertip)

Do you use marine epoxy to seat the knots?
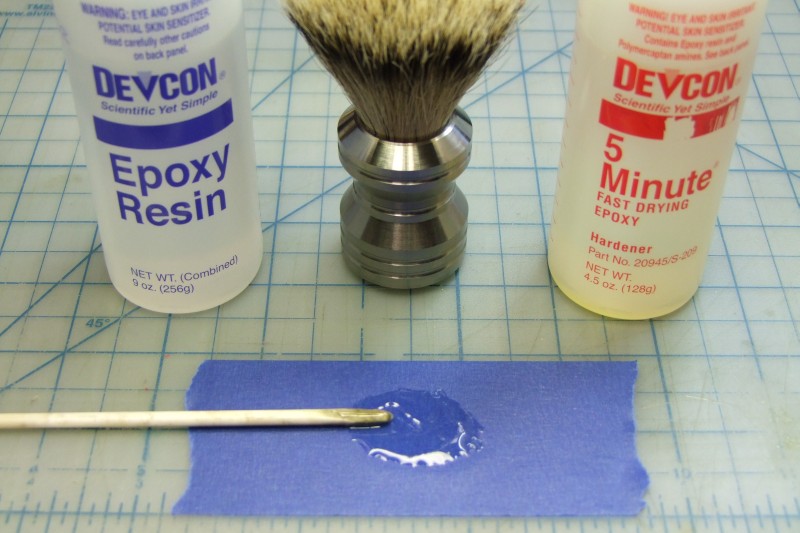
I used two-part clear epoxy, which I also used in my very first knot upgrade 5 months ago (which is my daily use brush) and after 5-months of use it is still working great and holding on strong.Do you use marine epoxy to seat the knots?
I did however worked on at least 3 dive LED flashlights in the last 2-3 years, and for those I use the marine epoxy.

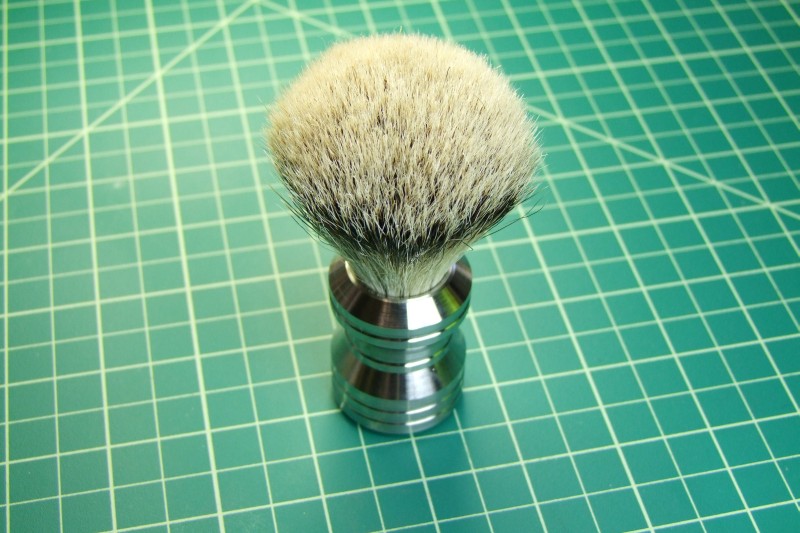
 2nd pic is first bloom. Loft is set at 52 mm.
My 1st restore: Ever Ready 100 opened up to accept a TGN 22 mm ff xh. Results--a great brush and a satisfying project. There will be more!
Last edited:
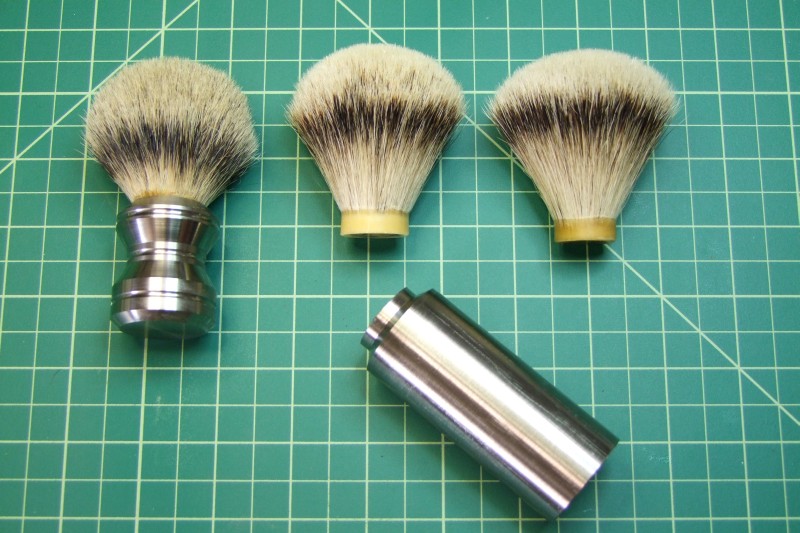
I finally had some time to complete the second Titanium shaving brush. This was my starting point - the left-over Ti round bar, and the two premium knots:
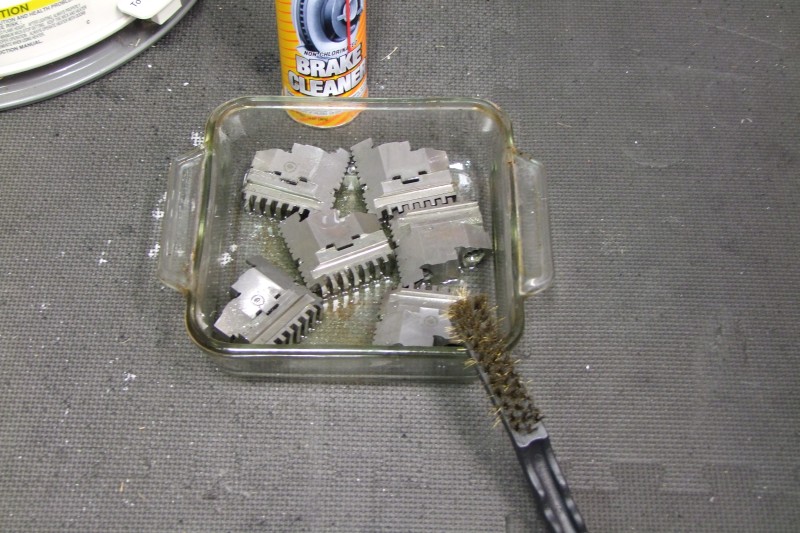
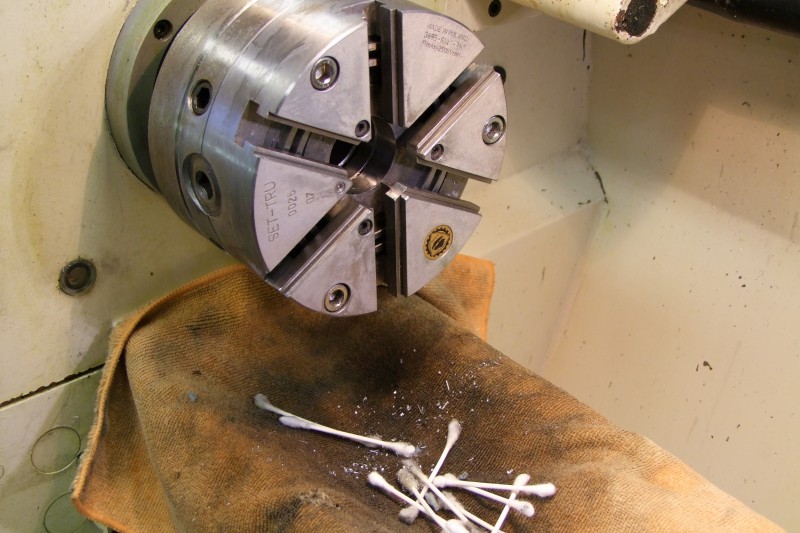
Since this left-over piece was shorter, I can't machine the whole handle at once - I have to remove the piece, and work on the opposite side. Even though my chuck is a set-tru with low TIR, I always clean-up, reset, and adjust the chuck when I know I will be working on both sides of a piece:
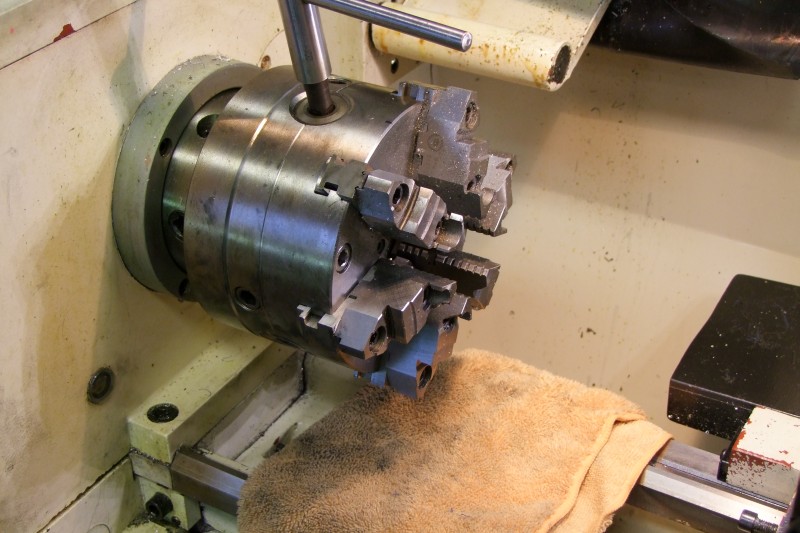

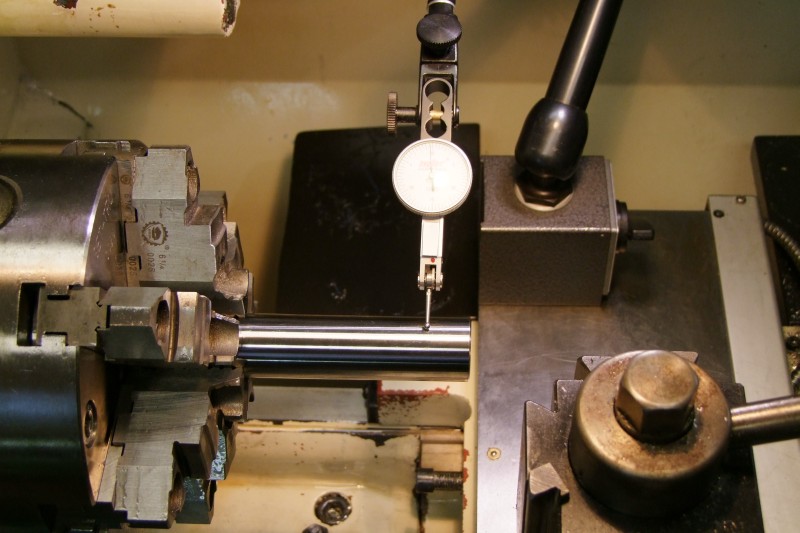
And once cleaned, I adjusted the TIR - this time I got it to about 0.0002":
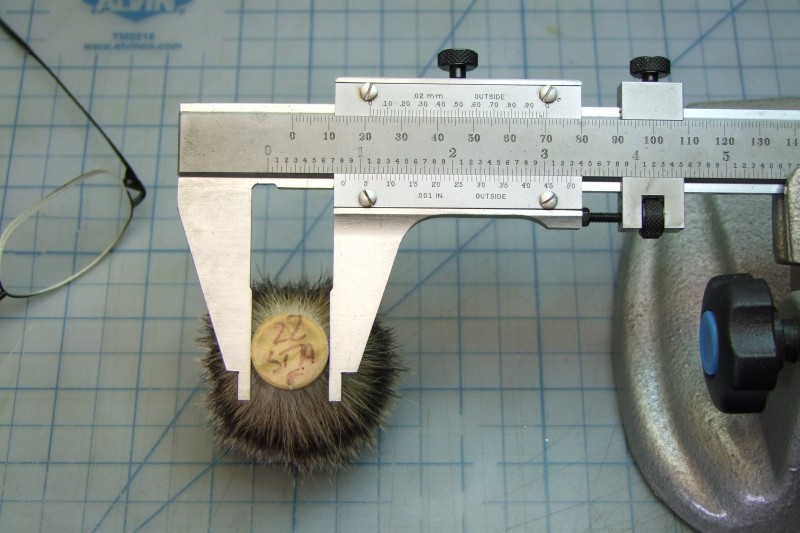
I decided to use the "fan" shaped knot, and started by measuring the true size (not quite the size marked), but it tapers out from the base towards the hair:
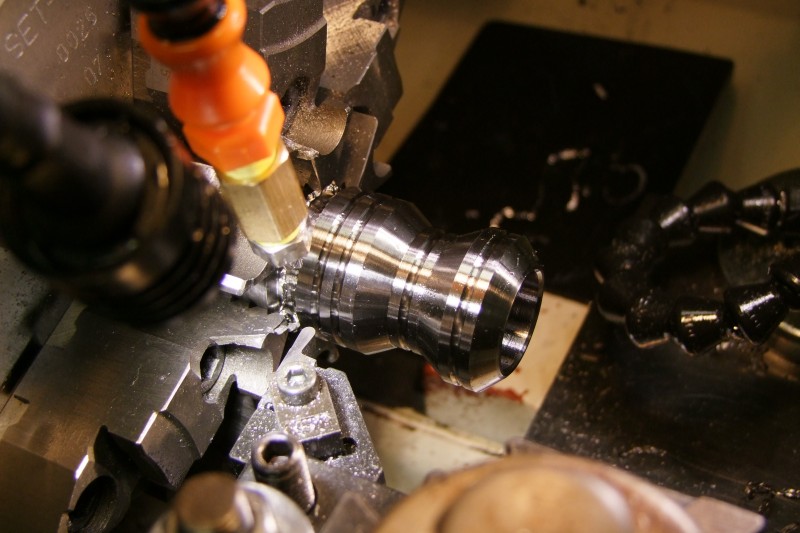
I then started work on the Ti piece:
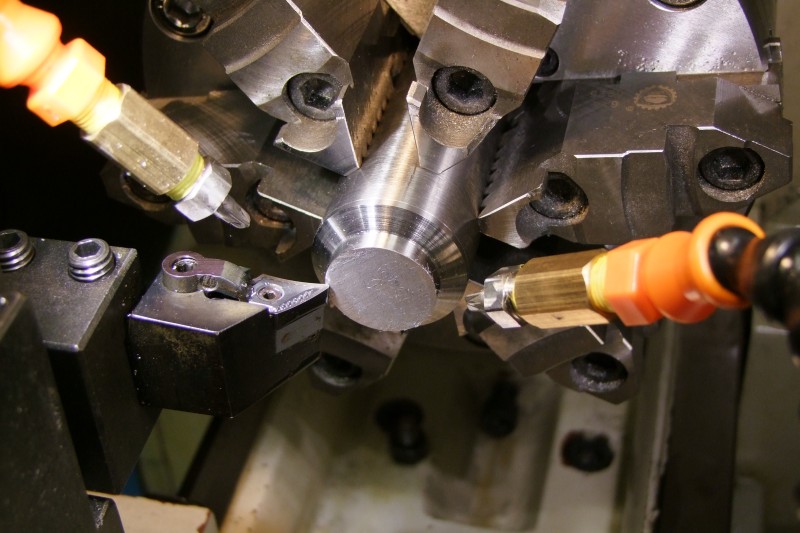
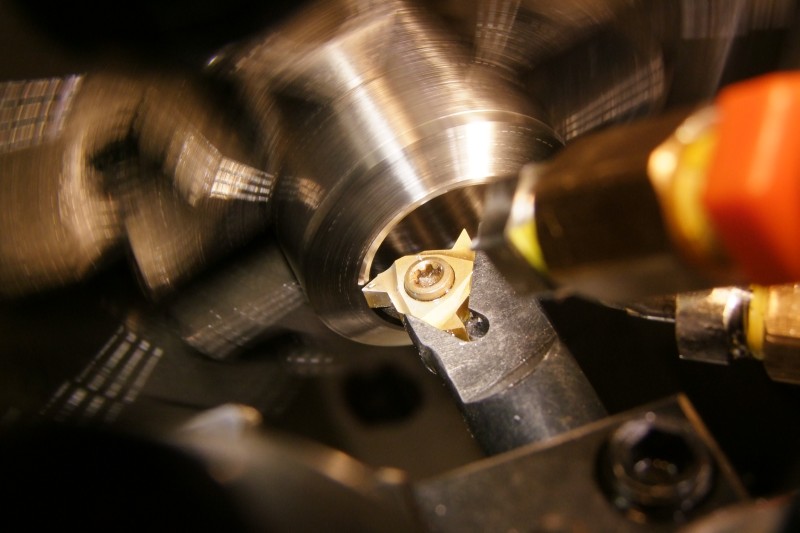
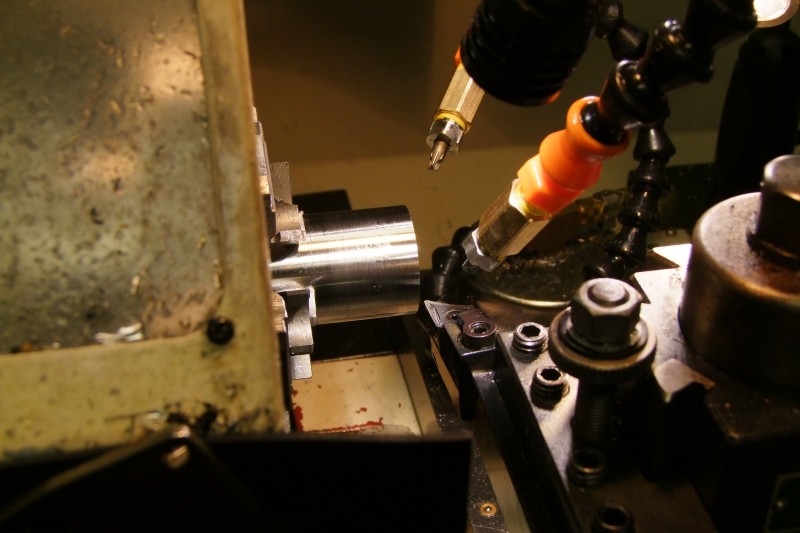
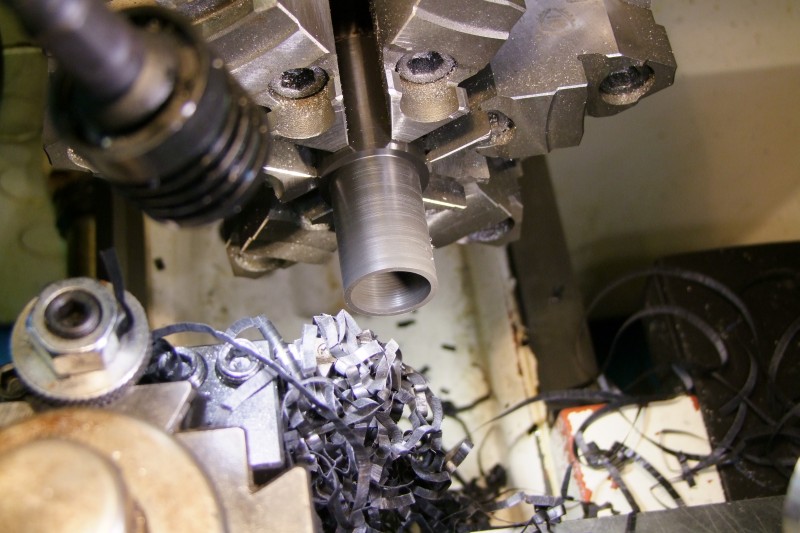
Here I am starting work on the hole for the knot:
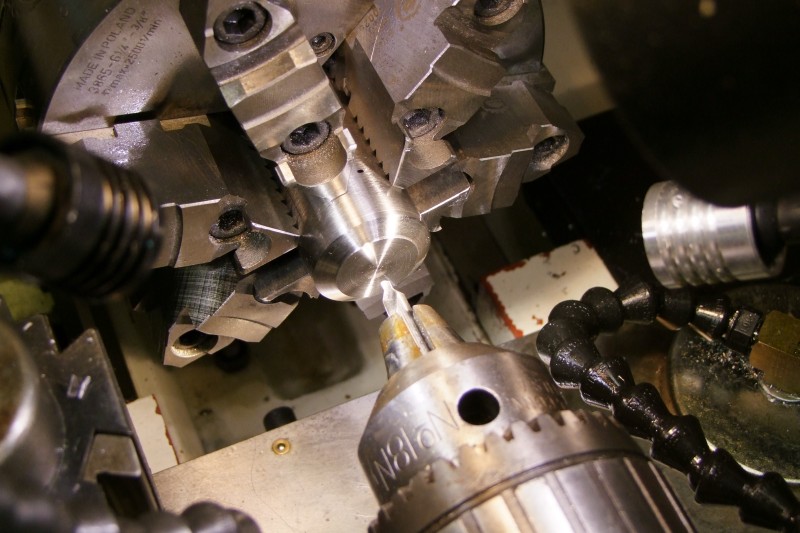
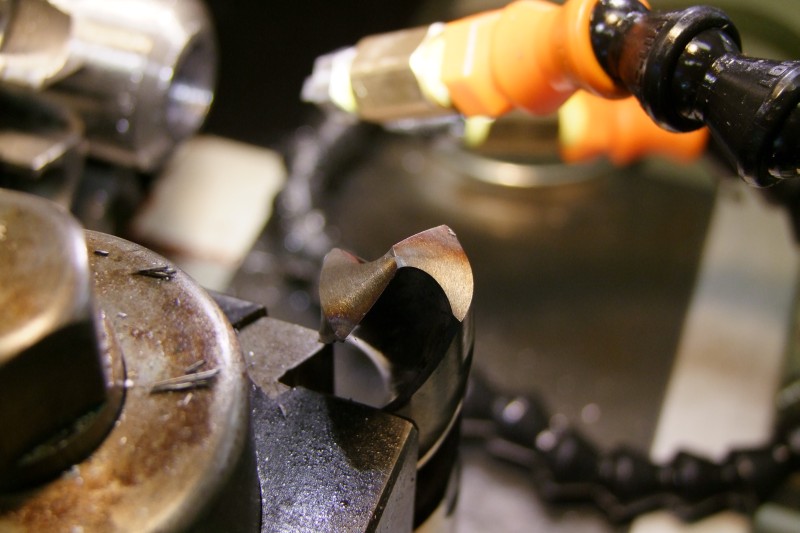
My Ti-specific, insert-based spade drill had not arrive yet, so I used a Cobalt drill:
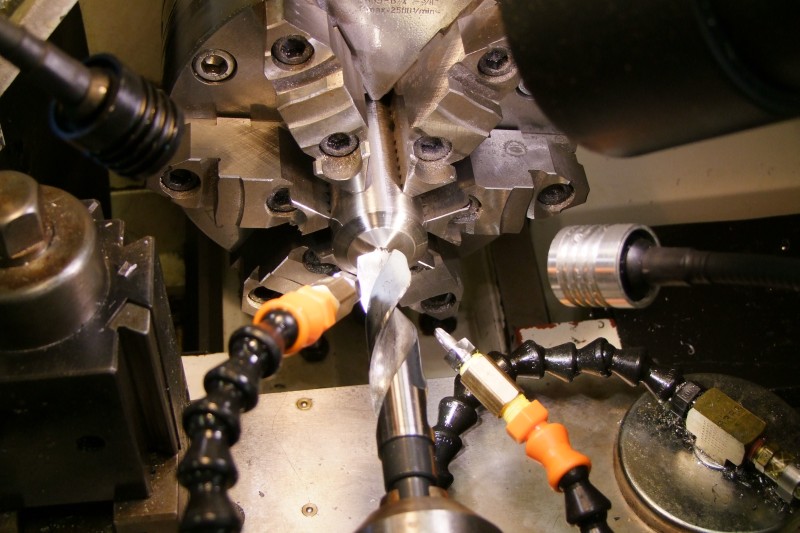
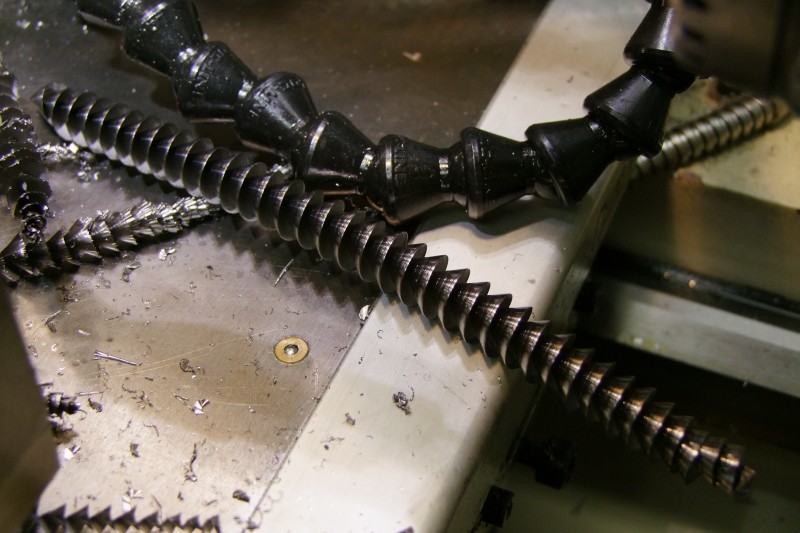
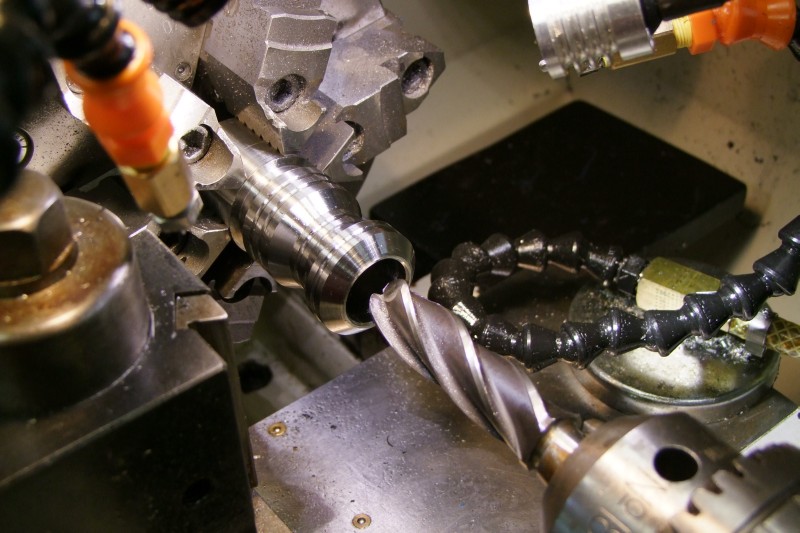
Look at the perfect chips coming out of each side of the drill:
Even with lubrication, I cooked the drill bit! (ideally I should use flood coolant for this operation):
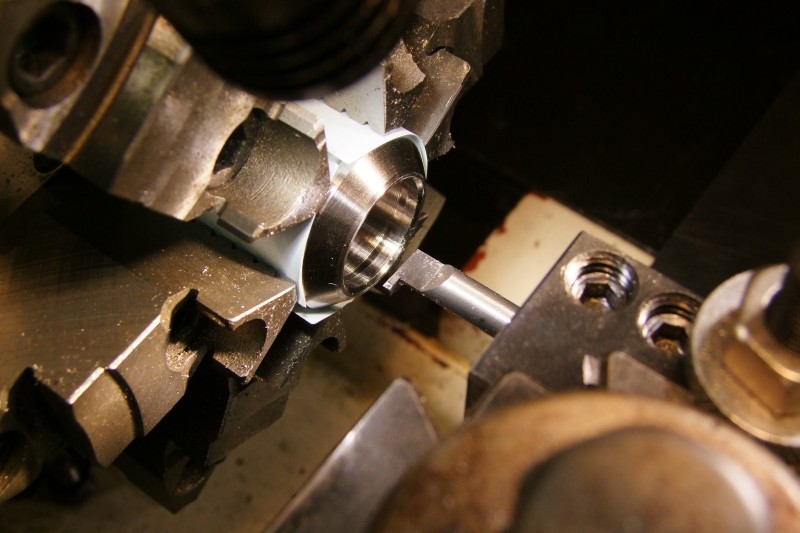
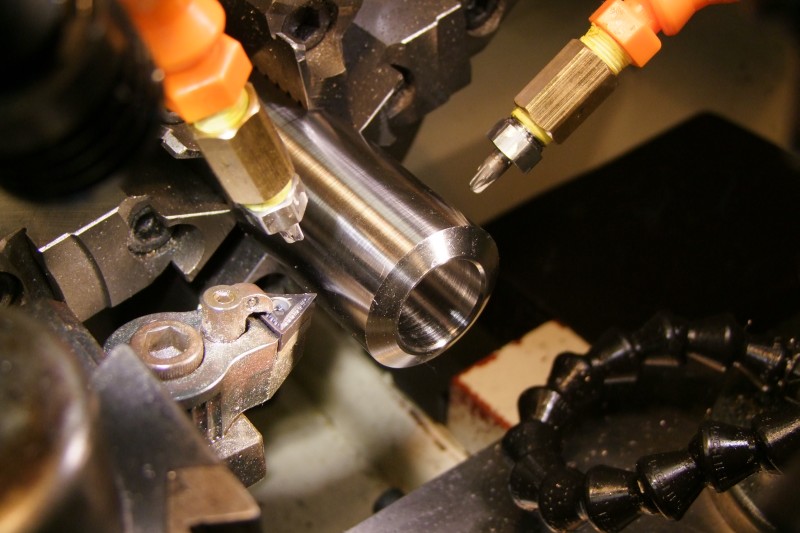
Then slowly bore to size:
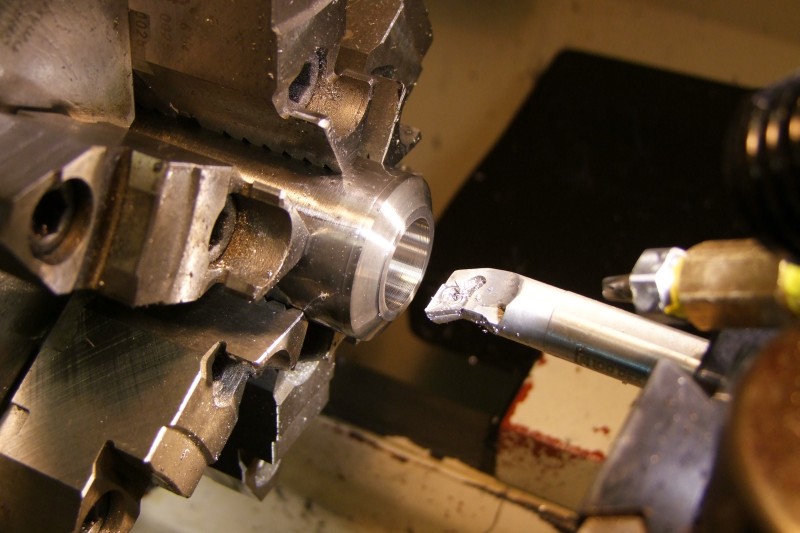
Test and adjust, test and adjust ...
add a taper for the knot (remove sharp corner):
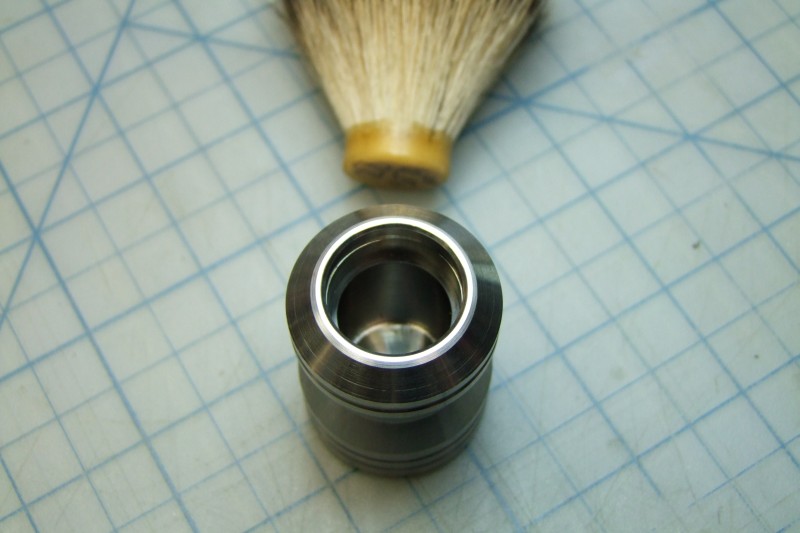
Then add an internal groove for the epoxy:
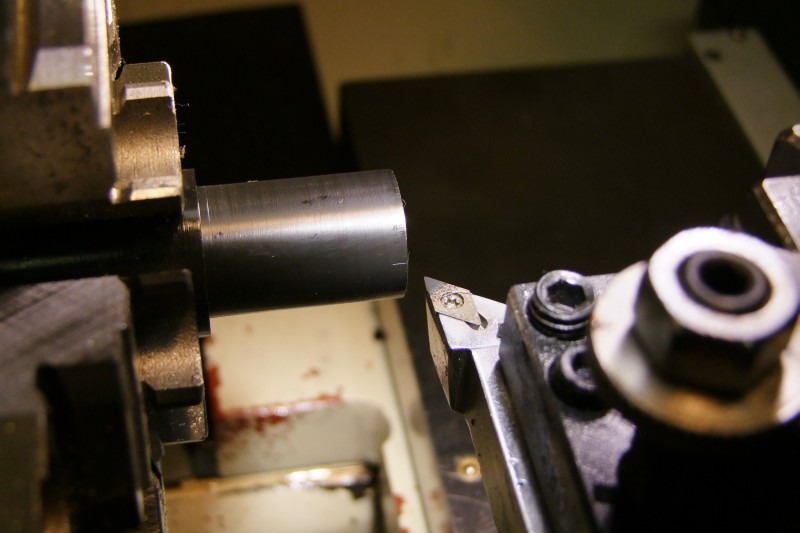
Clean up the OD:
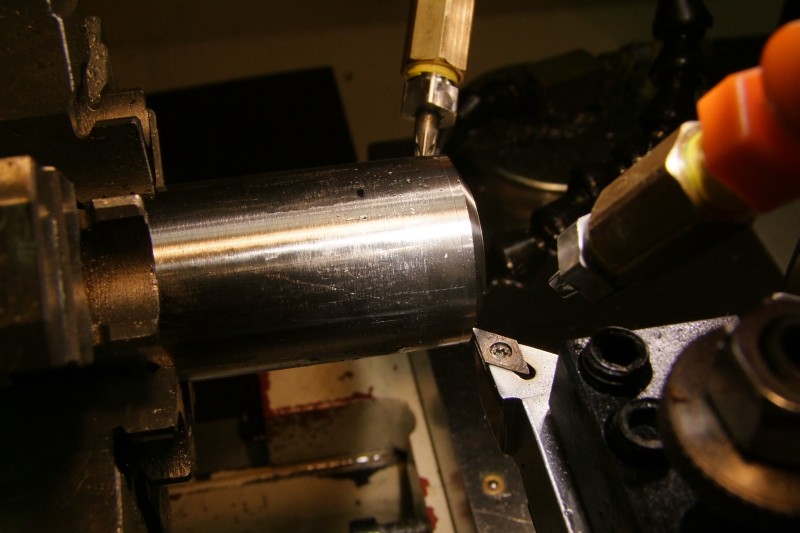
Then switch part around and do the other side - I selected the line where things meet as one of the areas I am going to grove, to leave no visible marks:
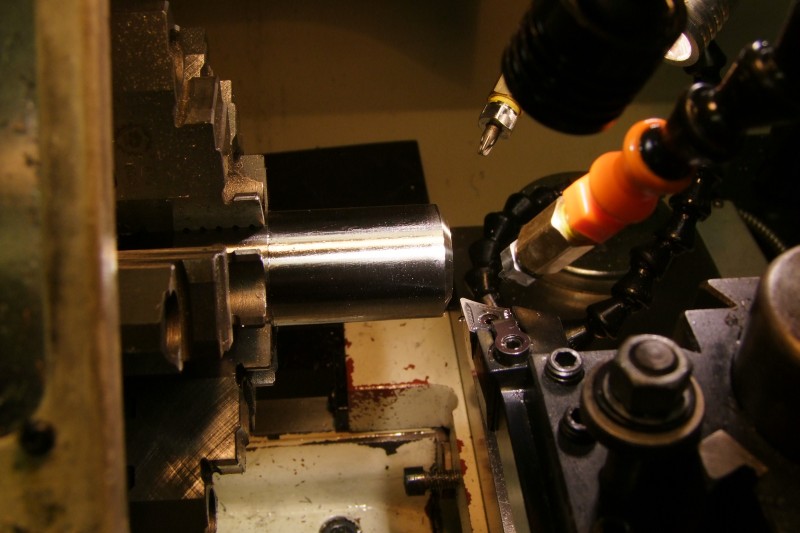
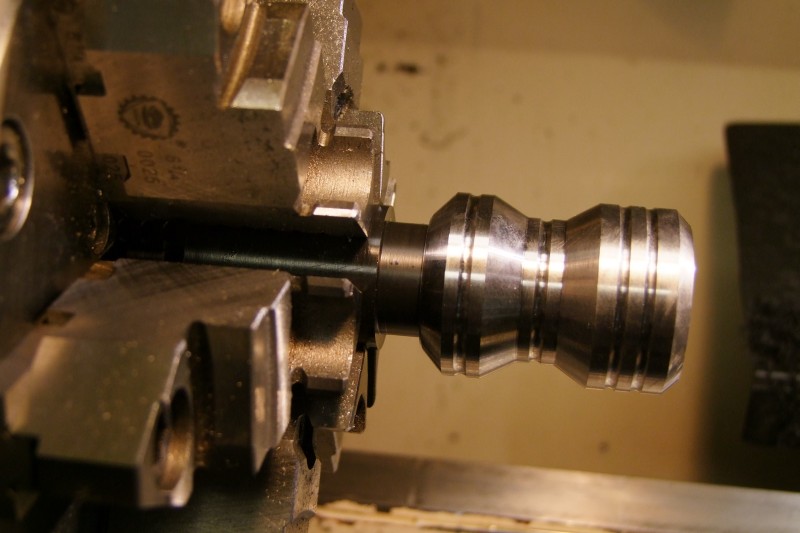
Like with the first brush, then comes the slow grooving of the actual shape:
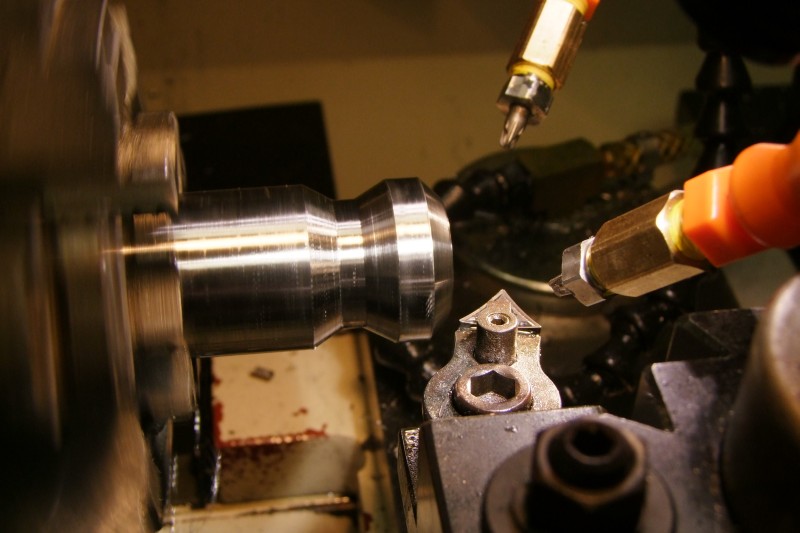
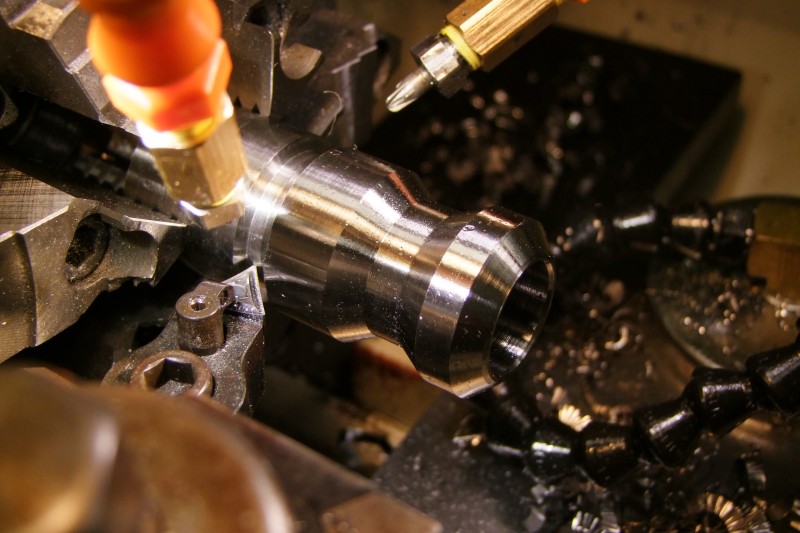
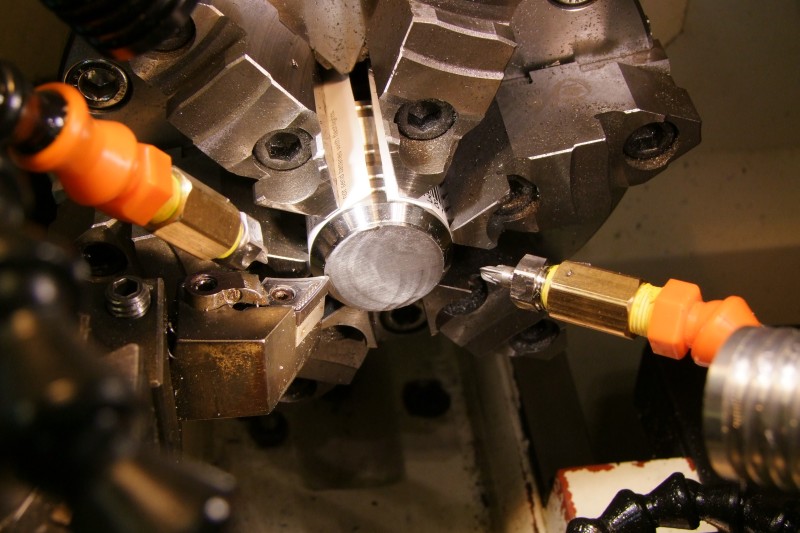
I then made the hole deeper to lower the weight of the handle:
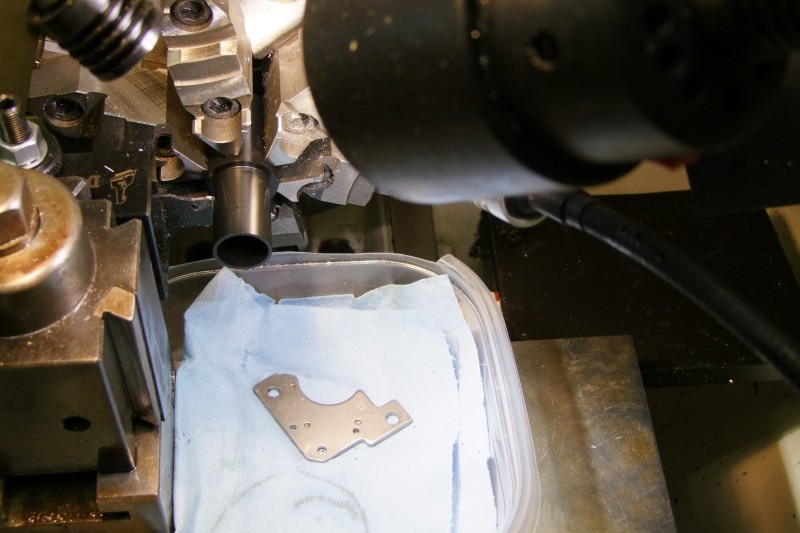
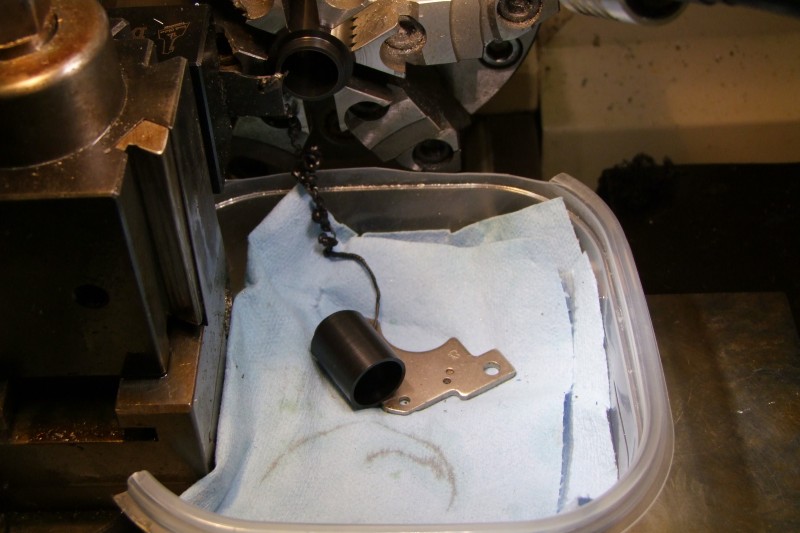
After cutting off the extra material on the metal bandsaw, I then cleaned-up the base on the lathe:
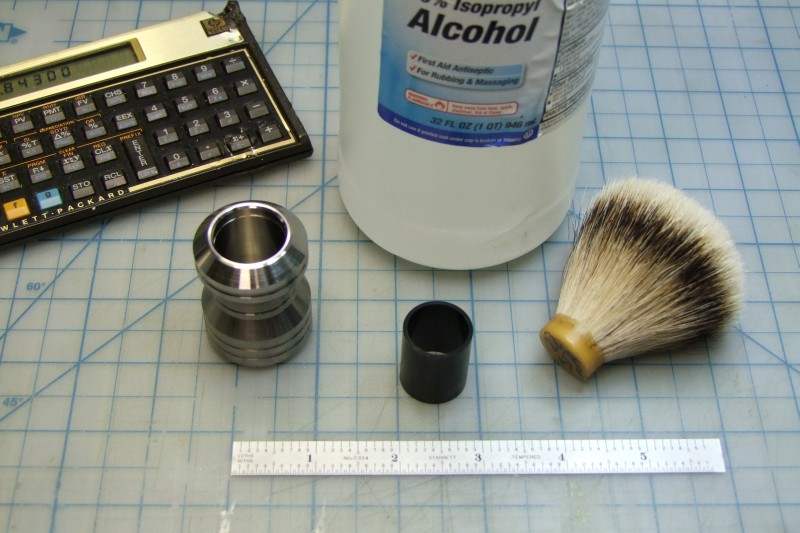
To ensure the knot will sit flat, and that it is epoxied at the correct height, I made a custom fitted Delrin insert:
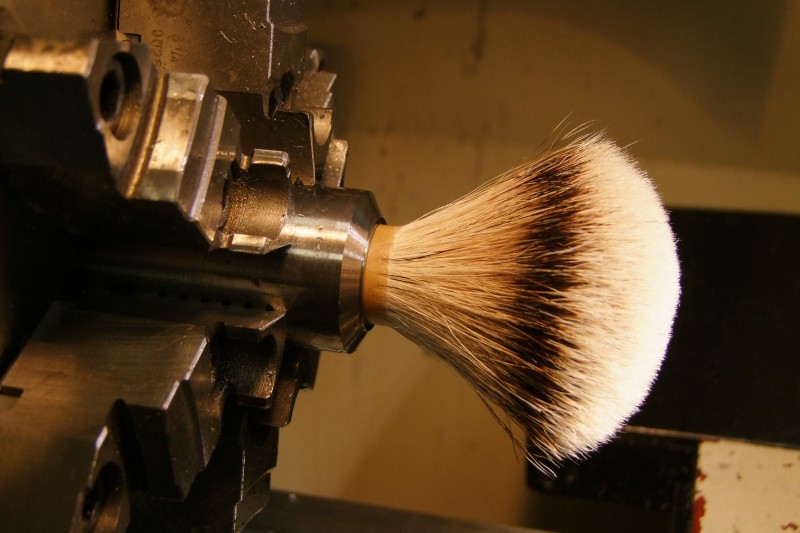
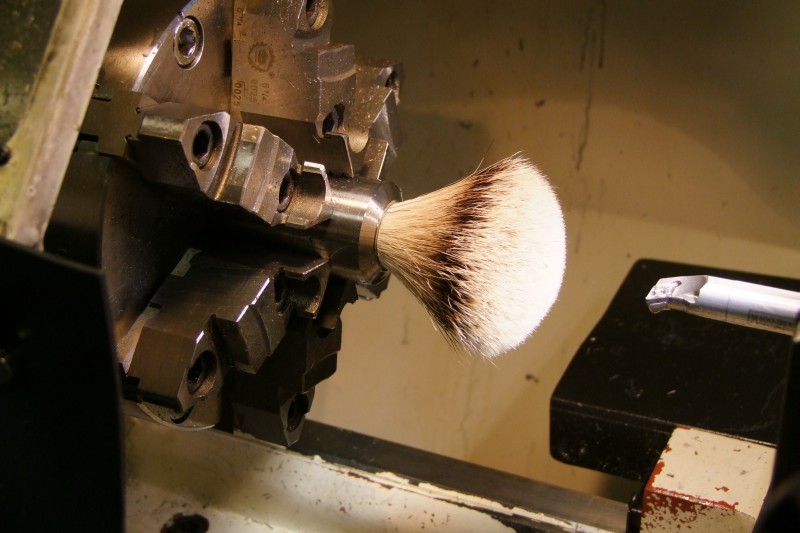
Then comes the easy part - cleaning and epoxying the parts together:
And the final product:
Since this left-over piece was shorter, I can't machine the whole handle at once - I have to remove the piece, and work on the opposite side. Even though my chuck is a set-tru with low TIR, I always clean-up, reset, and adjust the chuck when I know I will be working on both sides of a piece:
And once cleaned, I adjusted the TIR - this time I got it to about 0.0002":
I decided to use the "fan" shaped knot, and started by measuring the true size (not quite the size marked), but it tapers out from the base towards the hair:
I then started work on the Ti piece:
Here I am starting work on the hole for the knot:
My Ti-specific, insert-based spade drill had not arrive yet, so I used a Cobalt drill:
Look at the perfect chips coming out of each side of the drill:
Even with lubrication, I cooked the drill bit! (ideally I should use flood coolant for this operation):
Then slowly bore to size:
Test and adjust, test and adjust ...
add a taper for the knot (remove sharp corner):
Then add an internal groove for the epoxy:
Clean up the OD:
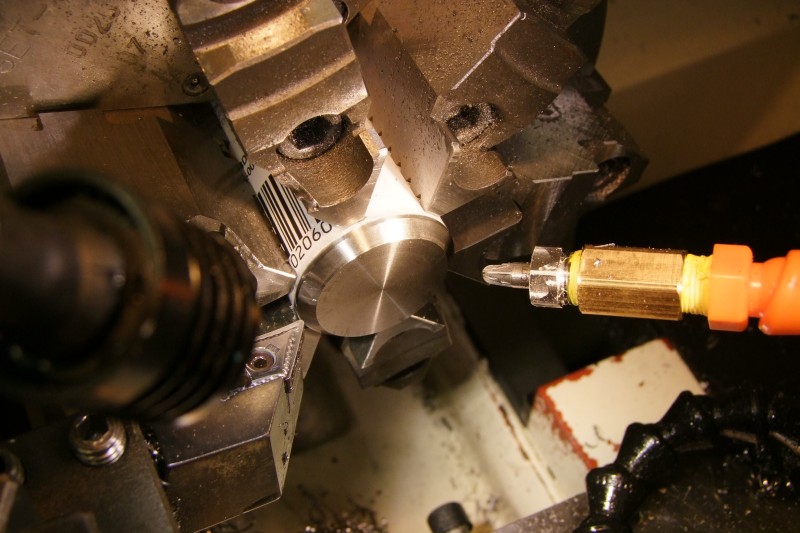
Then switch part around and do the other side - I selected the line where things meet as one of the areas I am going to grove, to leave no visible marks:
Like with the first brush, then comes the slow grooving of the actual shape:
I then made the hole deeper to lower the weight of the handle:
After cutting off the extra material on the metal bandsaw, I then cleaned-up the base on the lathe:
To ensure the knot will sit flat, and that it is epoxied at the correct height, I made a custom fitted Delrin insert:
Then comes the easy part - cleaning and epoxying the parts together:
And the final product:
Man, those are stunning - nice job!

 View attachment 373468View attachment 373469
Just a few of my favorites. I poured all but the molten copper blanks for these and turned them on my Jet.
Those look awesome - nice job!
This is a great thread. Some really great work.
Stunning!!! 
Lovely machining and that swarf is incredible! Forgive my ignorance but I can't work out the reason for the Delrin insert... there appears to be a small step inside anyway for the knot to sit on? Would love an explanation....
Thanks.
To lower the weight of the handle, I drilled the Titanium stock much deeper than required for the knot. The Delrin spacer then raises the knot to the desired position. To be able to fine-tune the position of the knot, I made the Delrin spacer a little long, and then I tried the knot and cut the Delrin spacer, and tried it again, a couple of times until I got the position I wanted (Delrin is far easier to cut than the Titanium).
What appears as a step for the knot is actually an inside groove for the epoxy. As the epoxy is applied to the inside surfaces of the hole, the epoxy will enter this groove - once the epoxy dries, it will form a mechanical bond which will make it much harder for the knot to come out. I did this since the Titanium has a different thermal expansion than of the knot and the epoxy so I wanted the assembly to stay together for a long while.
Ah that makes much more sense, Thanks. Why the concern of the weight... is a heavy brush handle not a good thing? I made one from Manganese Bronze which was heavy but I liked this (in hindsight it is a bit too heavy so will be bore some more material out the centre next time) titanium is much lighter than bronze though.
AI made one from Manganese Bronze which was heavy but I liked this (in hindsight it is a bit too heavy so will be bore some more material out the centre next time)
That was "exactly" what I did. My first Ti brush was solid, the second one, since it was a tad longer, I decided to hollow it a bit to compensate, and it ended up being a little bit lighter than the original one.
- Status
- Not open for further replies.
Similar threads
- Replies
- 176
- Views
- 9K
- Replies
- 654
- Views
- 26K