What's new

My "Gold Slash" 7 day set

in my best Popeye voice...Ah!, gug, gug, gug, gug, gug:laugh:

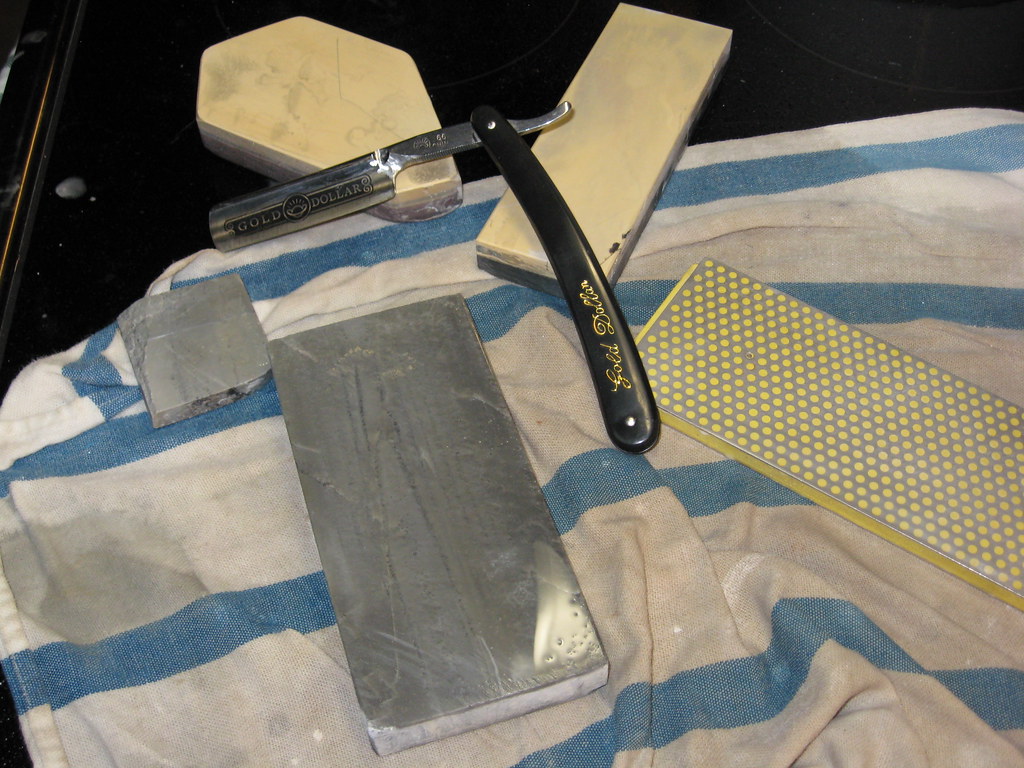
the shank broke for two reasons...1st, the shank was badly rusted before I cleaned it up. you can see the rust through at the top of the shank in this pic (below) which obviously weakened the shank
proxy.php

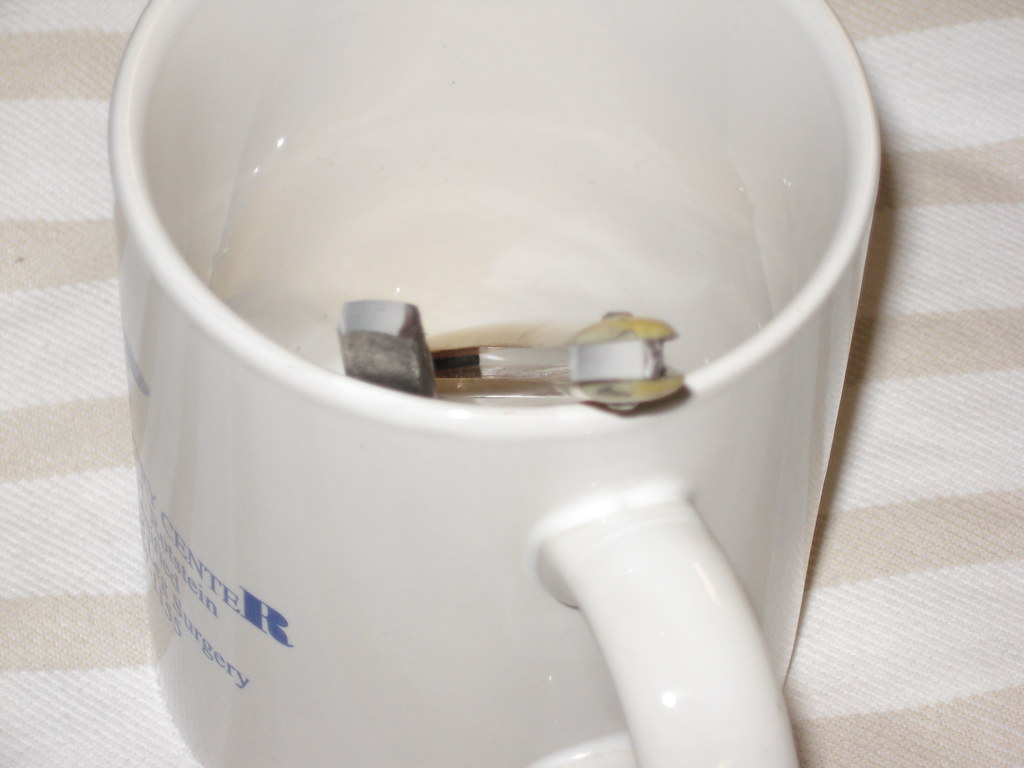
Secondly, I have a bad habit of carrying my razors (after shaving) in either my hip pocket, or my watch pocket. The time this shank broke I was carrying it in my watch pocket and went to sit down (on the crapper of all places), and while dropping my shorts (denim...I was wearing denim shorts), the razor fell out of my watch pocket onto the carpet in between the shower and the throne, in two pieces

I don't leave a strop in either of my bathrooms, so I strop in the one walk in closet where I ahve the strop attached to a wall rack or out in the garage where I have a few strops attached to an adjustable metal shelving unit. the downside of these locations...I usually put my razor in one of my pants pockets after shaving and sometimes I'll sit with the razor in my pocket (say back in my home office), forgetting it's there. More than once I've left razors in my hip pocket and have sat all night on a razor. Worst damage done up to this point was to my better goldedge with minty schales, I sat on it for a long time and when discovered, the one schale was rather bent, inward....it's straighten itself out about 90% over time, but next time you buy a used straight razor and one of the schales look like someone sat on it, it might have been mine at one time:a30:


Best,


Jake
Reddick Fla.
 
Won't welding mess with the blade tempering?

if i let the HAZ *(heat affected zone) creep down to the cutting edge.... but fortunately the blade broke close to the pivot.....

i don't foresee a problem as long as i pay attention to what i am doing and keep some ice cubes handy.....
 
Caio Baby!, I just recieved my 3 Gold Dollars in yesterday's mail...10 days from China?, must be some kind of new record...I've had chit shipped from the west coast get here 10 days later:a52:


here they are
proxy.php

notice anything strange?....look at the spine work on the bottom razor...now look at the other two's spines. needless to say, the shipper should have caught that before shipping 1/2 way round the world

Anywho, I took one of the better ones, cleaned the oil from the blade and slurried up my LPB bout to see how the bevels would take an edge. As other have reported with these razors, the last inch towards the ehel does not make contact with the hone. So, it's time for ye olde dremel to come out of the closet

proxy.php
you can see I took most of the shoulder at the heel off, and started to grind into the shank some. this is fun peeps!

FWIW I cleaned the razor and took it to the coti bout again to see if that was enough to change edge contact at the heel...no go

here's the show side~

proxy.php
anyways, I can see why Slash put some relief on the spine vertically where the heel is (look here)-
attachment.php

yeah so this is turning into fun big time:badger:


Best,


Jake
Reddick Fla.
 
I got my gold dollars in 10 days from China too. I just haven't had the time to work on them because I've been busy with school lately. Ill probably put some days in during spring break.
 
Darn... Hope he weighs back in. His thread got me all excited about Gold Dollars again. Here is another example of a simple GD modification. Took the scales off - using a Dremel cutoff tool and very carefully slicing the pins - being careful not to overheat the thing. The pins are extremely hard so it takes a bit of doing to get the scales off without frying them.

Wiped the scales down with acetone and took off the insignia. Cleaned the blade with acetone and then, because I was being my normal obsessive self, took off the Chinalloy stamp. I then painted the scales with black polyurethane, let it dry a couple of hours, sprayed it with Krylon quick dry outdoor paint (black). The Krylon will turn into a crackle-like finish that ends up looking more like a faux hide or alligator skin (right... but it does look kinda neat and provides a nice gripping surface). Let that dry completely and coated it with two good coats of polyurethane (spray - don't brush it on unless you are careful - if you build up too much clear coat, the crackle will be diminished).

Reassembled the whole thing. Put flat brass washers on the blade as bearing washers.

This is a very easy and cheap modification done with almost no tools (unless you count buffing out the stamp - which can be done with sandpaper and is still optional). The scales are fairly tough and the finish seems to stay with it. It makes the whole thing look and feel more like a straight razor.

$cracklescales640.jpg
 
Last edited:
I finally got one to take an edge. I *VERY LIGHTLY* bread knifed the blade until I could just see the entire edge without magnification under a good light (fluorescent canister light) The idea is to establish a indisputable no-edge condition, not alter the blade profile significantly. This took about 10 passes on the very end of my chosera 1k.

Next start grinding. I ground one side only keeping some track of my laps while applying spine pressure until I got something that resembled an edge the entire way across (I did not get a burr, even though I was trying for one) I then flipped the blade and ground a similar amount on the other side in the same manner, spine pressure no significant edge pressure.

Next up about 30 regular honing laps, flipping the blade each stroke, still on the chosera 1k. This is to eliminate any burr that may have formed.

Then on to my coticule in a regular honing progression, starting on milky slurry. My results were not perfect as it appears I created a twist in the blade so only part of the blade went to full shave ready, the rest is at arm-hair still. My edge bevel is very uneven so I have more work to do.

Phil
 
I finally got one to take an edge. I *VERY LIGHTLY* bread knifed the blade until I could just see the entire edge without magnification under a good light (fluorescent canister light) The idea is to establish a indisputable no-edge condition, not alter the blade profile significantly. This took about 10 passes on the very end of my chosera 1k.


Phil

I have started using a more aggressive approach - it saves me time. I use a 325 and then a 625 DMT with tape on the spine to stop from grinding it too much. I take this to butcher knife sharp across the whole edge. Then enough laps without tape on the 4K until I can shave arm hair across the whole length. I watch carefully while I'm setting the bevel to be sure I'm getting everything even. Then on to 8K and finishing. I usually use the 8K until it can just pop hairs - maybe with a little effort. This involves going from heavy slurry to diluted slurry. Also, I watch the polish on the edge and make sure it is gleaming. This may take a little time. I have a 12K but have settled on 2.5, 1, .5 diamond paste stropping and finishing with CrO2 and stropping. The result is a sharp blade that will give a BBS if the user does his thing. I recently took a trip, carried too many razors, but used a GD exclusively for 10 days (I shave my head with it, too). I took a small 'travel' paddle I made with denim/light CrO2 on one side and leather on the other. When I got back, the blade was still in great condition and ready to shave some more.
 
Okay, I finally shaved with one of my three #66 Gold Dollar razors and I have to admit I got BBS just like I do with most any of my straight razor blades
proxy.php

But 1st, a little splain'n how I got the edge, and it's a damn sharp one at that

The key first off is to makes sure the entire edge of the blade contacts your hone. If you go back and read my earlier posts, the one I have been playing with, the last 3/4" towards the heel (edge) wouldn't touch the hone. What I did, and I emulated what Slash did, and that was to take a dremel w/a sanding drum and make a cut into the spine on both sides, right above the end of the heel. that's imperative. the spine is too fat at the heel and forces the blade to kick out from your hone, so making the cut into the spine elimantes this 'high spot'. Admittedly, my razor doesn't look so good but it's a work in progress...the main thing is, it shaves well, or as good as it can get for me at this point...but the main thing is, I was able to get every bit of the edge to contact the hone and that's what you need with these razors starting out, or at least the one I picked up and began working with

So here's my hone progression:


I didn't fool around...I started with a DMT Duo Sharp 350 grit (blue), the one you see in the pic. it's worn quite a bit so I would guage the grit closer to 750 or so (just guessing)

Now I did not use any tape on the spine. Why? I was not concerned about spine wear at all. this is a $4 straight razor for one, and secondly, I wanted to see what kind of wear the DMT and other hones would put into the spine

I used a 10 X Loupe all the way so I could see progress and know what I had to do, and I had to work on a few areas to make sure the bevels were complete and even

Next hone up and this was only used after I was totally satisfied with what the DMT accomplished, and I used it for the first time, a hone I got from Emmanuel over on coticule.be ...his Cretan hone, and I like it a lot. The Cretan hone smoothed out the DMT marks...all of them. If I didn't have this hone, I would use a 1 K synthetic stone at this point, or go straight to a slurried coticule, if like me, you hone with natural stones

Next up was to use my la petit blanc coticule bout with a wet milky slurry. I started out doing sets of 30 reps and half strokes at that. Half strokes in that the blade was laid flat on the bout and moved forward then backward (finger pressed onto the blade for slight pressure) and that counted as one lap, and I did 30 on each side then flipped it over and did 30 more on the other side, back and forth, back and forth flipping the blade over and over again and again lightly misting the slurry to make sure it remained wet throughout. At this point, I knew I had a sharp edge going (watching the colour of the slurry), but I was only bevel correcting (bevel setting). You have to start somewhere and so far, this was the beginning

I've corrected enough bevels on this bout to know where the blade was so I decided to step down to sets of 15 reps still using 1/2 strokes, keeping the now black slurry wet. After a bunch of these reps I finished out with approx 30 x strokes, washed the edge and bout, dried the blade with paper towel and checked my edge doing the arm hair shave test, only I used my leg hairs. Passed with flying colours, all up and down the edge, both sides, my leg hairs popped easily, & this step is important to be sure the entire edge is sharp and cuts arm/leg hair evenly...so I look at the heel, the toe and the area between, both sides of the blade

Next step in the progression was to the 50X150mm les latnueses coticule you see in the above pic...I got a light milky slurry going on top (IIRC I used the DMT to raise the slurry) and began doing x strokes, adding water to keep the slurry wet and to also feather the edge via dilucot dilution, until I was down to straight water. How many laps to get there? I dunno, I just stroke and stroke and add water till I feel the edge progress's the way I think it should, and according to how it feels while doing it. You can just feel the edge come around, how the edge feels on top of the stone transmitted to/through your fingers

then I rinsed the edge well, wiped with paper towel, took it to linen for approx 60 laps then another 50 laps on leather and called it a night. Next day I did another 30 or so laps on leather, warming the leather strop with my palm first, then shaved with it

My prep is the barber towel and this shave I used Proraso pre shave cream and then their shave soap under the towel, wiped it all off after 3 minutes and applied fresh Proraso shave soap and shaved. Two passes north to south, the 3rd south to north, then touch ups on the jowels and a few more here and there and I called it done

I'm not gonna tell you this blades is as comfortable to shave with as any of my full hollows because it's not. it feels and looks to me like a 6/8 1/2 hollow. There's a lot of metal on the spine and down into the blade. Not a lot of give here and feels accordingly on my face, but it shaves well. The only way you'll screw up with it is your technique, or lack thereof

All in all I highly recommend anyone to buy at least two or three of these razors (#66 Gold Dollar) and have at it. At the very least it will make you a better straight razor honer, and it's not a bad razor for $4 delivered, after you remove some metal from the blade here and there. All the instructions you need to do that is in this thread

What are you waiting for? Get Going!


Best,


Jake
Reddick Fla.
 
Okay, I finally shaved with one of my three #66 Gold Dollar razors and I have to admit I got BBS just like I do with most any of my straight razor blades

But 1st, a little splain'n how I got the edge, and it's a damn sharp one at that

I've only had to take metal off of one of the spines/heels that I've honed up so far. I guess I've been luckier than some. The blades are not uniformly made - so I can see having to grind things on some of them. I also watch carefully to make sure the bevel is very even. (Edit: took out a longer missive about how I did it... just realized I posted it two posts ago. ;-})

Good to read your full process and I agree with your recommendation 100%. Get a few of these and have some fun. Changing the scales and taking off that terrible lacquer paint on the blade (comes off with acetone) makes them look really spiffy. You can actually refinish the scales and remount them if you want. Got to be the best value for money out there.
 
Last edited:
Okay, I finally shaved with one of my three #66 Gold Dollar razors and I have to admit I got BBS just like I do with most any of my straight razor blades

Thanks for the update and details. This thread inspired me to order a few and give it a go. I am just getting started out honing my own razors so I dont expect to achieve a great edge right away, but for the price I dont mind having something to use so I can play with my dremel and hopefully I get one shaveable at some point.
 
Changing the scales and taking off that terrible lacquer paint on the blade (comes off with acetone) makes them look really spiffy. You can actually refinish the scales and remount them if you want. Got to be the best value for money out there.


~~~I gotta admit, at this point I'm leaving the schales as is. IMO, they aren't bad at all from a function stand point. Sure, they aren't winning any beauty contests anytime soon but they work fine as is. I guess that makes me lazy laving them on there=:) I'm all about getting/putting on a good edge and shaving with it. that's where my interests lie. Pretty razors are nice and all but let's face it, who sees it other you when you shave with it. It's a tool, use it for shaving


Best,


Jake
Reddick Fla.
 
Thanks for the update and details. This thread inspired me to order a few and give it a go. I am just getting started out honing my own razors so I dont expect to achieve a great edge right away, but for the price I dont mind having something to use so I can play with my dremel and hopefully I get one shaveable at some point.


~~~if I've learned anything about honing a straight razor and can pass some of that on to you, my advice for you is to spend enough time (the time that it takes) to set a good bevel. That's where good edges start. Get the bevel setting (correcting) right and you're ready to move on to the next stage


Best,


Jake
Reddick Fla.
 
Top Bottom